前情提要
前一篇已經完成了註冊、登入、登出,基本功能,不過仍有一些不足的地方,原本是要紀錄在前一篇,但怕篇幅過長,所以將「登出」及「驗證」的部分,寫在本篇並跟前篇做一個銜接,並讓整個 API 機制更加完整。
本篇重點
- Authorization:前一篇沒有說明到的是 Token 的驗證,雖然有設定有效期限,實際驗證邏輯是需要寫在程式裡面的
- 基於角色的驗證:角色授權,通常驗證與授權是一起的,本篇會帶入一點角色驗證的實作
- JWT Refresh Token:JWT Refresh Token 機制讓使用者在短期內不需要頻繁登入,通過使用 Refresh Token 可以提供了更好的用戶體驗和安全性。
Authorize
先回到登出方法,加上一個 [Authorize],代表需要經過驗證的使用者才可以使用這個功能,而登出確實是要登入的使用者才可以執行的動作
 1
 2
 3
 4
 5
 6
 7
 8
 9
10
11
12
13
14
15
16
17
18
19
20
21
22
| /// <summary>
/// 登出
/// </summary>
/// <returns> 登出結果 </returns>
[Authorize]
[HttpPost("logout")]
public async Task<IActionResult> LogoutAsync()
{
// 從 header 讀取 JWT
var token = $"{HttpContext.Request.Headers.Authorization}"
.Replace("Bearer", string.Empty, StringComparison.OrdinalIgnoreCase)
.Trim();
if (string.IsNullOrEmpty(token))
return BadRequest("Not token provided!");
// 將 JWT 加入黑名單
var result = await _tokenService.AddTokenToTokenBlackListAsync(token);
if (!result) return BadRequest("Logout failed!");
return Ok("Logout successfully!");
}
#endregion
|
再使用 Postman Send 登入的請求取得一個合法的 JWT,接著使用剛剛取得的 JWT Send 一個登出請求,會發現出現了 Exception
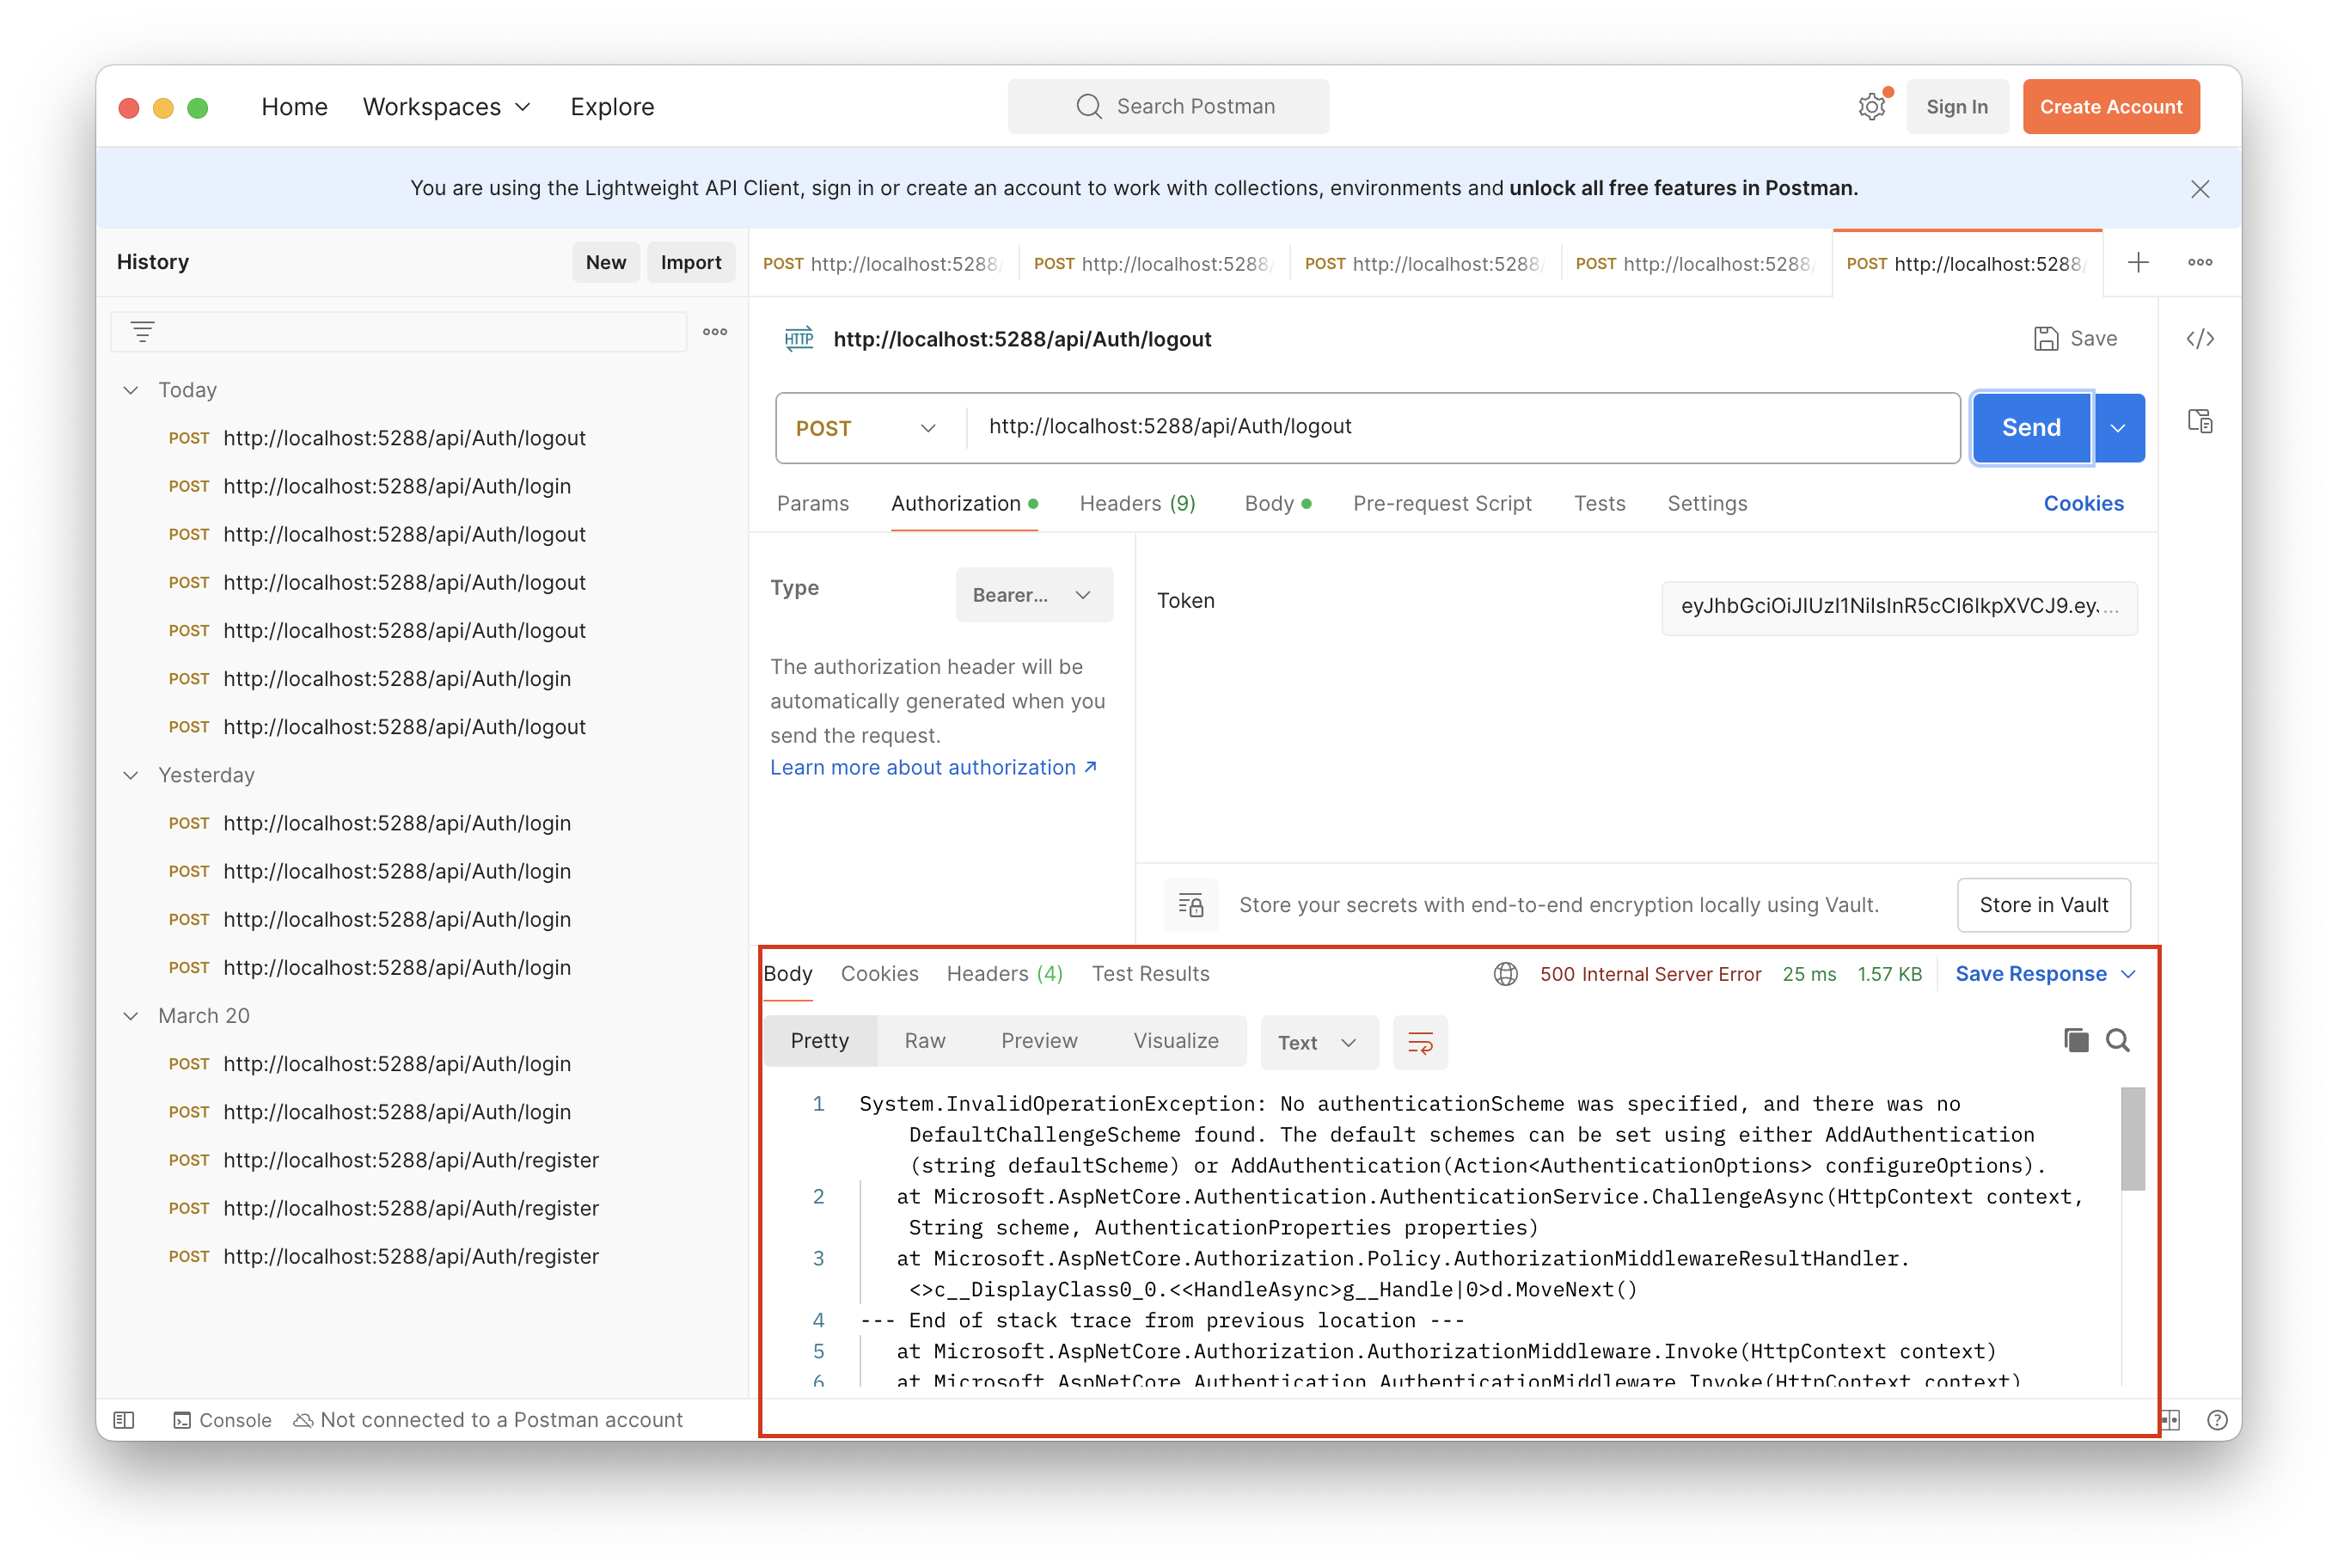
System.InvalidOperationException: No authenticationScheme was specified, and there was no DefaultChallengeScheme found. The default schemes can be set using either AddAuthentication(string defaultScheme) or AddAuthentication(Action<AuthenticationOptions> configureOptions).
這是因為當啟用了 [Authorize] 告訴應用程式 LogoutAsync 這個方法是需要驗證過才可以呼叫,但應用程式卻沒有指定要使用什麼驗證機制
常見了驗證機制有
- Session 驗證
- Cookie 驗證
- Token 驗證(JWT 屬於這一類)
AddAuthentication
所以要回到 Program.cs 加入驗證方案的設定,透過 AddAuthentication 方法新增驗證方式
 1
 2
 3
 4
 5
 6
 7
 8
 9
10
11
12
13
14
15
16
17
18
19
20
21
22
23
24
25
26
27
28
29
30
31
32
33
34
| #region Authentication Service
builder.Services
// 啟用 JWT 驗證
.AddAuthentication(JwtBearerDefaults.AuthenticationScheme)
// Jwt 驗證選項
.AddJwtBearer(options =>
{
// 不使用 Dependency Injection 方式讀取設定檔
var jwtOptions = builder.Configuration.GetSection(nameof(JwtOptions)).Get<JwtOptions>()!;
// 回應 JWT 詳細錯誤訊息,方便 Debug,所以只有在非正式環境開啟
options.IncludeErrorDetails = builder.Environment.IsDevelopment();
// 要加入這個設定,不然 Sub 會變成 ClaimTypes.NameIdentifier
options.MapInboundClaims = false;
// JWT 驗證規則
options.TokenValidationParameters = new TokenValidationParameters
{
// 驗證發行單位
ValidateIssuer = true,
ValidIssuer = jwtOptions.Issuer,
// 不驗證接收單位,不需要瞼證要改成 false, 原始預設是 true
ValidateAudience = false,
// 驗證有效期限
ValidateLifetime = true,
// 驗證金鑰
ValidateIssuerSigningKey = true,
IssuerSigningKey = new SymmetricSecurityKey(
Encoding.UTF8.GetBytes(jwtOptions.SecretKey))
};
});
#endregion
|
程式碼詳解如下
- AddAuthentication:設定驗證的方法,參數是驗證方法的名稱,如果去 JwtBearerDefaults 的原始碼查看,會發現他只是一個字串 “Bearer”,也就是說你也可以寫成
AddAuthentication("Bearer") 效果是一樣的,不過有經驗的工程師以及官方都不會推薦使用 Hard code 的方式來寫,其中一個缺點是程式碼會變得很沒彈性
 1
 2
 3
 4
 5
 6
 7
 8
 9
10
11
12
13
14
15
16
| AddAuthentication(JwtBearerDefaults.AuthenticationScheme);
// JwtBearerDefaults 原始碼
namespace Microsoft.AspNetCore.Authentication.JwtBearer
{
/// <summary>
/// Default values used by <see cref="T:Microsoft.AspNetCore.Authentication.JwtBearer.JwtBearerHandler" /> for JWT bearer authentication.
/// </summary>
public static class JwtBearerDefaults
{
/// <summary>
/// Default value for AuthenticationScheme property in the <see cref="T:Microsoft.AspNetCore.Authentication.JwtBearer.JwtBearerOptions" />.
/// </summary>
public const string AuthenticationScheme = "Bearer";
}
}
|
- AddJwtBearer:設定 JWT 驗證的細節,參數是一個函數,這個函數就是執行設定的 function,指定了驗證方案後,就要針對驗證細節設定
在這個函數一開始先取得了 JwtOptions 的設定值
1
2
| // 不使用 Dependency Injection 方式讀取設定檔
var jwtOptions = builder.Configuration.GetSection(nameof(JwtOptions)).Get<JwtOptions>()!;
|
- builder.Configuration 會取得
appsettings.json 設定檔
 1
 2
 3
 4
 5
 6
 7
 8
 9
10
11
12
13
14
| {
"Logging": {
"LogLevel": {
"Default": "Information",
"Microsoft.AspNetCore": "Warning"
}
},
"AllowedHosts": "*",
"JwtOptions": {
"Expiry": 5,
"Issuer": "JWT-Authentication-API",
"SecretKey": "This-is-secret-key-for-JWT-Authentication"
}
}
|
- GetSection:取得設定檔某個設定值的內容,參數是設定值的 Key,nameof 會將 JwtOptions 轉成字串,也就是說這個方法會跟
GetSection("JwtOptions") 是一樣的,並且會取得下面的設定內容
1
2
3
4
5
| "JwtOptions": {
"Expiry": 5,
"Issuer": "JWT-Authentication-API",
"SecretKey": "This-is-secret-key-for-JWT-Authentication"
}
|
- Get<T>:會將上一個方法取得的設定轉成 T 類別,也就是上一篇完成的 JwtOptions.cs 相當於將上一個方法取得的設定執行下面的程式,但要記得類別欄位大小寫要一致,不然有些值會無法正確轉換
1
2
3
4
5
6
| var jwtOptions = new JwtOptions
{
Expiry = 5,
Issuer = "JWT-Authentication-API",
SecretKey = "This-is-secret-key-for-JWT-Authentication"
};
|
- options.IncludeErrorDetails:詳細錯誤訊息顯示,大部分網站會將詳細錯誤訊息紀錄在資料庫或者 log 的檔案,所以正式產品一般不太會開啟這個設定,只會在測試或開發環境開啟
- builder.Environment:會取得現在的環境
- IsDevelopment:現在是在開發環境的 bool,如果是開發環境就 true
合起來就是如果是開發環境就開啟詳細 JWT 詳細錯誤訊息顯示
1
| options.IncludeErrorDetails = builder.Environment.IsDevelopment();
|
- options.MapInboundClaims:是否將 JWT token 中的 claims 映射到標準的 claim 名稱,這裡調整成 false,不然 Jwt 的 JwtRegisteredClaimNames.Sub 會被轉換成
ClaimTypes.NameIdentifier,後續 ActionFilter 實作 要處理。 - options.TokenValidationParameters:設定驗證規則
我只驗證三個
- Issuer:發行單位,確定是這個應用程式發出去的
- ValidateLifetime:是否過期
- IssuerSigningKey:加密金鑰,設定方法跟
JwtHelper.cs 中一樣,參考 產生 JWT,從這邊也可以看出 JWT 是對稱加密,加解密使用同一把 Key
 1
 2
 3
 4
 5
 6
 7
 8
 9
10
11
12
13
14
15
16
17
18
19
20
21
22
| options.TokenValidationParameters = new TokenValidationParameters
{
#region 驗證發行單位
// 是否驗證發行單位
ValidateIssuer = true,
// 正確的發行單位值
ValidIssuer = jwtOptions.Issuer,
#endregion
#region 驗證有效期限
// 是否驗證有效期限
ValidateLifetime = true,
#endregion
#region 驗證加密金鑰
// 是否驗證加密金鑰
ValidateIssuerSigningKey = true,
// 正確的加密金鑰
IssuerSigningKey = new SymmetricSecurityKey(
Encoding.UTF8.GetBytes(jwtOptions.SecretKey))
#endregion
}
|
驗證細節都設定好了後,最後在 Program.cs 中加入啟用驗證機制,其中呼叫順序很重要,一定要先呼叫 UseAuthentication 在呼叫 UseAuthorization
- Authentication:驗證你是誰
- Authorization:知道你是誰後,驗證你有沒有權限做這件事
以整個應用場景延續 產生 JWT,如果有出國經驗,可以想像成,你拿著 護照(Claims) 去日本(Login),入境時海關會確認你的身份(臺灣人,姓名 - Validate),如果沒有問題就會放你入境(Authorization),並給你入境許可(JWT),因為臺灣免簽入境可以待 90 天(JWT.Exp),成功入境後,可以去東京迪士尼、大板環球……
前一陣子日本銀山溫泉因為遊客過多,所以有實施管制措施,如果沒有入住當地的溫泉旅館或沒有入場券的遊客,會被禁止進入(Authorization)
1
2
3
4
| // 啟用驗證機制
app.UseAuthentication().UseAuthorization();
// 在 app.Run 之前啟用驗證
app.Run();
|
好了就可以來測試驗證了,先用 Postman 登入取得合法的 Toke,可以看到期限是 5 分鐘後到期

等過了時間再登出,會發現出現了 Http 401 的回應,就是驗證沒過
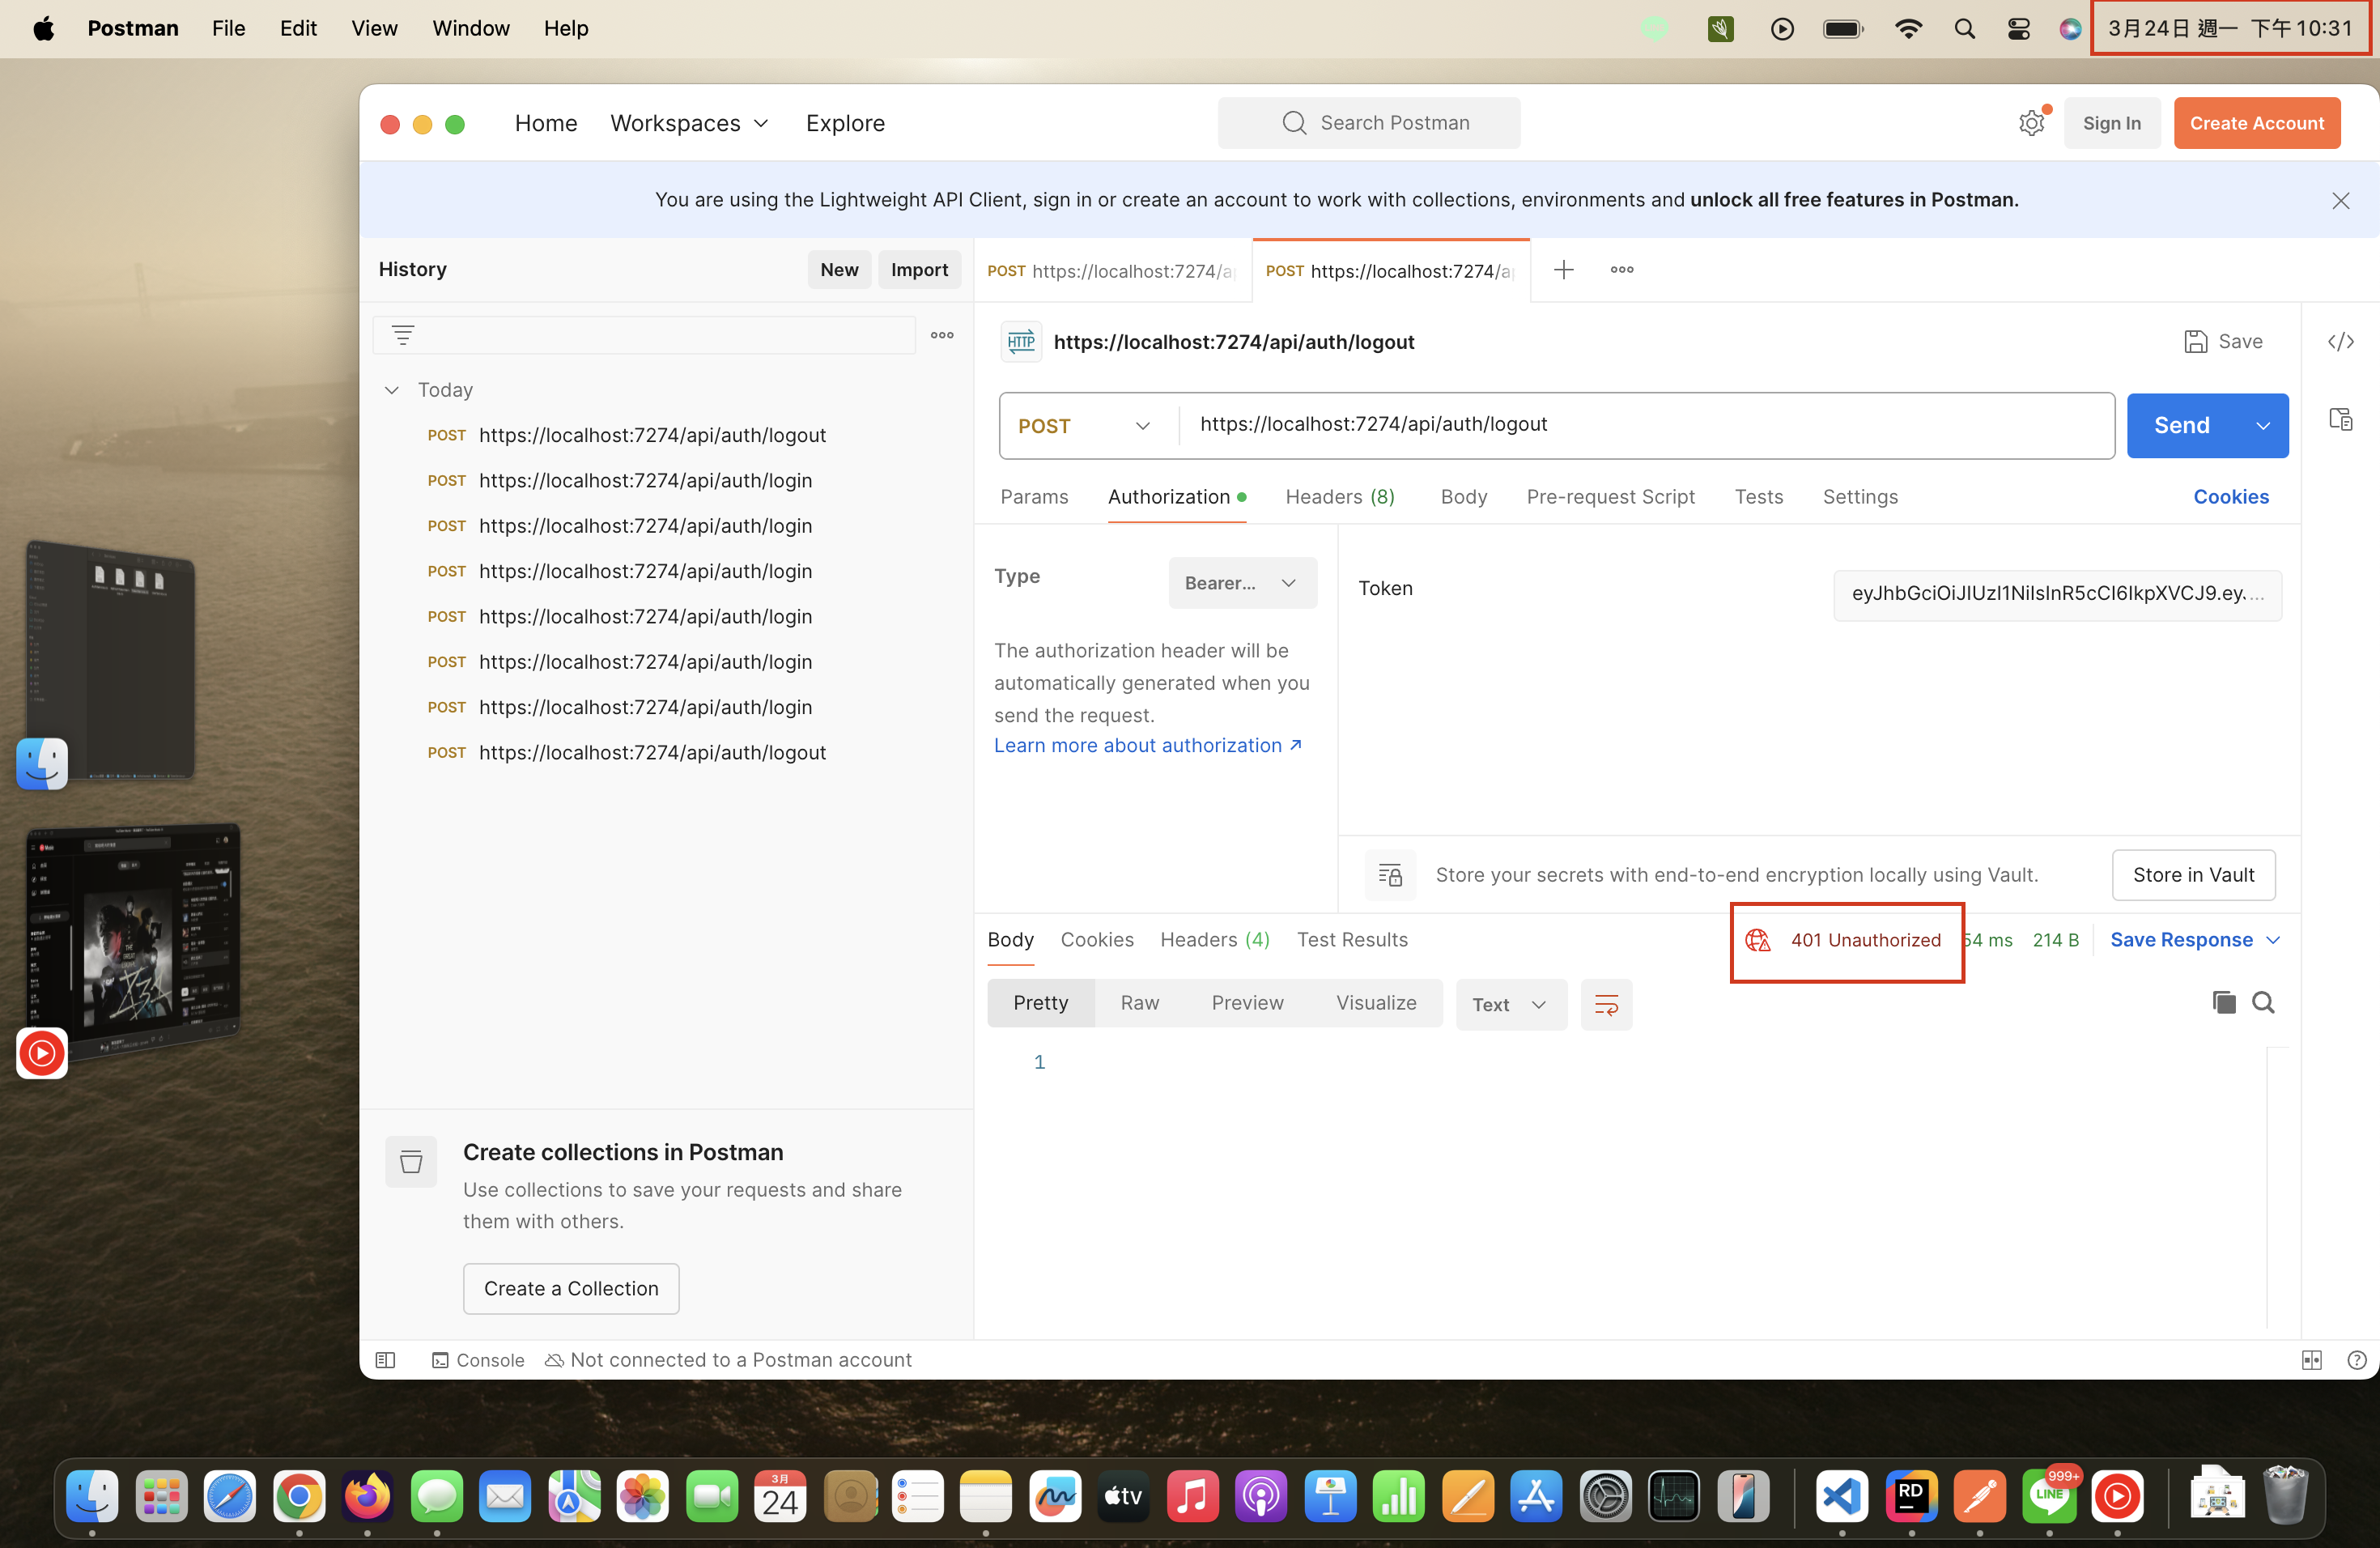
這樣驗證功能就完成了
Authorize 回顧
- 在驗證的方法上加上 [Authorize]
- AddAuthentication:設定驗證方案
- JWT Audience:接收單位預設是會驗證的,不要驗證要設定 false
- 在
app.Run() 之前啟用驗證及授權 UseAuthentication, UseAuthorization,驗證一定在授權之前呼叫
Authorization
字面上的意思是授權,就是給與某一個使用者權限,有些會公司會使用 角色授權摸式,也就是某些角色可以使用某些特定的功能,有些會也使用 讀寫模式,某些功能只能讀,某些功能可以讀寫,也有可能是兩者結合一起,本篇會實作基於角色的授權模式
為了增加角色,在專案目錄下新增一個 Enums 目錄,並新增一個 UserRole.cs 的類別,加入使用者角色設定如下
1
2
3
| JWT_Authentication_API
└─Enums
└─UserRole.cs
|
 1
 2
 3
 4
 5
 6
 7
 8
 9
10
11
12
13
14
15
16
| using System.ComponentModel;
namespace JWT_Authentication_API.Enums;
/// <summary>
/// 使用者角色
/// </summary>
public enum UserRole
{
[Description("實習生")]
Intern,
[Description("人資助理")]
HrAssistant,
[Description("人資主管")]
HrHead
}
|
為了簡化教學,只設定這三個角色,並直接利用前一篇建立好了 EmployeeService 作為員工資料存取,接著開啟 Entities/Employee.cs,加入使用者角色欄位(int),同樣為了簡化教學,只在 Employee 加入設定,通常會設計一個角色資料模型,並設定員工與角色的關聯,不過資料庫設計非本篇主題,就不多說明了
不過要特別說明的是
- 為什麼設成 整數 型別?是因為 Enum 可以轉換成 int,處理起來比較方便,可以參考 C# Enum
- 為什麼要多一個 Enum?我個人的看法是為了增加了程式可讀性,可能還有其他的原因,另外這種固定的設定項目,滿常會用 Enum 來實作的
 1
 2
 3
 4
 5
 6
 7
 8
 9
10
11
12
13
14
15
16
17
18
19
20
21
22
23
24
25
26
27
28
29
30
31
32
33
34
35
36
37
38
39
40
41
42
43
44
45
| using System.ComponentModel.DataAnnotations;
using System.ComponentModel.DataAnnotations.Schema;
namespace JWT_Authentication_API.Entities;
/// <summary>
/// 員工資料模型
/// </summary>
public class Employee
{
/// <summary>
/// 員工資料識別(PK)
/// </summary>
[Key]
// 告訴資料庫這是自動產值的欄位,讓資料庫自行產生 key 值
// 這樣程式就不用處理了
[DatabaseGenerated(DatabaseGeneratedOption.Identity)]
public Guid Id { get; set; }
/// <summary>
/// 員工信箱:必要欄位
/// </summary>
[Required, MaxLength(256)]
public string Email { get; set; } = string.Empty;
/// <summary>
/// 密碼:必要欄位,且是加密過的值
/// </summary>
[Required, MaxLength(256)]
public string PasswordHash { get; set; } = string.Empty;
/// <summary>
/// 使用者角色
/// </summary>
public int UserRole { get; set; }
/// <summary>
/// 員工資料建立的時間,預設值是建立的當下
/// </summary>
public DateTimeOffset CreatedOn { get; set; } = DateTimeOffset.UtcNow;
/// <summary>
/// 員工資料修改的間,預設值是修改的當下
/// </summary>
public DateTimeOffset? ModifiedOn { get; set; } = DateTimeOffset.UtcNow;
}
|
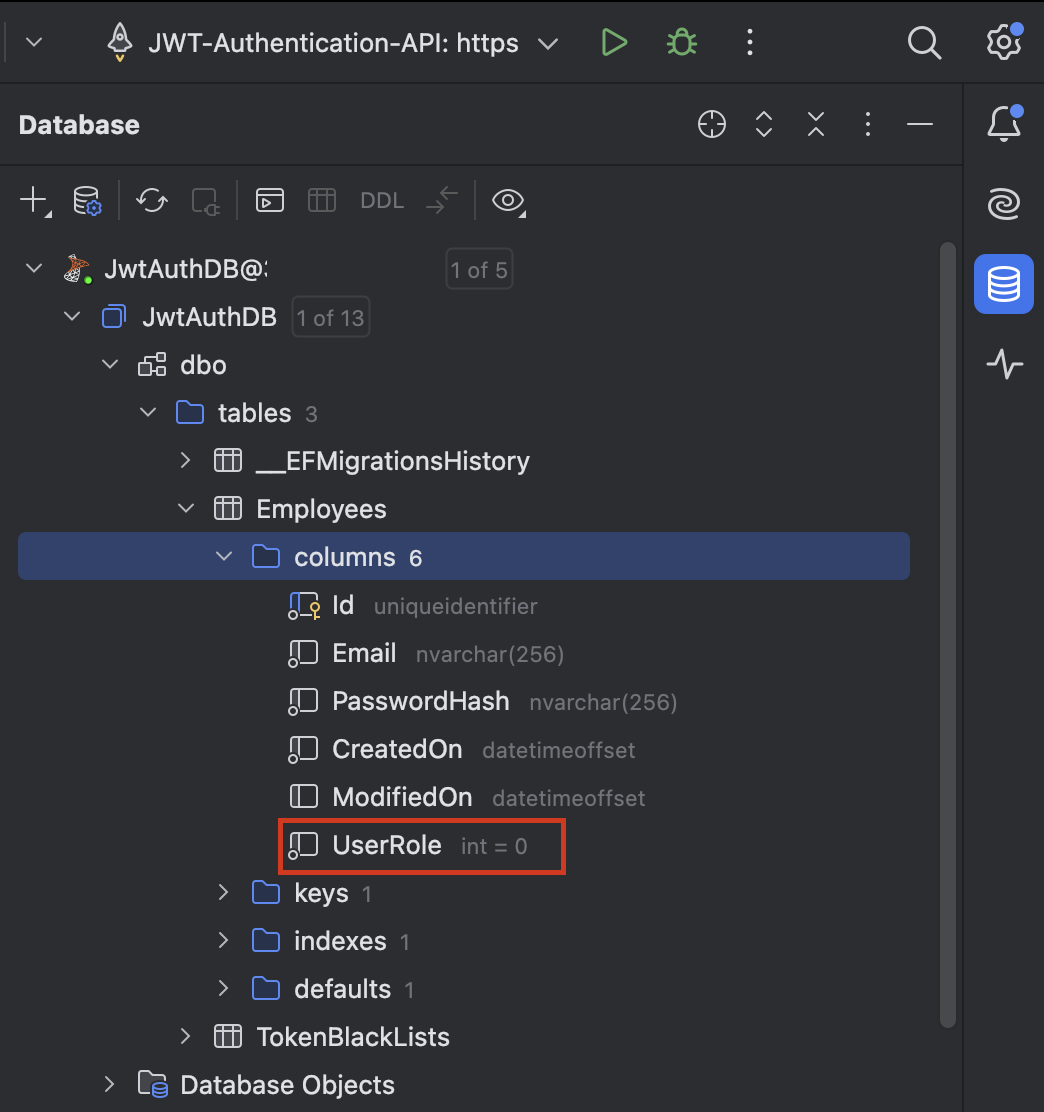
修改完成後記得使用 Rider 提供的工具,新增 Migration,並 Update Database,可以參考前篇 新增 Migration,連回資料庫確認更新結果,如果有看到多了一個 UserRole 的欄位,就是成功了
接下來將原本的測試註冊時的 peter 改成人資主管 HrHead(2),Enum 類別的成員,如果沒有特別設定整數值的話,預設是從 0 開始,也就是說由上往下第一個成員是 0,第一個成員是 1,依此類推
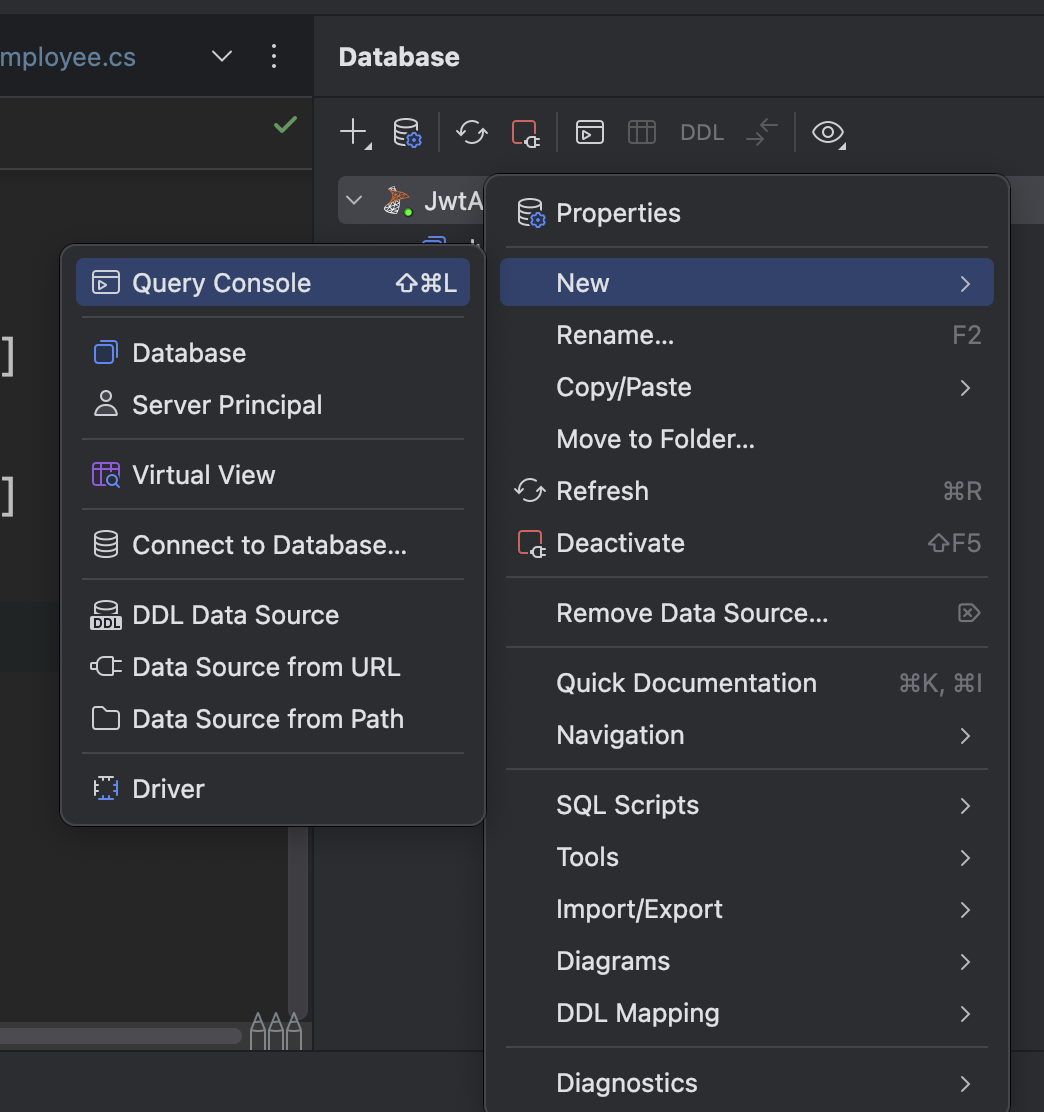
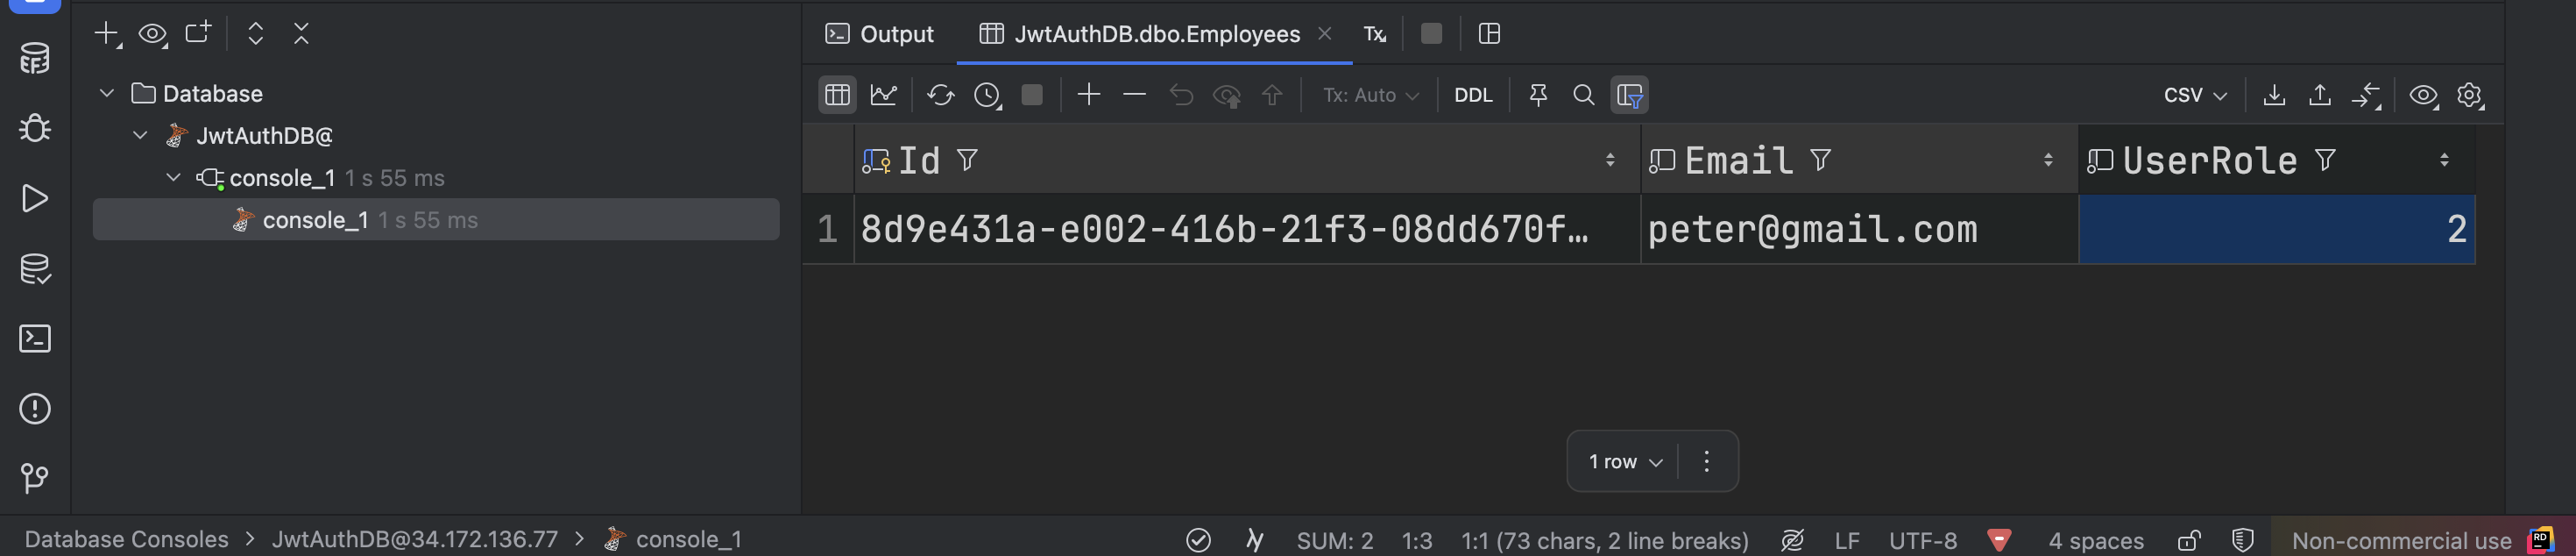
這邊我直接使用 SQL 改,在資料庫右鍵 → New → Query Console,會出現 SQL 的查詢編輯器,輸入下面的更新語法
1
2
3
4
5
6
| -- 因為我目前只有一個 peter@gmail.com 的帳號,
-- 所以也可以不用 WHERE 條件,不過如果你在測試時有註冊多筆帳號
-- 可能要指定 Email 或 Id 作為條件判斷欄位
UPDATE Employees
SET UserRole = 2
WHERE Email = 'peter@gmail.com'
|
更新完成後,將更新的語法清除,再輸入下面的語法確認更新結果
1
2
3
| SELECT Id, Email, UserRole
FROM Employees
WHERE Email = 'peter@gmail.com'
|
確認 peter 的角色是不是 2(人資主管)
新增角色資料
接著為了測試角色驗證,我們再新增兩個使用者,不過我就不使用 Auth/register 方法註冊了,因為還要設定指定的使用者角色,就要重新設定 RegisterDto,有興趣可以自己研究,這裡一樣直接使用 SQL 新增使用者資料,為了方便測試,我直接將兩人的密碼設成跟 peter 一樣 parker 的加密值
當然你也可以使用 Auth/register 註冊兩個使用者後,再用上面的更新語法更新它們各自的角色,另外我所使用的是 SQL Server,某些語法能有些不同,可以自己查詢所使用的資料庫對應的 SQL
- Adam:人資助理(1)
- Heine:實習生(0)
1
2
3
4
| INSERT INTO Employees
Values(Id, Email, PasswordHash, UserRole, CreateOn)
('3bf378ee-c168-459b-f067-08dd664a4725', 'Adam@gmail.com', 'AQAAAAIAAYagAAAAEGg06rTvDW9YMxQ9dHKfU+N97g7OnbxDQmVkMAqYmQtYFXC36mQkXY6fxO/J5ngQFg==', 1, GETDATE()),
('23476149-9d29-42fe-85df-27e3e254bd76', 'Heine@gmail.com', 'AQAAAAIAAYagAAAAEGg06rTvDW9YMxQ9dHKfU+N97g7OnbxDQmVkMAqYmQtYFXC36mQkXY6fxO/J5ngQFg==', 0, GETDATE())
|
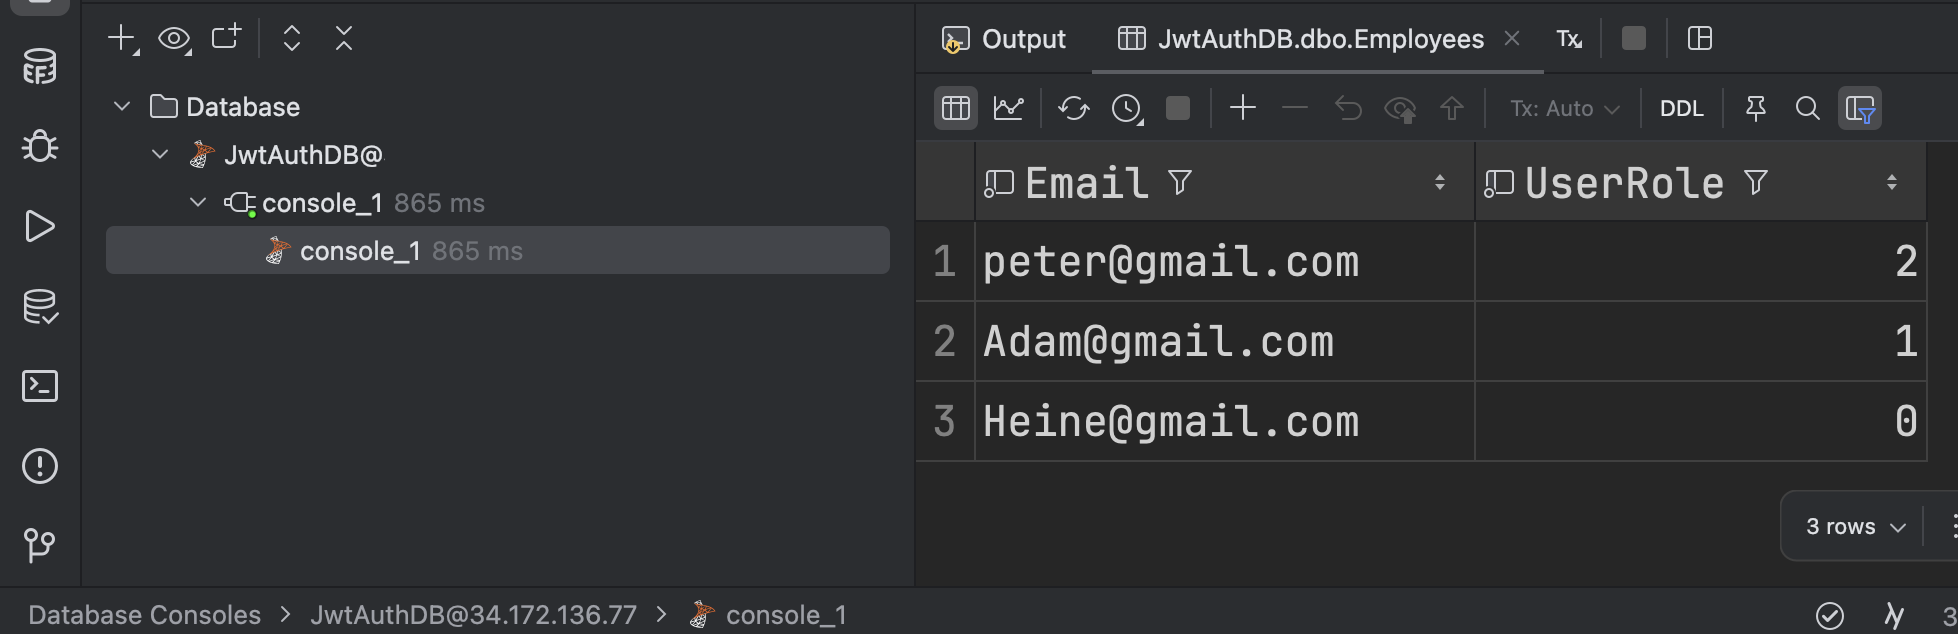
新增完成後,用下面的語法確認新增結果
1
2
3
| SELECT Email, UserRole
FROM Employees
ORDER BY UserRole DESC
|
配合角色驗證調整項目
角色設定完成後,要再 AuthController 加入最後的設定,在 RegisterAsync 跟 LoginAsync 方法加入 [AllowAnonymous] 表示登入跟註冊是不需要驗證的,任何使用者都可以使用這兩個方法,
 1
 2
 3
 4
 5
 6
 7
 8
 9
10
11
12
13
14
15
16
17
18
19
20
21
22
23
| /// <summary>
/// 登入 API
/// </summary>
/// <param name="loginDto"> 使用者的輸入資料 </param>
/// <returns> 登入結果 </returns>
[AllowAnonymous]
[HttpPost("login")]
public async Task<ActionResult> LoginAsync(LoginDto loginDto)
{
......
}
/// <summary>
/// 註冊 API
/// </summary>
/// <param name="registerDto"> 使用者傳送的員工註冊資料 </param>
/// <returns> 註冊結果 </returns>
[AllowAnonymous]
[HttpPost("register")]
public async Task<ActionResult> RegisterAsync(RegisterDto registerDto)
{
......
}
|
為了取得使用者角色,需要在下面幾個地方調整
EmployeeDto
再 Model 目錄新增一個 EmployeeDto.cs,紀錄員工與角色的資訊,角色預設為 -1,因為在 UserRole.cs 中定義的最低數值是 Intern(0),所以為表示沒有角色給 -1
 1
 2
 3
 4
 5
 6
 7
 8
 9
10
11
12
13
14
15
16
17
18
19
20
21
22
| namespace JWT_Authentication_API.Models;
/// <summary>
/// 員工角色資料
/// </summary>
public class EmployeeDto
{
/// <summary>
/// 員工帳號
/// </summary>
public string Email { get; set; } = string.Empty;
/// <summary>
/// 員工密碼(加密)
/// </summary>
public string PasswordHash { get; set; } = string.Empty;
/// <summary>
/// 員工角色
/// </summary>
public int EmployeeRole { get; set; } = -1;
}
|
修改 JwtHelper,將傳入參數改成剛剛建立的 EmployeeDto,員工帳號識別,將員工角色寫入 JWT,如下
CreateJwt
 1
 2
 3
 4
 5
 6
 7
 8
 9
10
11
12
13
14
15
16
17
18
19
20
21
22
| /// <summary>
/// 產生 JWT
/// </summary>
/// <param name="employee"> 員工的登入資訊 </param>
/// <returns> JSON Web Token </returns>
public string CreateJwt(EmployeeDto employee) // 改傳入的參數
{
var now = DateTimeOffset.UtcNow;
// 設定 Payload
List<Claim> claims = [
// 發行單位
new(JwtRegisteredClaimNames.Iss, _jwtOptions.Issuer),
// 員工帳號作為識別
new(JwtRegisteredClaimNames.Sub, employee.Email),
// .......
// 員工角色
new(ClaimTypes.Role, $"{employee.EmployeeRole}", ClaimValueTypes.Integer)
];
......
}
|
GetEmployeeByEmailAsync
這個方法,需要調整 IEmployeeService 及 EmployeeService 的回傳物件型別
 1
 2
 3
 4
 5
 6
 7
 8
 9
10
11
12
13
14
15
16
17
18
19
20
21
22
23
24
25
26
27
28
29
30
31
32
33
34
35
36
37
38
39
40
41
42
| /// <summary>
/// 員工資料存取介面
/// </summary>
public interface IEmployeeService
{
......
/// <summary>
/// 依帳號取得員工資料
/// </summary>
/// <param name="email"> 員工帳號 </param>
/// <returns> 員山資料,如果使用者不存在就 null </returns>
Task<EmployeeDto?> GetEmployeeByEmailAsync(string email); // 這裡改成回傳 `EmployeeDto?`
}
/// <summary>
/// 員工資料存取服務
/// </summary>
public class EmployeeService(AppDbContext dbContext) : IEmployeeService
{
......
/// <summary>
/// 依帳號取得員工資料
/// </summary>
/// <param name="email"> 登入信箱/註冊信箱 </param>
/// <returns> 員工資料 或 null </returns>
public async Task<EmployeeDto?> GetEmployeeByEmailAsync(string email)
{
var employee = await _appDb.Employees
.FirstOrDefaultAsync(e => e.Email == email);
return employee == null
? null
: new EmployeeDto
{
Email = employee.Email,
PasswordHash = employee.PasswordHash,
EmployeeRole = employee.UserRole
};
}
}
|
ValidateUserAsync
因為驗證密碼的方法也有使用 GetEmployeeByEmailAsync,所以也要調整 AuthService 的驗證部分,在這裡有重複取得員工資料再驗證,改成不再讀取員工資料一次,改成從 AuthController 傳入,這邊一樣要調整 IAuthService,AuthService
 1
 2
 3
 4
 5
 6
 7
 8
 9
10
11
12
13
14
15
16
17
18
19
20
21
22
23
24
25
26
27
28
29
30
31
32
33
34
35
36
37
38
39
40
41
42
43
44
| using JWT_Authentication_API.Models;
namespace JWT_Authentication_API.Interfaces;
/// <summary>
/// 驗證服務介面
/// </summary>
public interface IAuthService
{
/// <summary>
/// 驗證員工登入資料是否與資料庫相同
/// </summary>
/// <param name="loginDto"> 員工登入資料 </param>
/// <param name="employeeDto"> 員工資料 </param>
/// <returns> 驗證結果 </returns>
bool ValidateUserAsync(LoginDto loginDto, EmployeeDto employeeDto);
}
/// <summary>
/// 驗證服務
/// </summary>
public class AuthService: IAuthService // 將 EmployeeService 拿掉
{
/// <summary>
/// 驗證員工登入密碼
/// </summary>
/// <param name="loginDto"> 員工登入資料 </param>
/// <param name="employeeDto"> 員工資料 </param>
/// <returns> 驗證結果 </returns>
public bool ValidateUserAsync(LoginDto loginDto, EmployeeDto employeeDto)
{
if(string.IsNullOrEmpty(loginDto.Email)
|| string.IsNullOrEmpty(loginDto.Password))
throw new ArgumentException($"Invalid {nameof(loginDto.Email)} or {nameof(loginDto.Password)}!");
// 驗證員工資料
if (employeeDto == null) throw new NullReferenceException("Employee not found!");
// 回傳驗證結果
return new PasswordHasher<EmployeeDto>().VerifyHashedPassword(
employeeDto, employeeDto.PasswordHash, loginDto.Password
) == PasswordVerificationResult.Success;
}
}
|
LoginAsync
最後回來改 AuthController 的登入方法,驗證方法因為 GetEmployeeByEmailAsync 的改變也改變了
 1
 2
 3
 4
 5
 6
 7
 8
 9
10
11
12
13
14
15
16
17
18
19
20
21
22
23
24
25
26
| #region 登入
/// <summary>
/// 登入 API
/// </summary>
/// <param name="loginDto"> 使用者的輸入資料 </param>
/// <returns> 登入結果 </returns>
[AllowAnonymous]
[HttpPost("login")]
public async Task<ActionResult> LoginAsync(LoginDto loginDto)
{
// 登入資料驗證
......
// 檢查員工帳號
......
// 檢查員工密碼並回傳登入結果
if (!_authService.ValidateUserAsync(loginDto, employee))
return BadRequest("Login failed!");
// 產生 Jwt
var jwt = _jwtHelper.CreateJwt(employee);
return Ok(jwt);
}
#endregion
|
實作驗證
在專案目錄下新增 ActionFilter 目錄,在錄目下新增 RolePermission.cs 作為驗證邏輯
1
2
3
| JWT_Authentication_API
└─ActionFilter
└─RolePermission.cs
|
RolePermission
大部分在網路上 Google 到的範例,應該都是使用 ASP.NET Core 預設的驗證,預設的 Filter 只有提供字串,不過我採用自定義 ActionFilter 的方式進行驗證,可以提供更多元的驗證邏輯,要實作一個類別,跟一個介面
1
2
3
4
| // 多個使用者,「,」分隔
[Authorize(Roles = "Role1, Role2")]
// 一個使用者
[Authorize(Roles = "Role")]
|
不過我希望可以套用到自已的 UserRole,所以要實作 Attribute 類別,提供自定義的角色
1
2
3
4
5
| namespace JWT_Authentication_API.ActionFilter;
public class RolePermission: Attribute
{
}
|
另外預設的驗證是實作 IActinFilter,我需要是一個專門在處理權限的驗證,因此會再實作 IAuthorizationFilter,並傳入自定義的角色 UserRole 作為參數,如下
 1
 2
 3
 4
 5
 6
 7
 8
 9
10
11
12
13
14
15
16
17
18
19
20
21
22
23
24
25
26
27
28
29
30
31
32
33
34
35
36
37
38
39
40
41
42
43
44
45
46
47
48
49
50
51
52
53
54
55
56
57
58
59
60
61
62
63
64
65
66
67
68
| using System.Security.Claims;
using JWT_Authentication_API.Enums;
using Microsoft.AspNetCore.Mvc;
using Microsoft.AspNetCore.Mvc.Filters;
namespace JWT_Authentication_API.ActionFilter;
/// <summary>
/// 角色驗證的邏輯
/// </summary>
/// <param name="userRoles"> 允許的角色名單 </param>
public class RolePermission(params UserRole[] userRoles): Attribute, IAuthorizationFilter
{
/// <summary>
/// 角色清單
/// </summary>
private readonly UserRole[] _userRoles = userRoles;
/// <summary>
/// 實際角色驗證的邏輯
/// </summary>
/// <param name="context"> 驗證場景,包含 request 的相關資訊 </param>
public void OnAuthorization(AuthorizationFilterContext context)
{
// 從 JWT 中取得使用者角色
var userRole = context.HttpContext.User?.Claims
.Where(c => c.Type == ClaimTypes.Role)
.Select(c => c.Value)
.FirstOrDefault();
// 取得失敗
if (string.IsNullOrEmpty(userRole))
// Http 403
context.Result = new ForbidResult();
// 取出來的角色是 string,為避免轉換失敗,用 TryParse 轉換成 int
// TryParse 會回傳轉換的結果,如果無法轉換會 回傳 fasle
// 如果可以轉換,會將轉換的值寫到 out 指定的變數
if (int.TryParse(userRole, out var role))
{
// 如果不在允許的角色清單中
if (_userRoles.All(u => (int)u != role))
{
// Http 403
context.Result = new ForbidResult();
}
else
{
// 在行 JWT 中取得角色帳號
var email = context.HttpContext.User.Claims
.Where(c => c.Type == JwtRegisteredClaimNames.Sub)
.Select(c => c.Value)
.FirstOrDefault();
// 如果沒有取得使用帳號,回傳 Http 403
if(string.IsNullOrEmpty(email))
context.Result = new ForbidResult();
// 記住現在登入者的角色及帳號
context.HttpContext.Items.Add(nameof(UserRole), role);
context.HttpContext.Items.Add("Email", email);
}
}
else
{
// 轉換失敗,Http 403
context.Result = new ForbidResult();
}
}
}
|
EmployeeController
接著我設計一個情境,只有人資主管可以看到所有的員工資料,其他員工只能看到自已的資料,所以需要一個 EmployeeController 來處理員工資料存取的請求,並注入 EmployeeService 如下
 1
 2
 3
 4
 5
 6
 7
 8
 9
10
11
12
13
14
15
16
| using JWT_Authentication_API.Interfaces;
using Microsoft.AspNetCore.Mvc;
namespace JWT_Authentication_API.Controllers;
/// <summary>
/// 員工資料存取
/// </summary>
/// <param name="employeeService"> 員工資料服務 </param>
[ApiController, Route("api/[controller]")]
public class EmployeeController(IEmployeeService employeeService) : Controller
{
/// <summary>
/// 員工資料服務
/// </summary>
private readonly IEmployeeService _employeeService = employeeService;
}
|
同時要調整 IEmployeeService 及 EmployeeService 加入取得所有員工資料的方法,如下
 1
 2
 3
 4
 5
 6
 7
 8
 9
10
11
12
13
14
15
16
17
18
19
20
21
22
23
24
25
26
27
28
29
30
31
32
33
34
35
36
37
38
39
40
41
42
43
44
45
46
47
48
49
50
51
52
53
54
| using JWT_Authentication_API.Models;
namespace JWT_Authentication_API.Interfaces;
/// <summary>
/// 員工資料存取介面
/// </summary>
public interface IEmployeeService
{
......
/// <summary>
/// 取得所有員工資料
/// </summary>
/// <returns> 所有員工資料 </returns>
Task<IEnumerable<EmployeeDto>> GetEmployeesAsync();
}
using System.ComponentModel.DataAnnotations;
using JWT_Authentication_API.Entities;
using JWT_Authentication_API.Interfaces;
using JWT_Authentication_API.Models;
using Microsoft.AspNetCore.Identity;
using Microsoft.EntityFrameworkCore;
namespace JWT_Authentication_API.Services;
/// <summary>
/// 員工資料存取服務
/// </summary>
/// <param name="dbContext"> 資料庫對映物件 </param>
public class EmployeeService(AppDbContext dbContext) : IEmployeeService
{
/// <summary>
/// 資料庫對映物件
/// </summary>
private readonly AppDbContext _appDb = dbContext;
......
/// <summary>
/// 取得所有員工資料
/// </summary>
/// <returns> 所有員工資料 </returns>
public async Task<IEnumerable<EmployeeDto>> GetEmployeesAsync()
{
// 從資料庫取得員工資料,由於資料量少,可以直接 ToList,當資料量大的時候建議實作分頁
return await _appDb.Employees.Select(e => new EmployeeDto
{
Email = e.Email,
EmployeeRole = e.UserRole
}).ToListAsync();
}
}
|
再回到 EmployeeController,加入 Employees 及 GetEmployee 方法如下
 1
 2
 3
 4
 5
 6
 7
 8
 9
10
11
12
13
14
15
16
17
18
19
20
21
22
23
24
25
26
27
28
29
30
31
32
33
34
35
36
37
38
39
40
41
42
43
44
45
46
47
48
49
50
51
52
53
54
| using JWT_Authentication_API.ActionFilter;
using JWT_Authentication_API.Enums;
using JWT_Authentication_API.Interfaces;
using Microsoft.AspNetCore.Mvc;
namespace JWT_Authentication_API.Controllers;
/// <summary>
/// 員工資料存取
/// </summary>
/// <param name="employeeService"> 員工資料服務 </param>
[ApiController, Route("api/[controller]")]
public class EmployeeController(IEmployeeService employeeService) : Controller
{
/// <summary>
/// 員工資料服務
/// </summary>
private readonly IEmployeeService _employeeService = employeeService;
/// <summary>
/// 取得單一員工資料
/// </summary>
/// <returns> 指定的員工資料 </returns>
[RolePermission(UserRole.Intern, UserRole.HrAssistant, UserRole.HrHead)]
[HttpPost("get/employee")]
public async Task<ActionResult> GetEmployee()
{
var userRole = HttpContext.Items[nameof(UserRole)] as string;
var email = HttpContext.Items["Email"] as string;
if (string.IsNullOrEmpty(userRole) || string.IsNullOrEmpty(email))
return BadRequest($"{nameof(userRole)} or {nameof(email)} are required.");
// 取得員工資料
var employee = await _employeeService.GetEmployeeByEmailAsync(email);
if(employee == null)
return NotFound($"{email} not found.");
// 密碼不應該回傳
employee.PasswordHash = string.Empty;
return Ok(employee);
}
/// <summary>
/// 取得所有員工資料
/// </summary>
/// <returns></returns>
[RolePermission(UserRole.HrHead)]
[HttpPost("get/employees")]
public async Task<IActionResult> Employees()
{
var employees = await _employeeService.GetEmployeesAsync();
if(employees == null) return NotFound();
return Ok(employees.ToList());
}
}
|
都完成後就可以使用 Postman 來測試了,測試資料參考
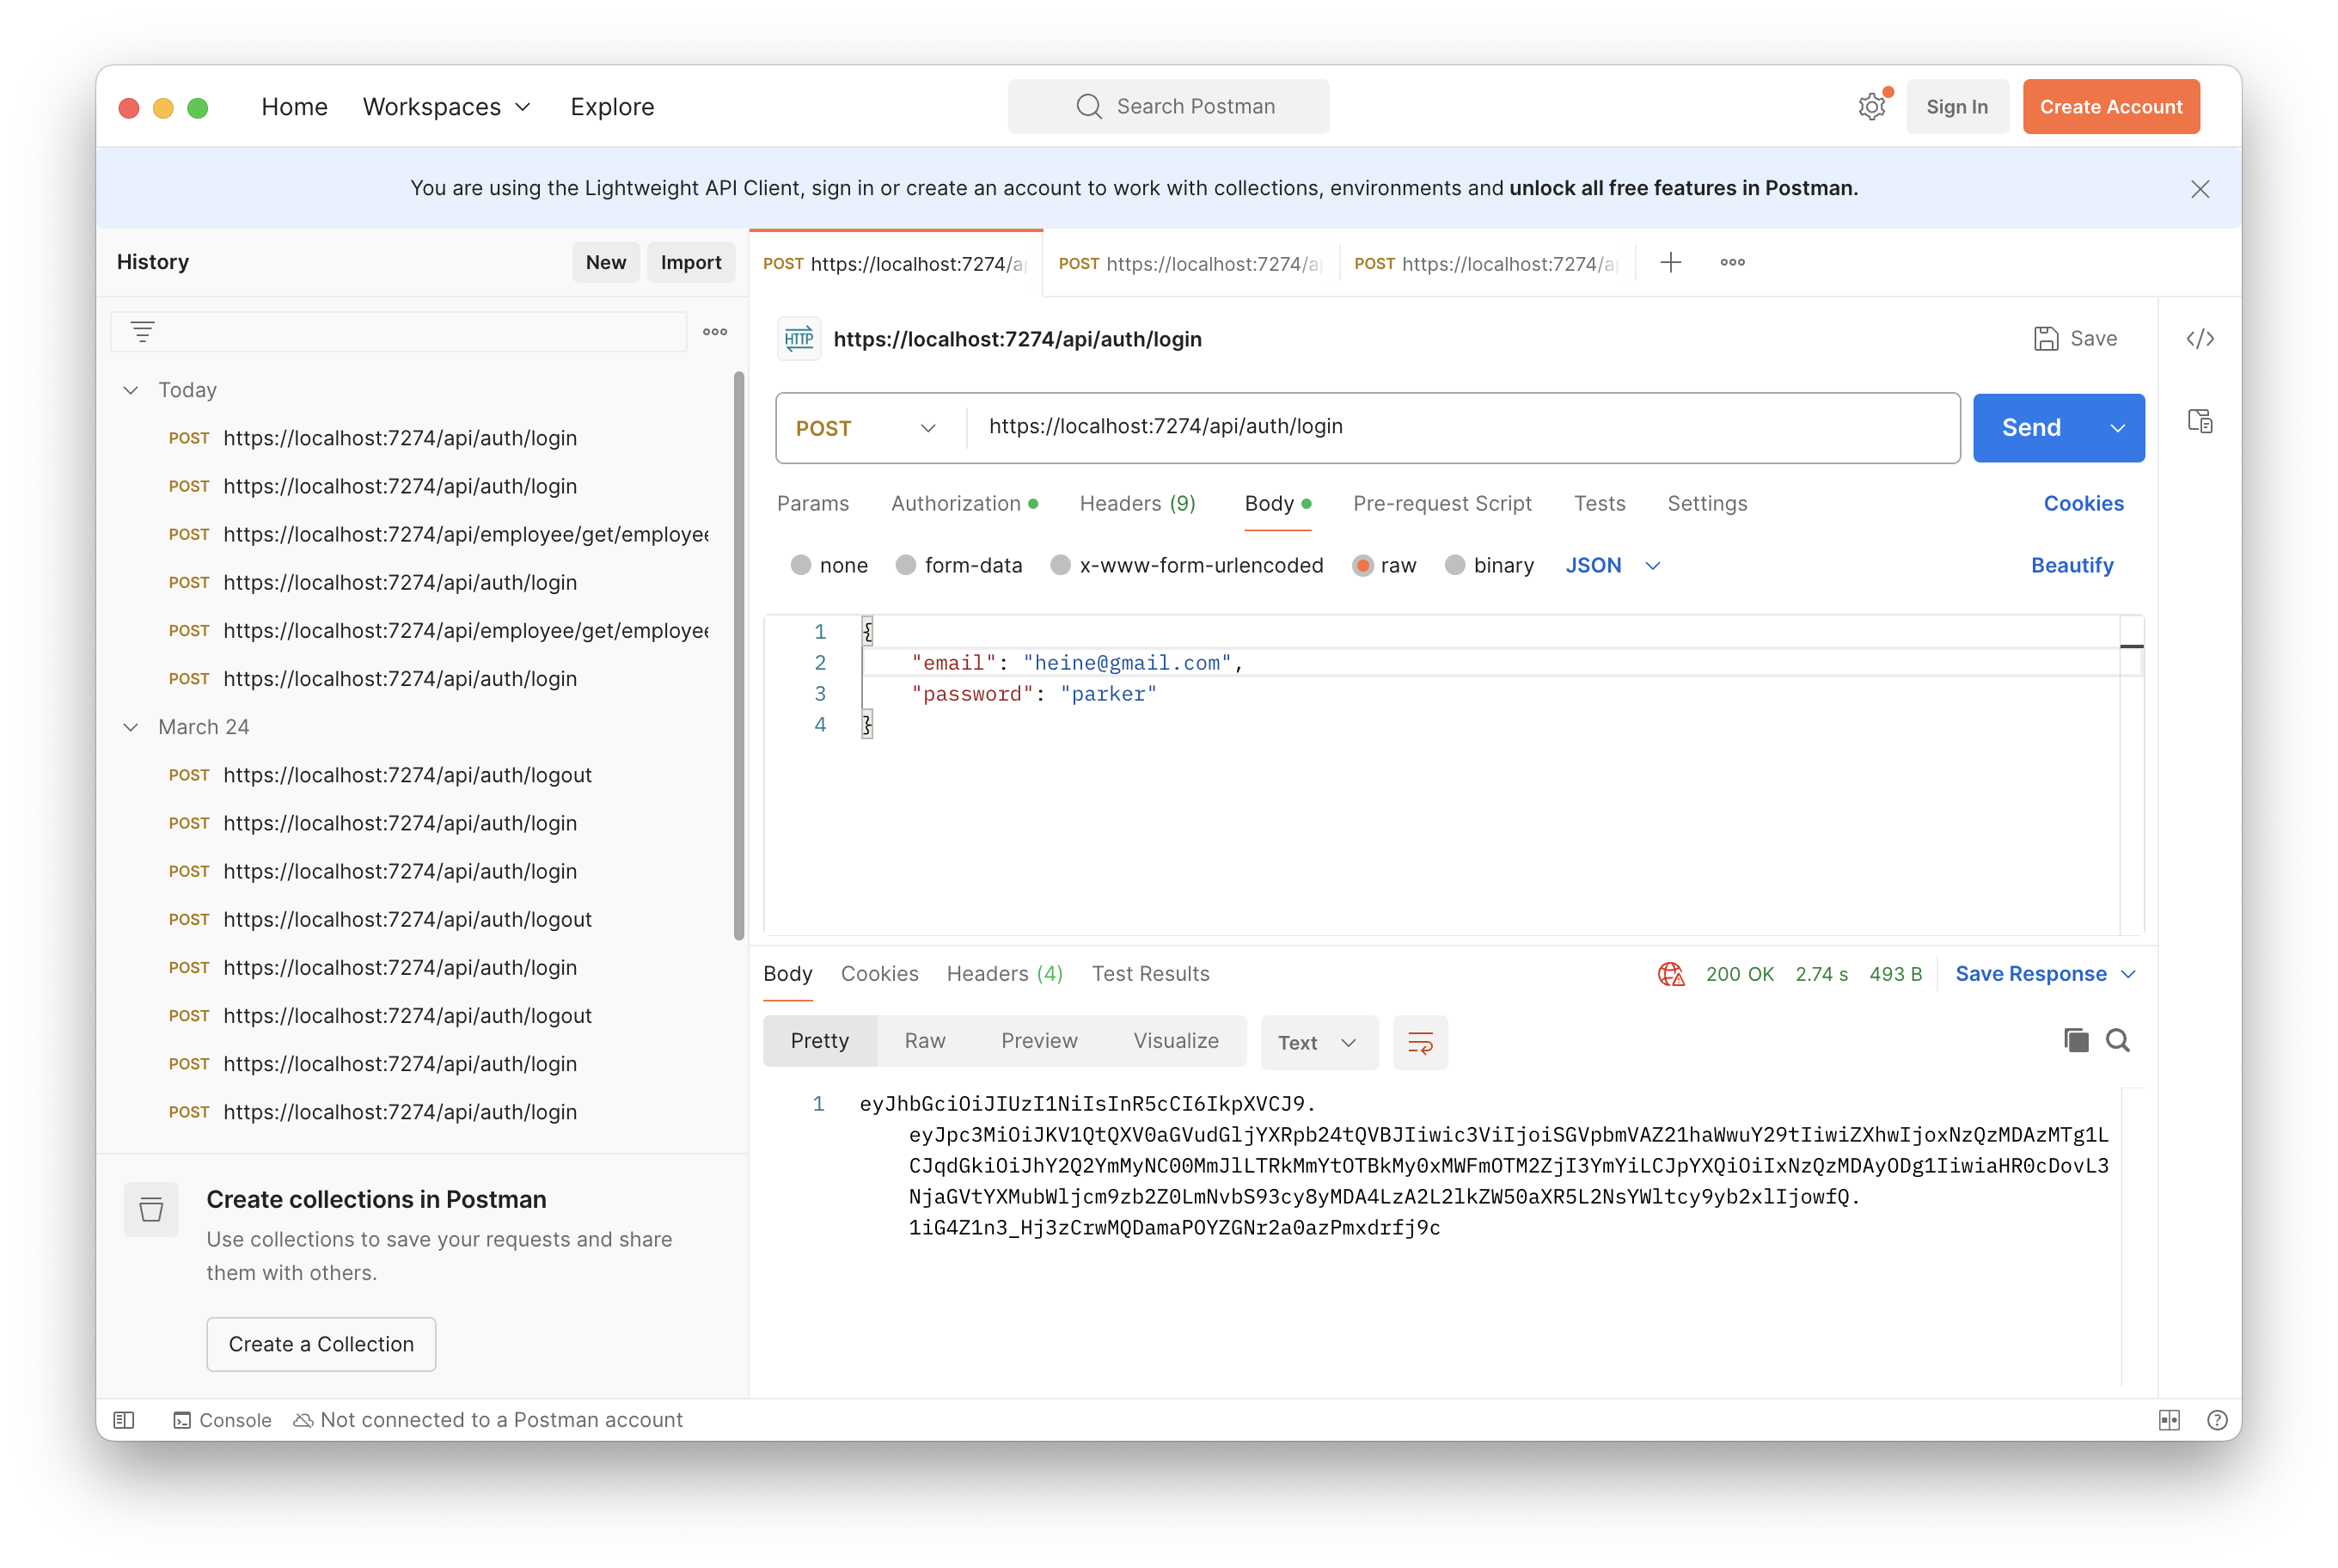
Heine
本例角色是實習生(UserRole = 0),先用 auth/login 取得 heine 的 JWT:在用下面的相關網址測試權限
get/employee 測試取得自己的員工資料
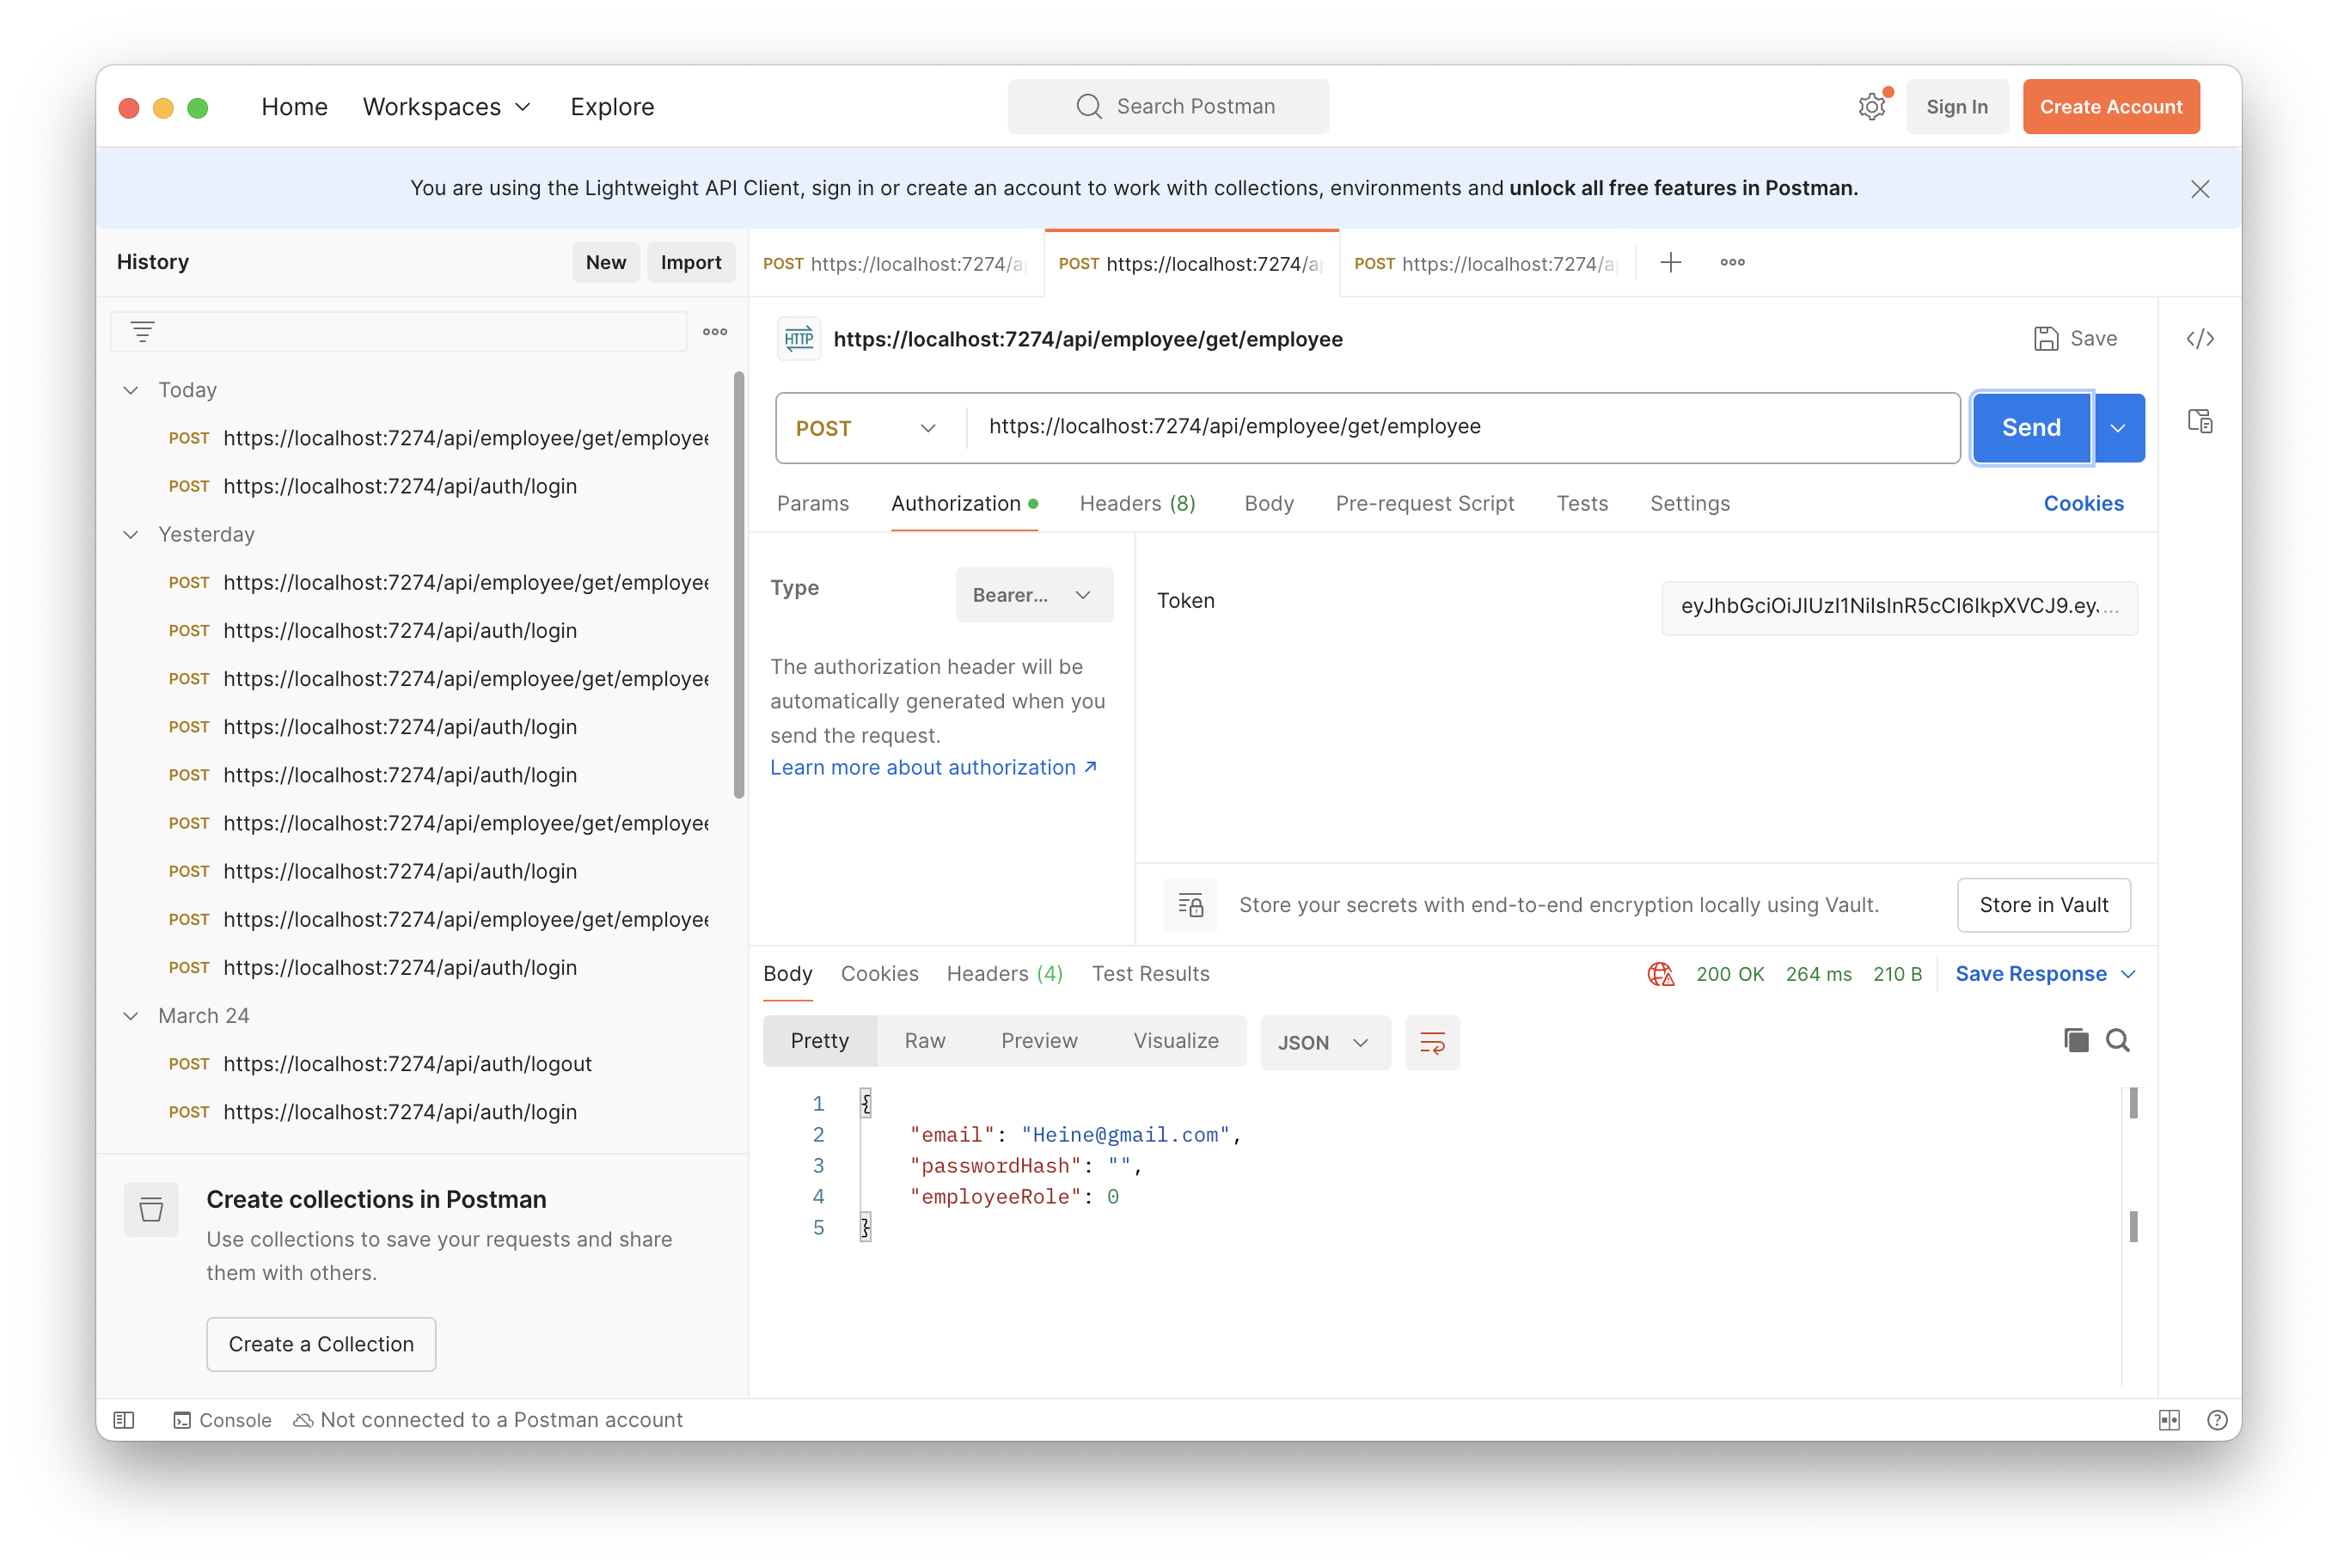
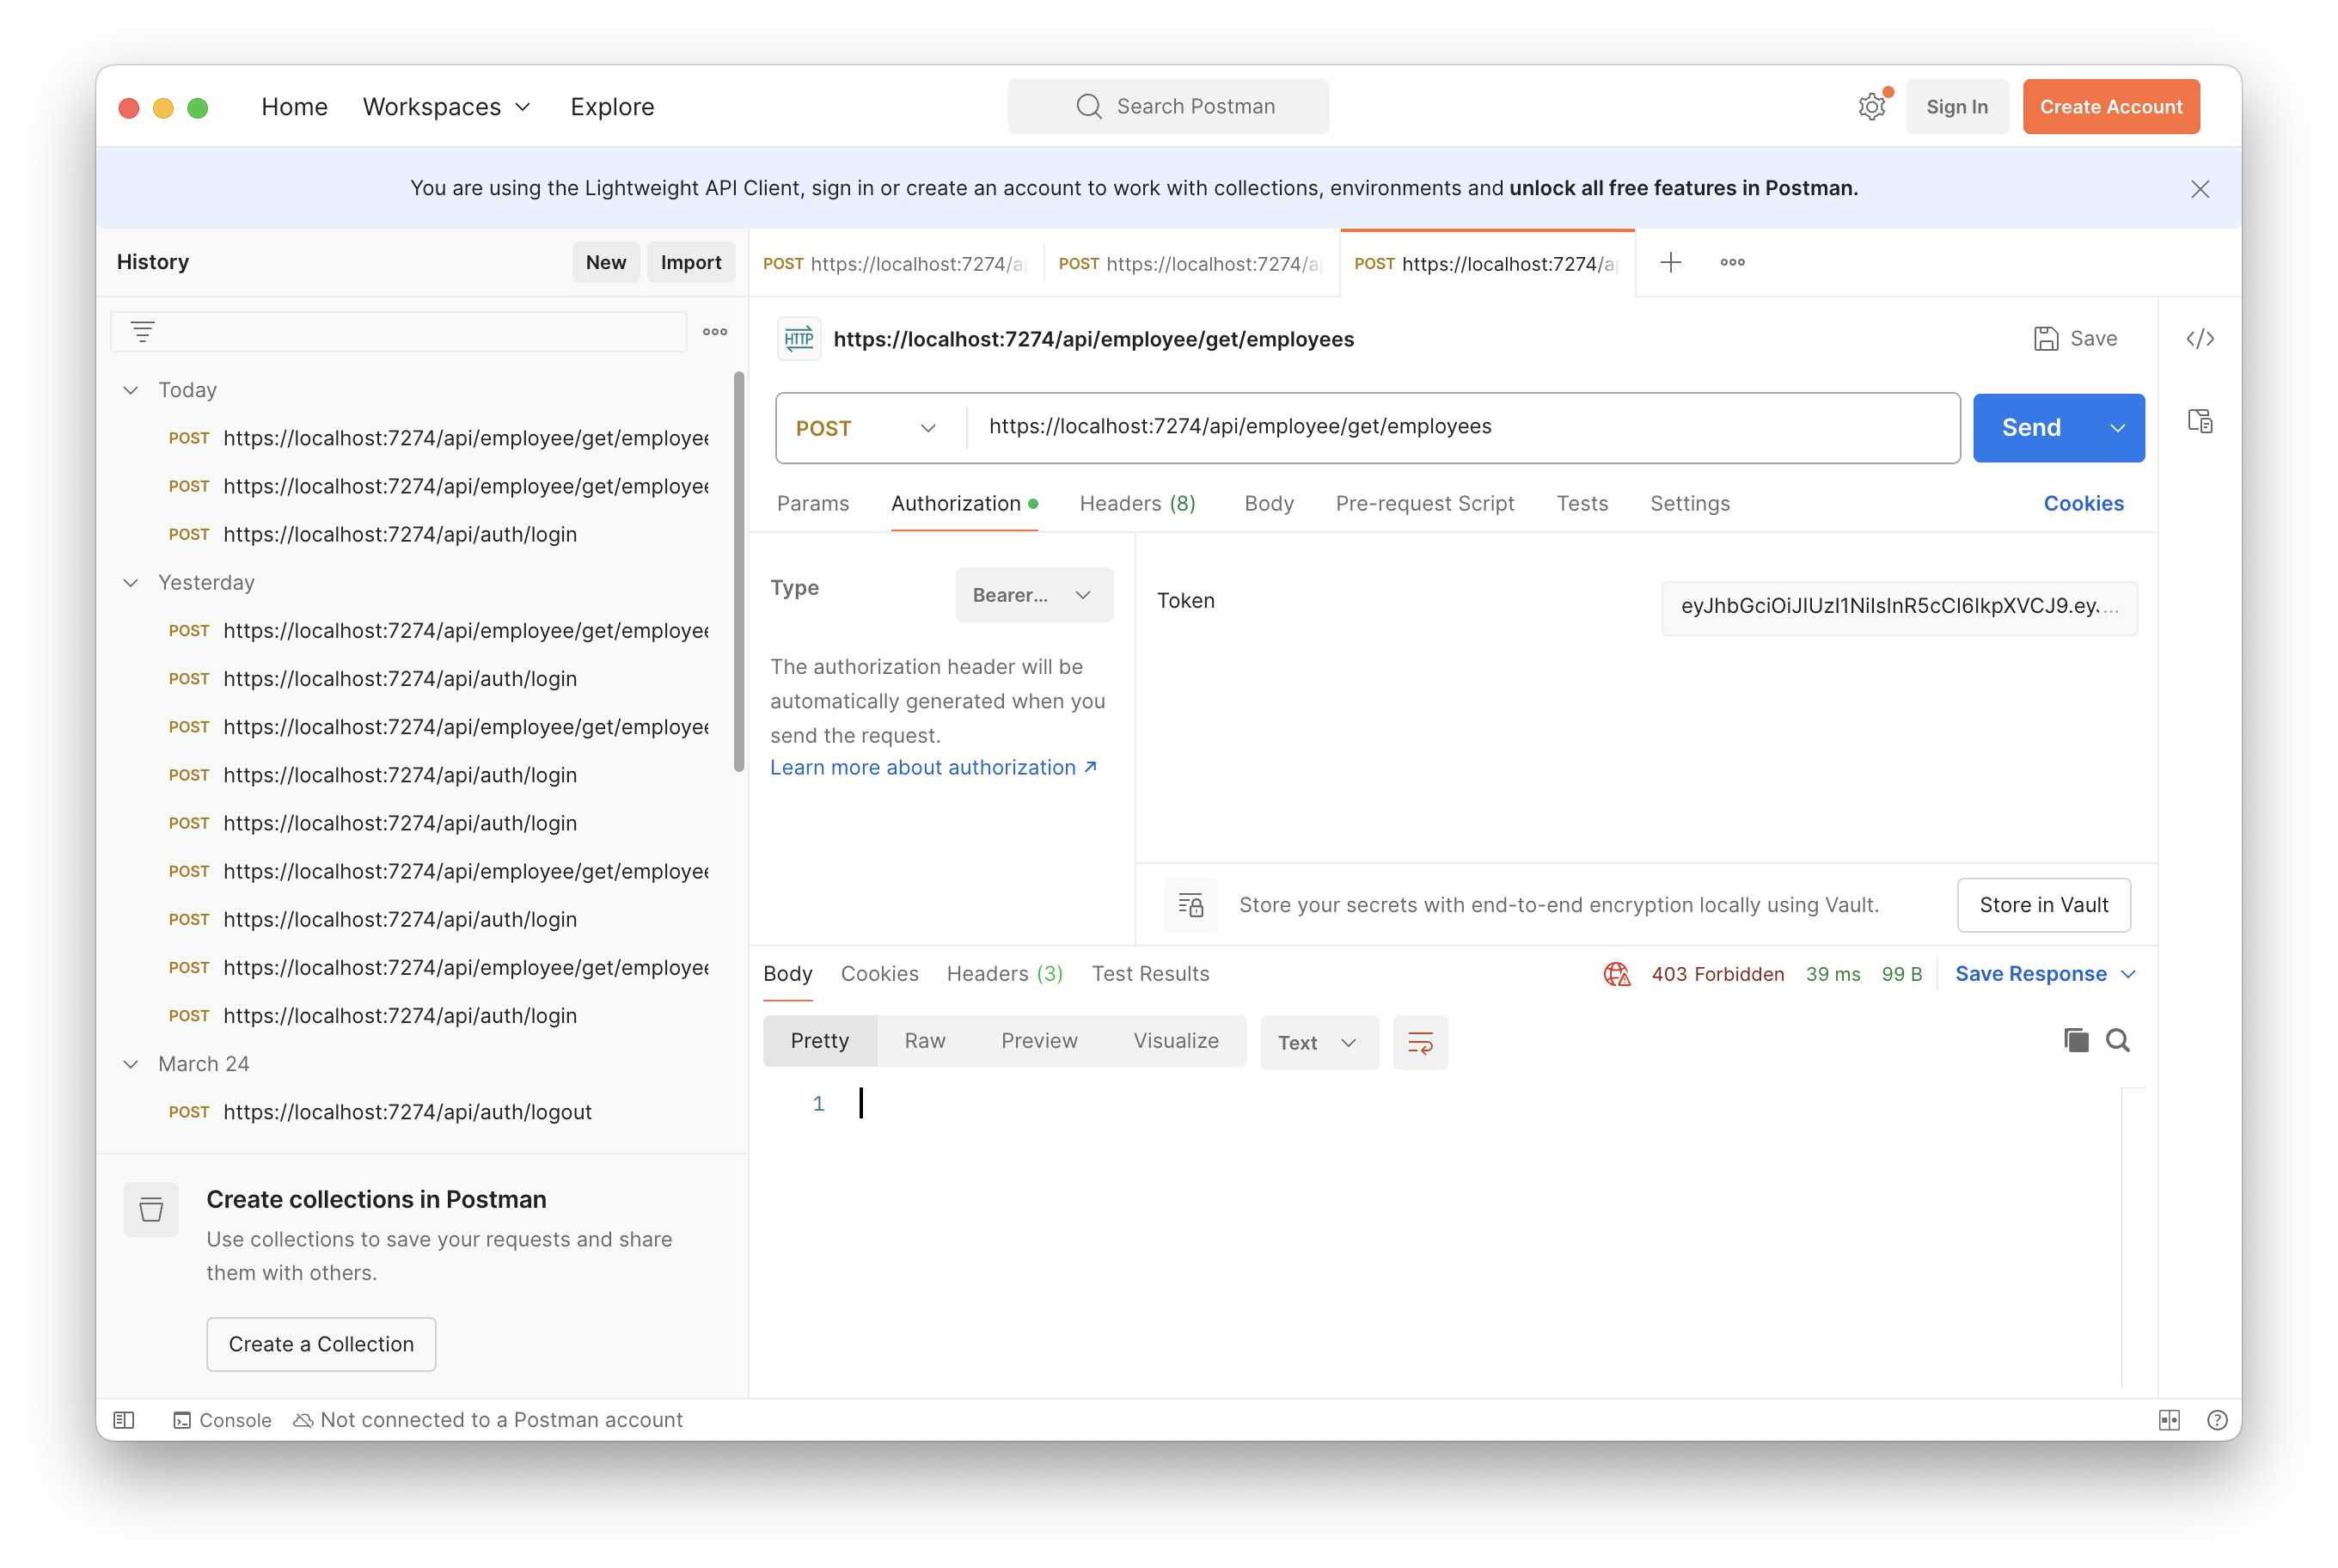
get/employees 測試取得所有員工資料,會發現是 Http 403 回應,代表實習生是沒有這個權限的
Adam
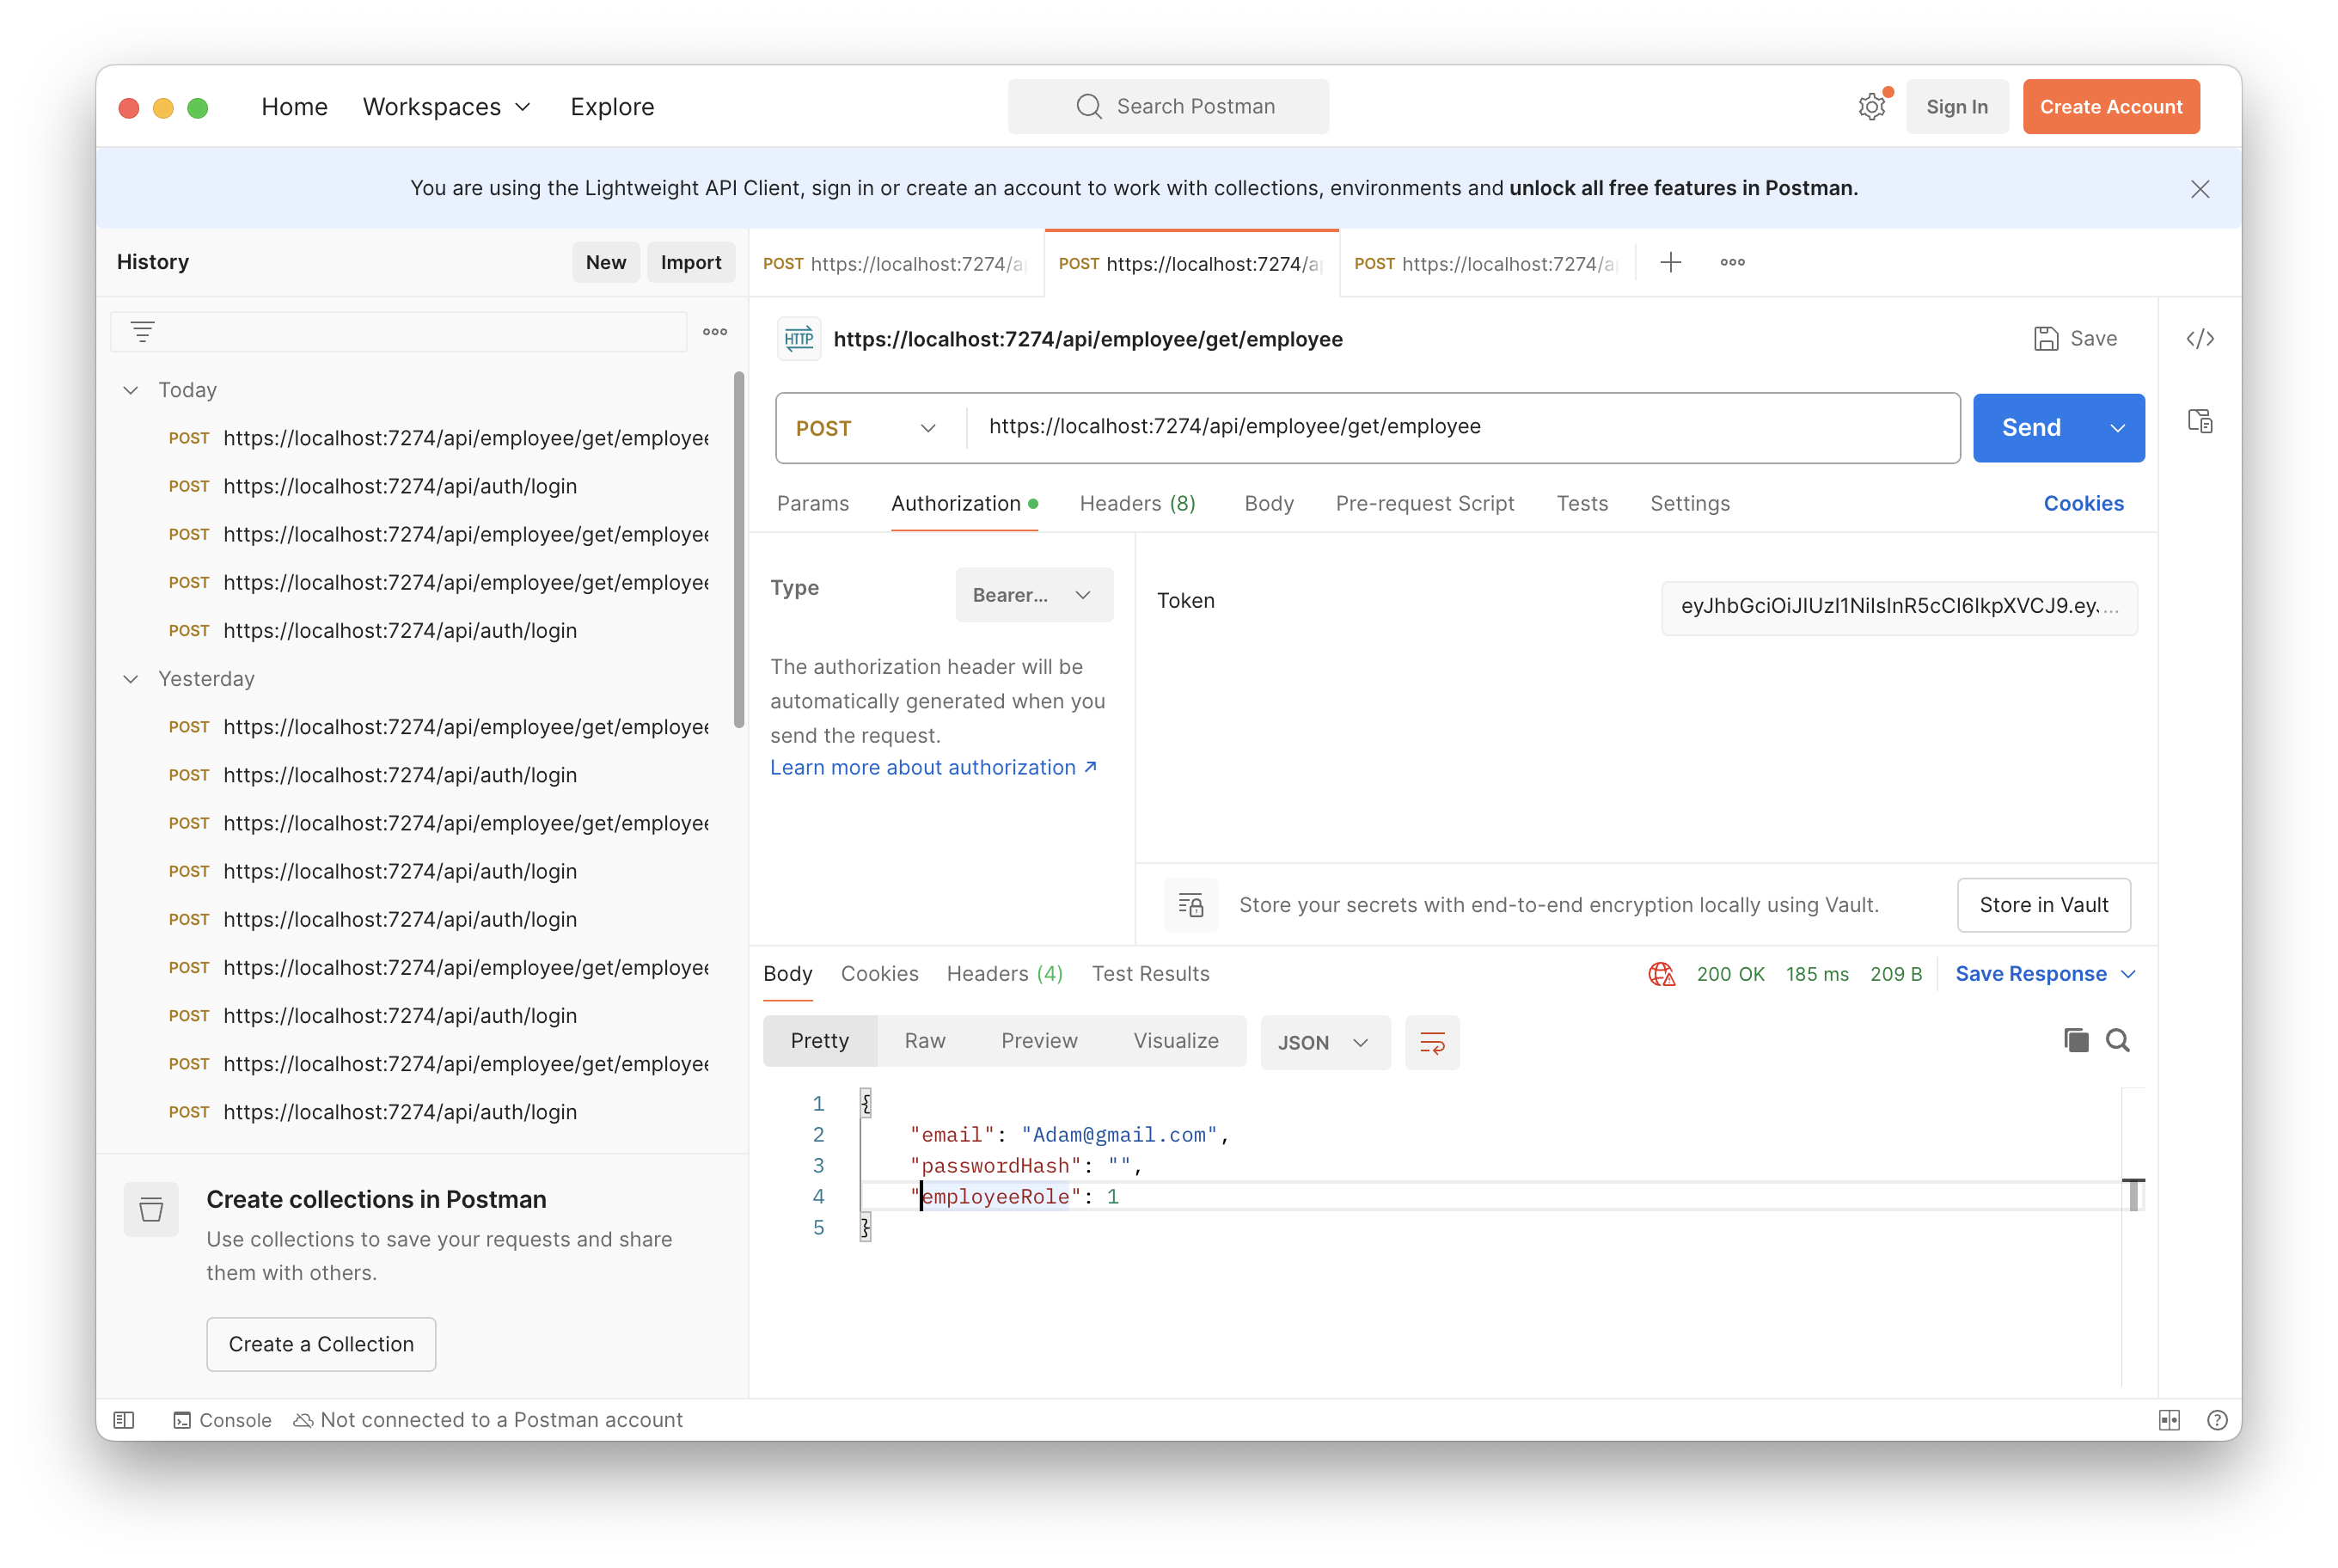
本例角色是人資助理(UserRole = 1),應該也只能取得自己的資料,操作同上
get/employee
get/employees
Peter
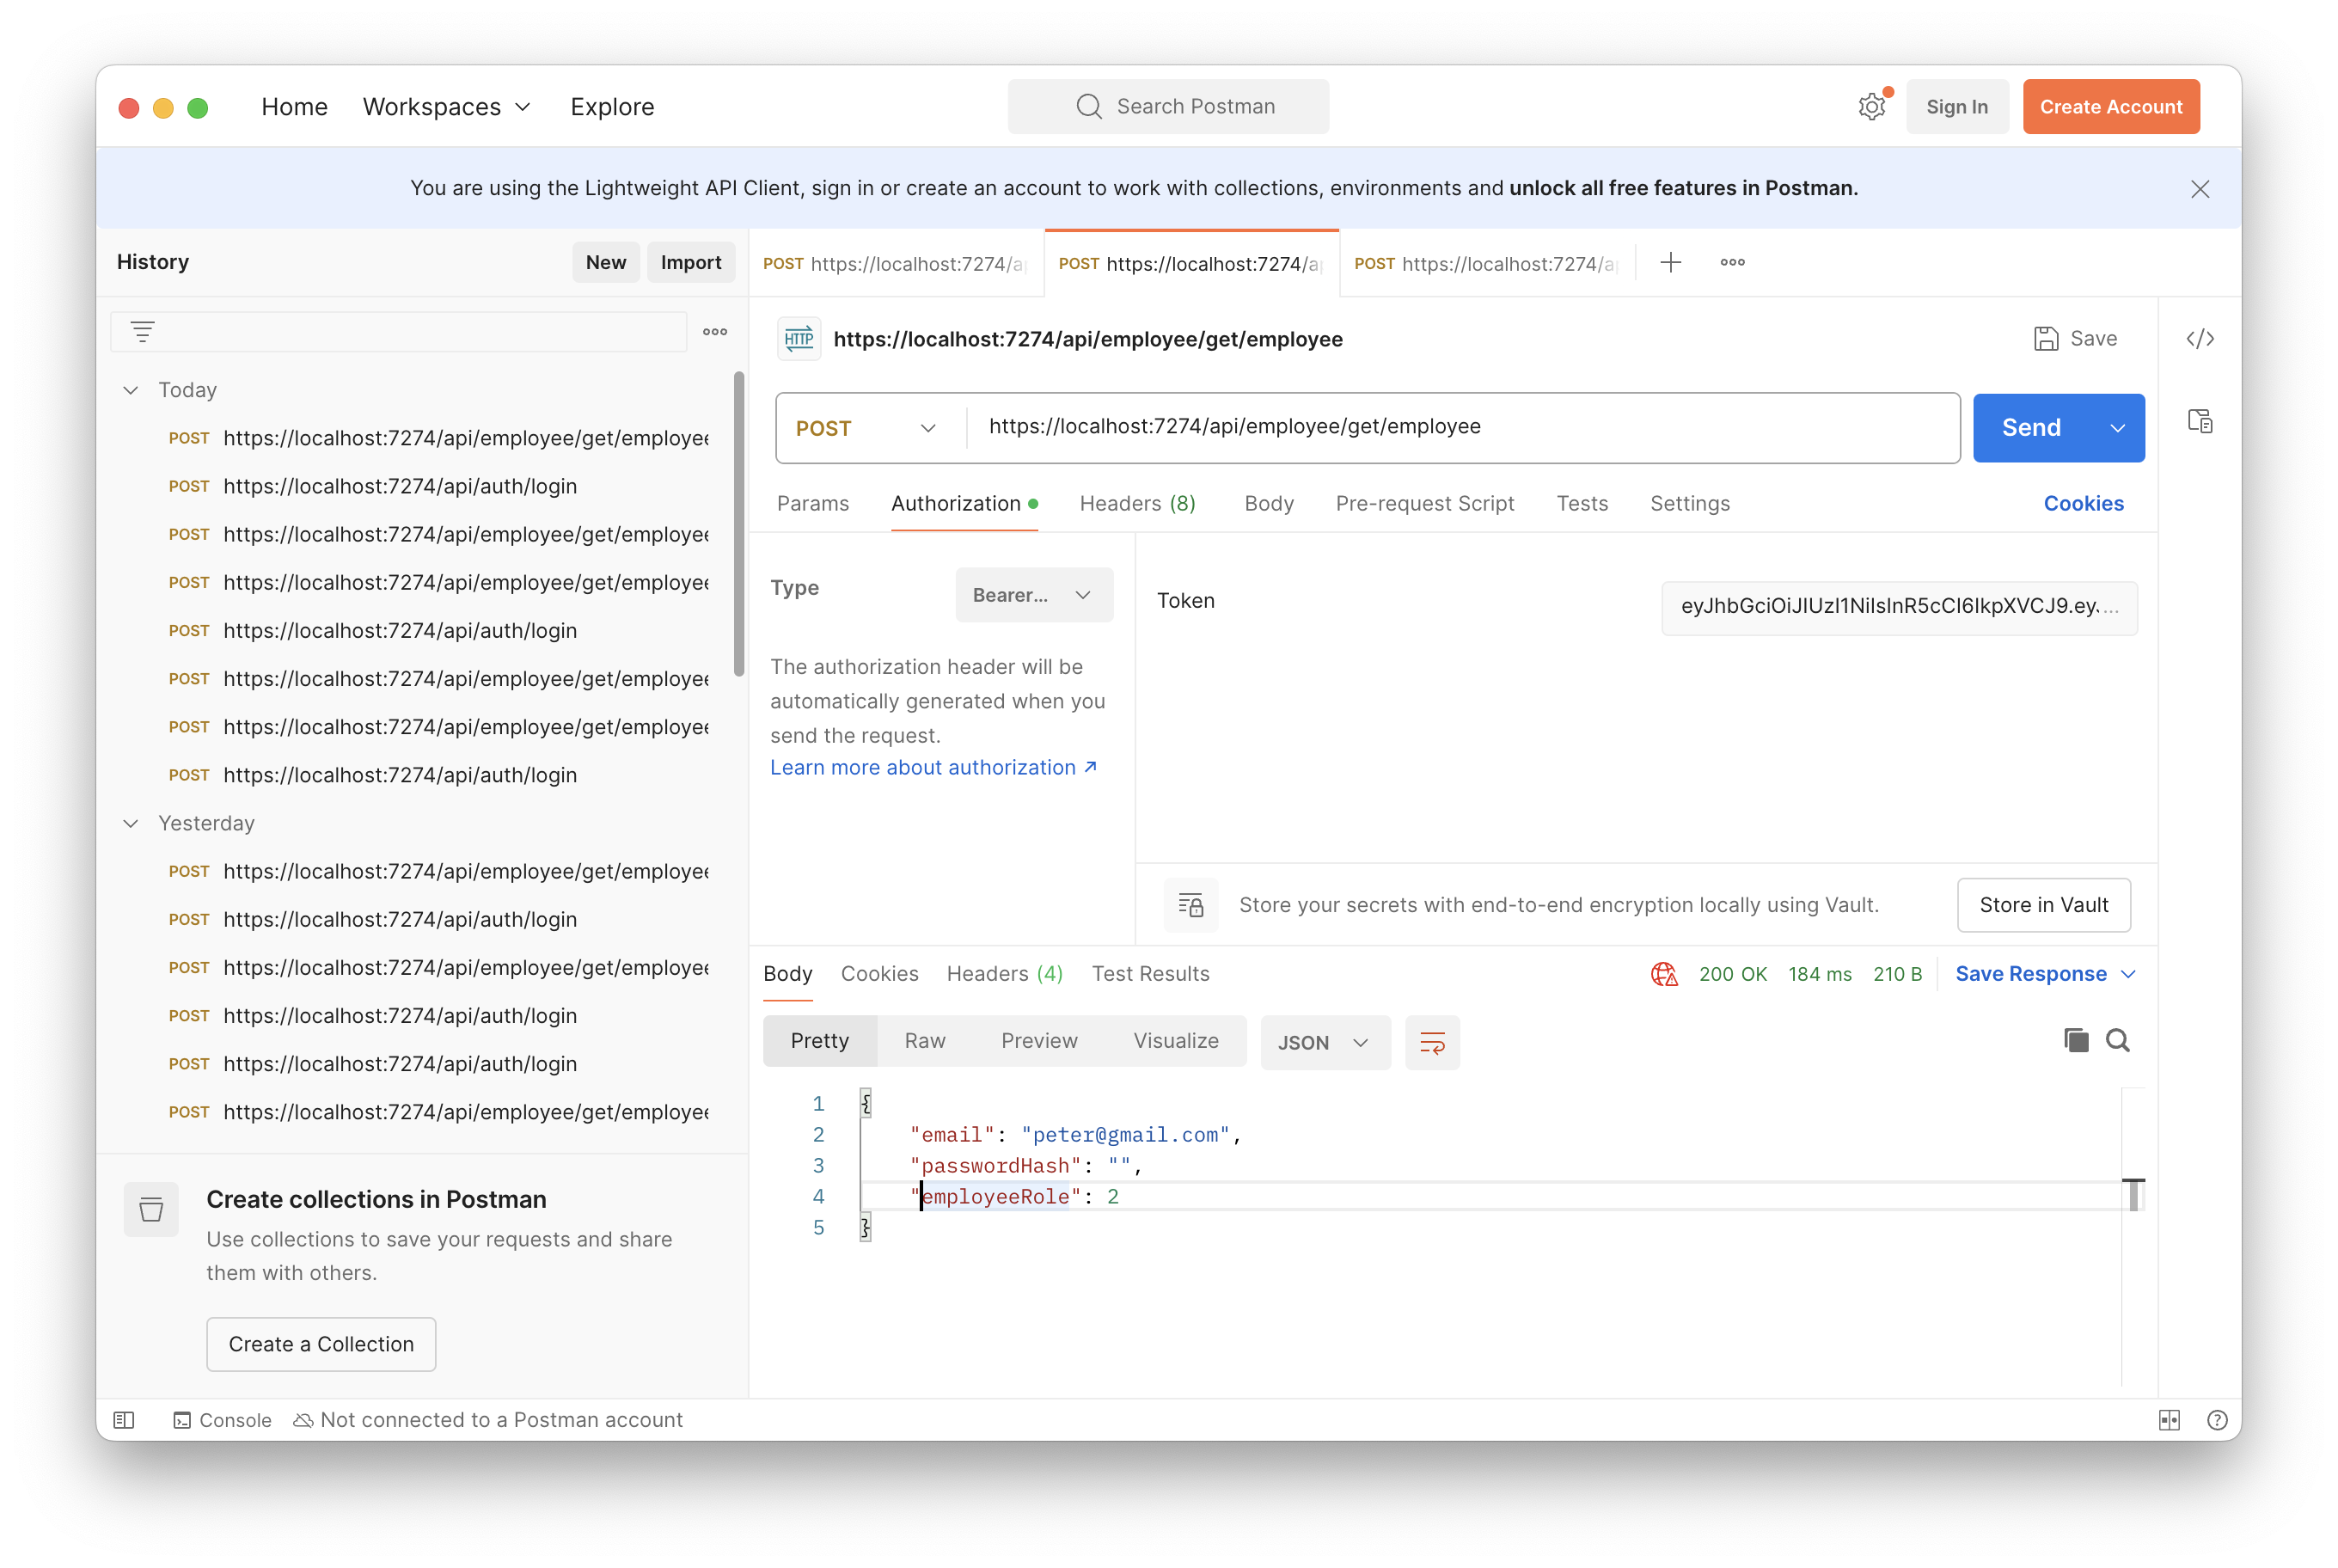
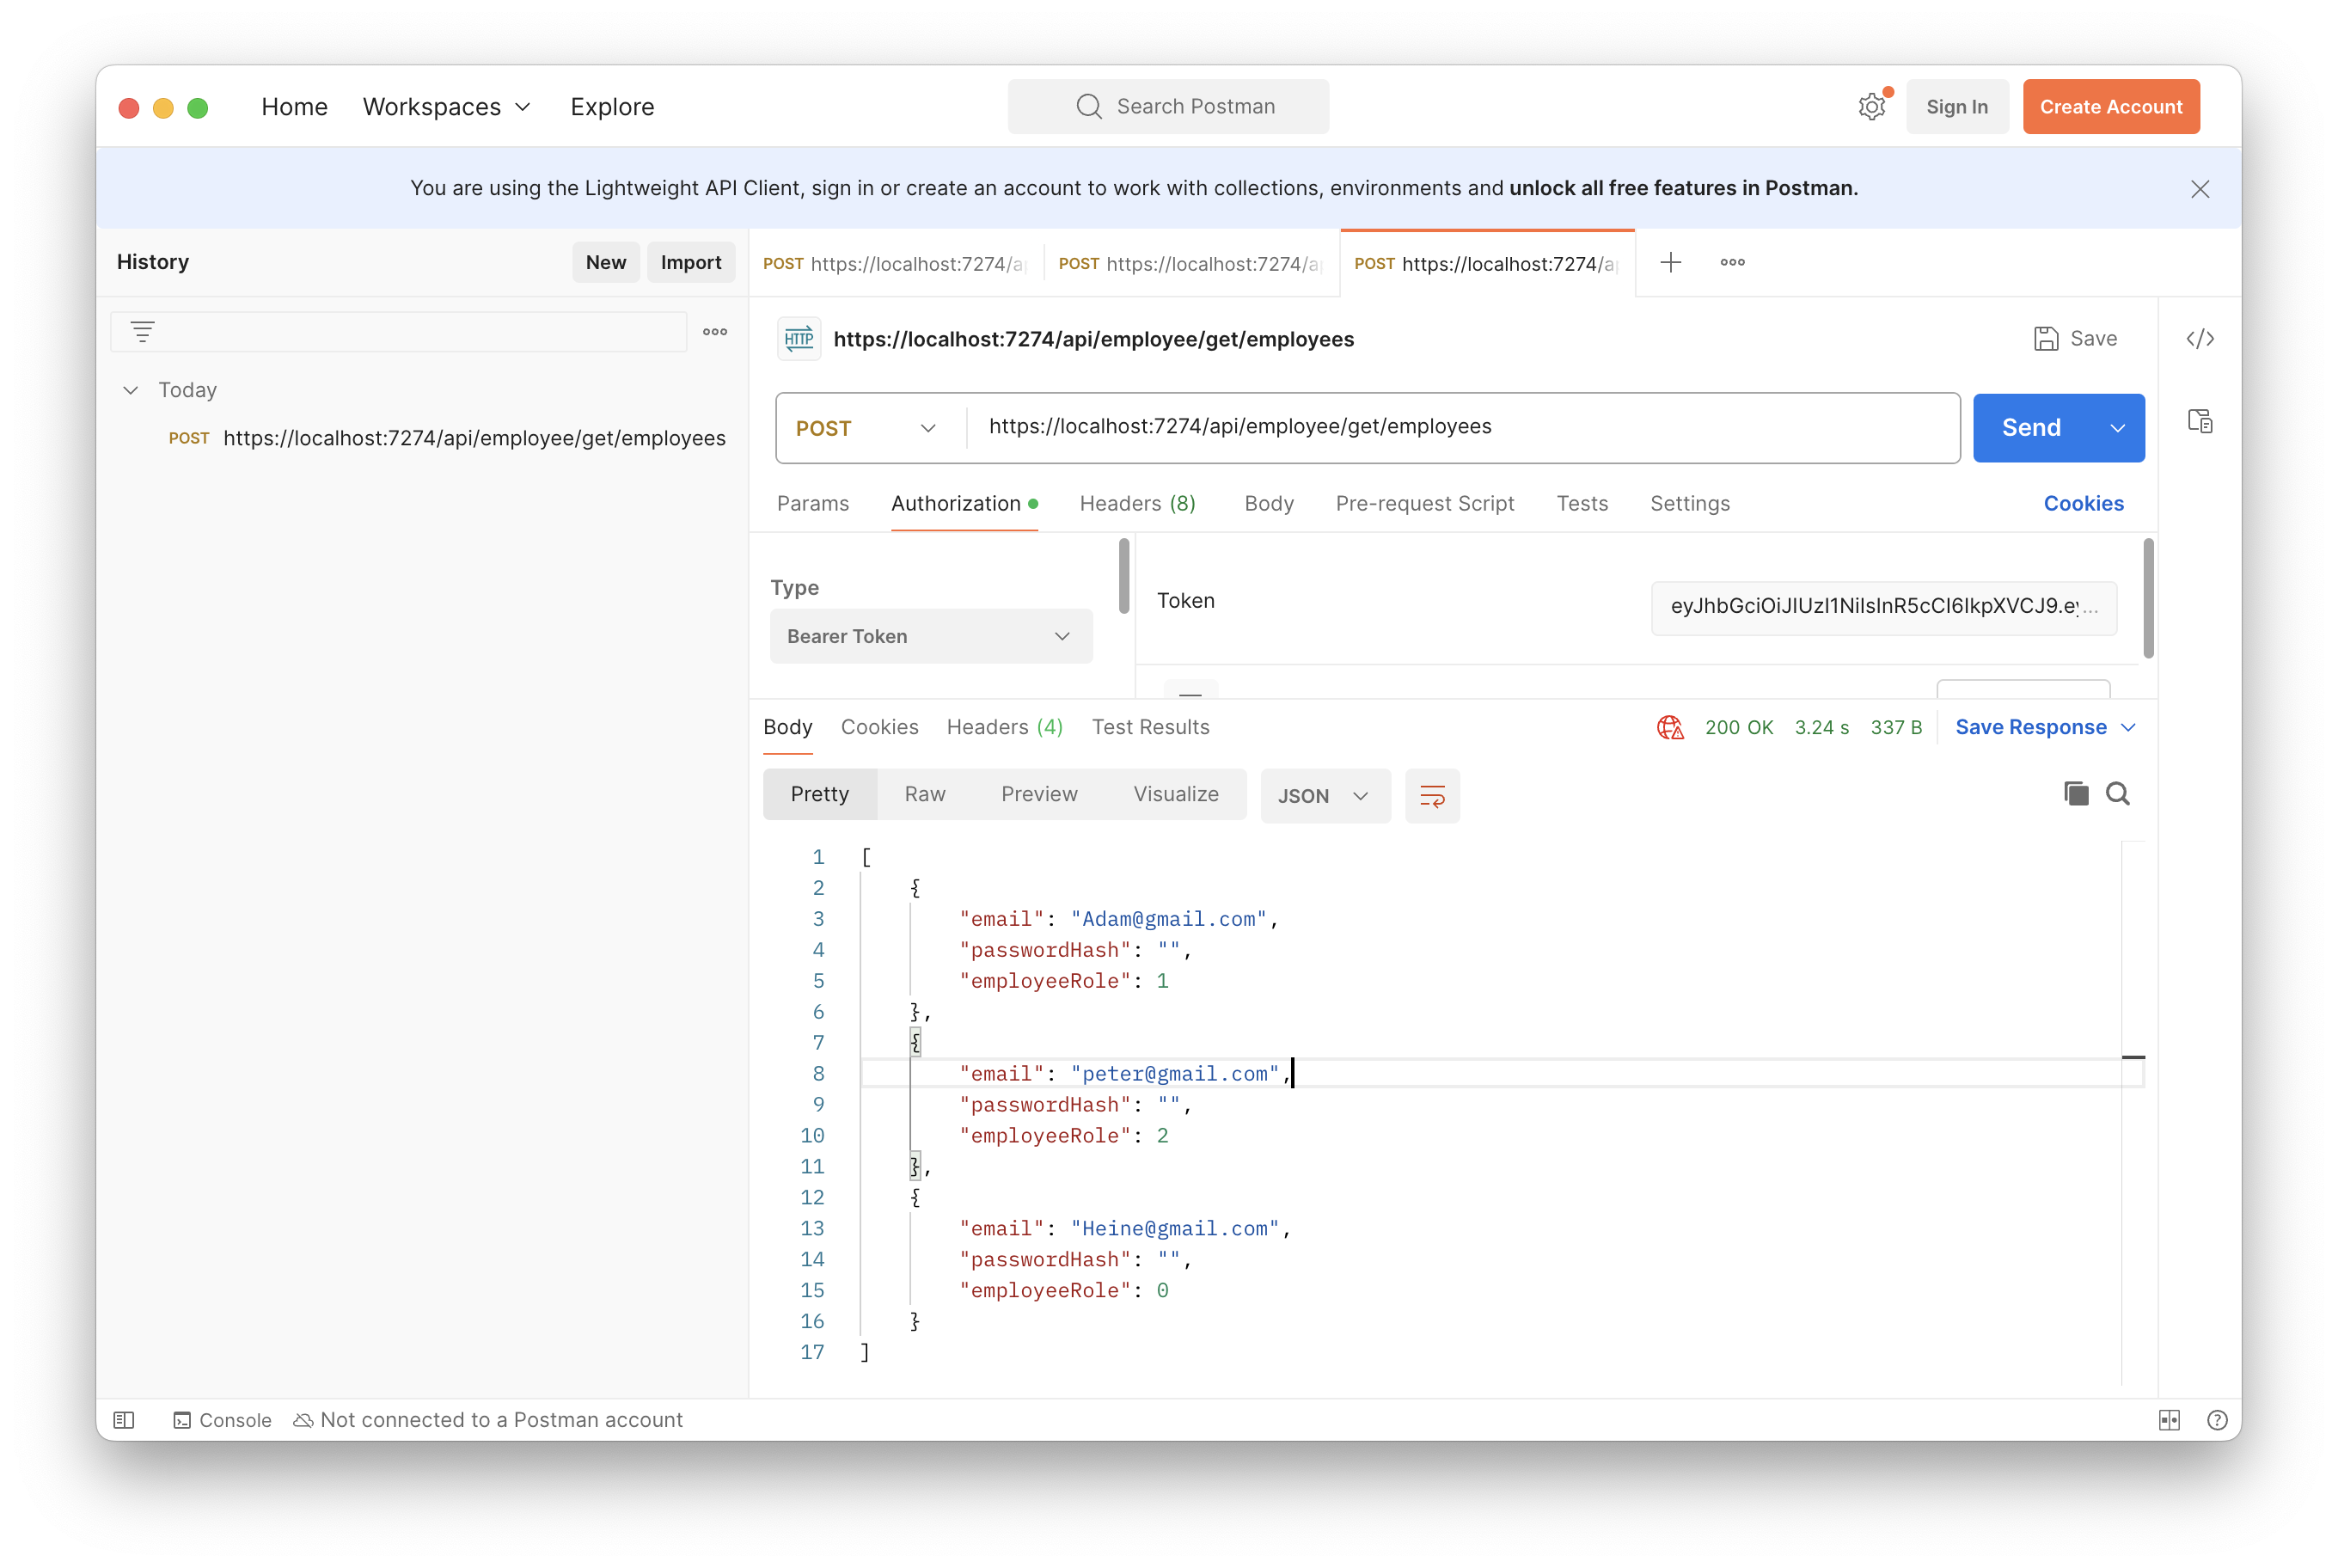
本例是人資主管(UserRole = 2),應該要可以取得所有員工資料
get/employee
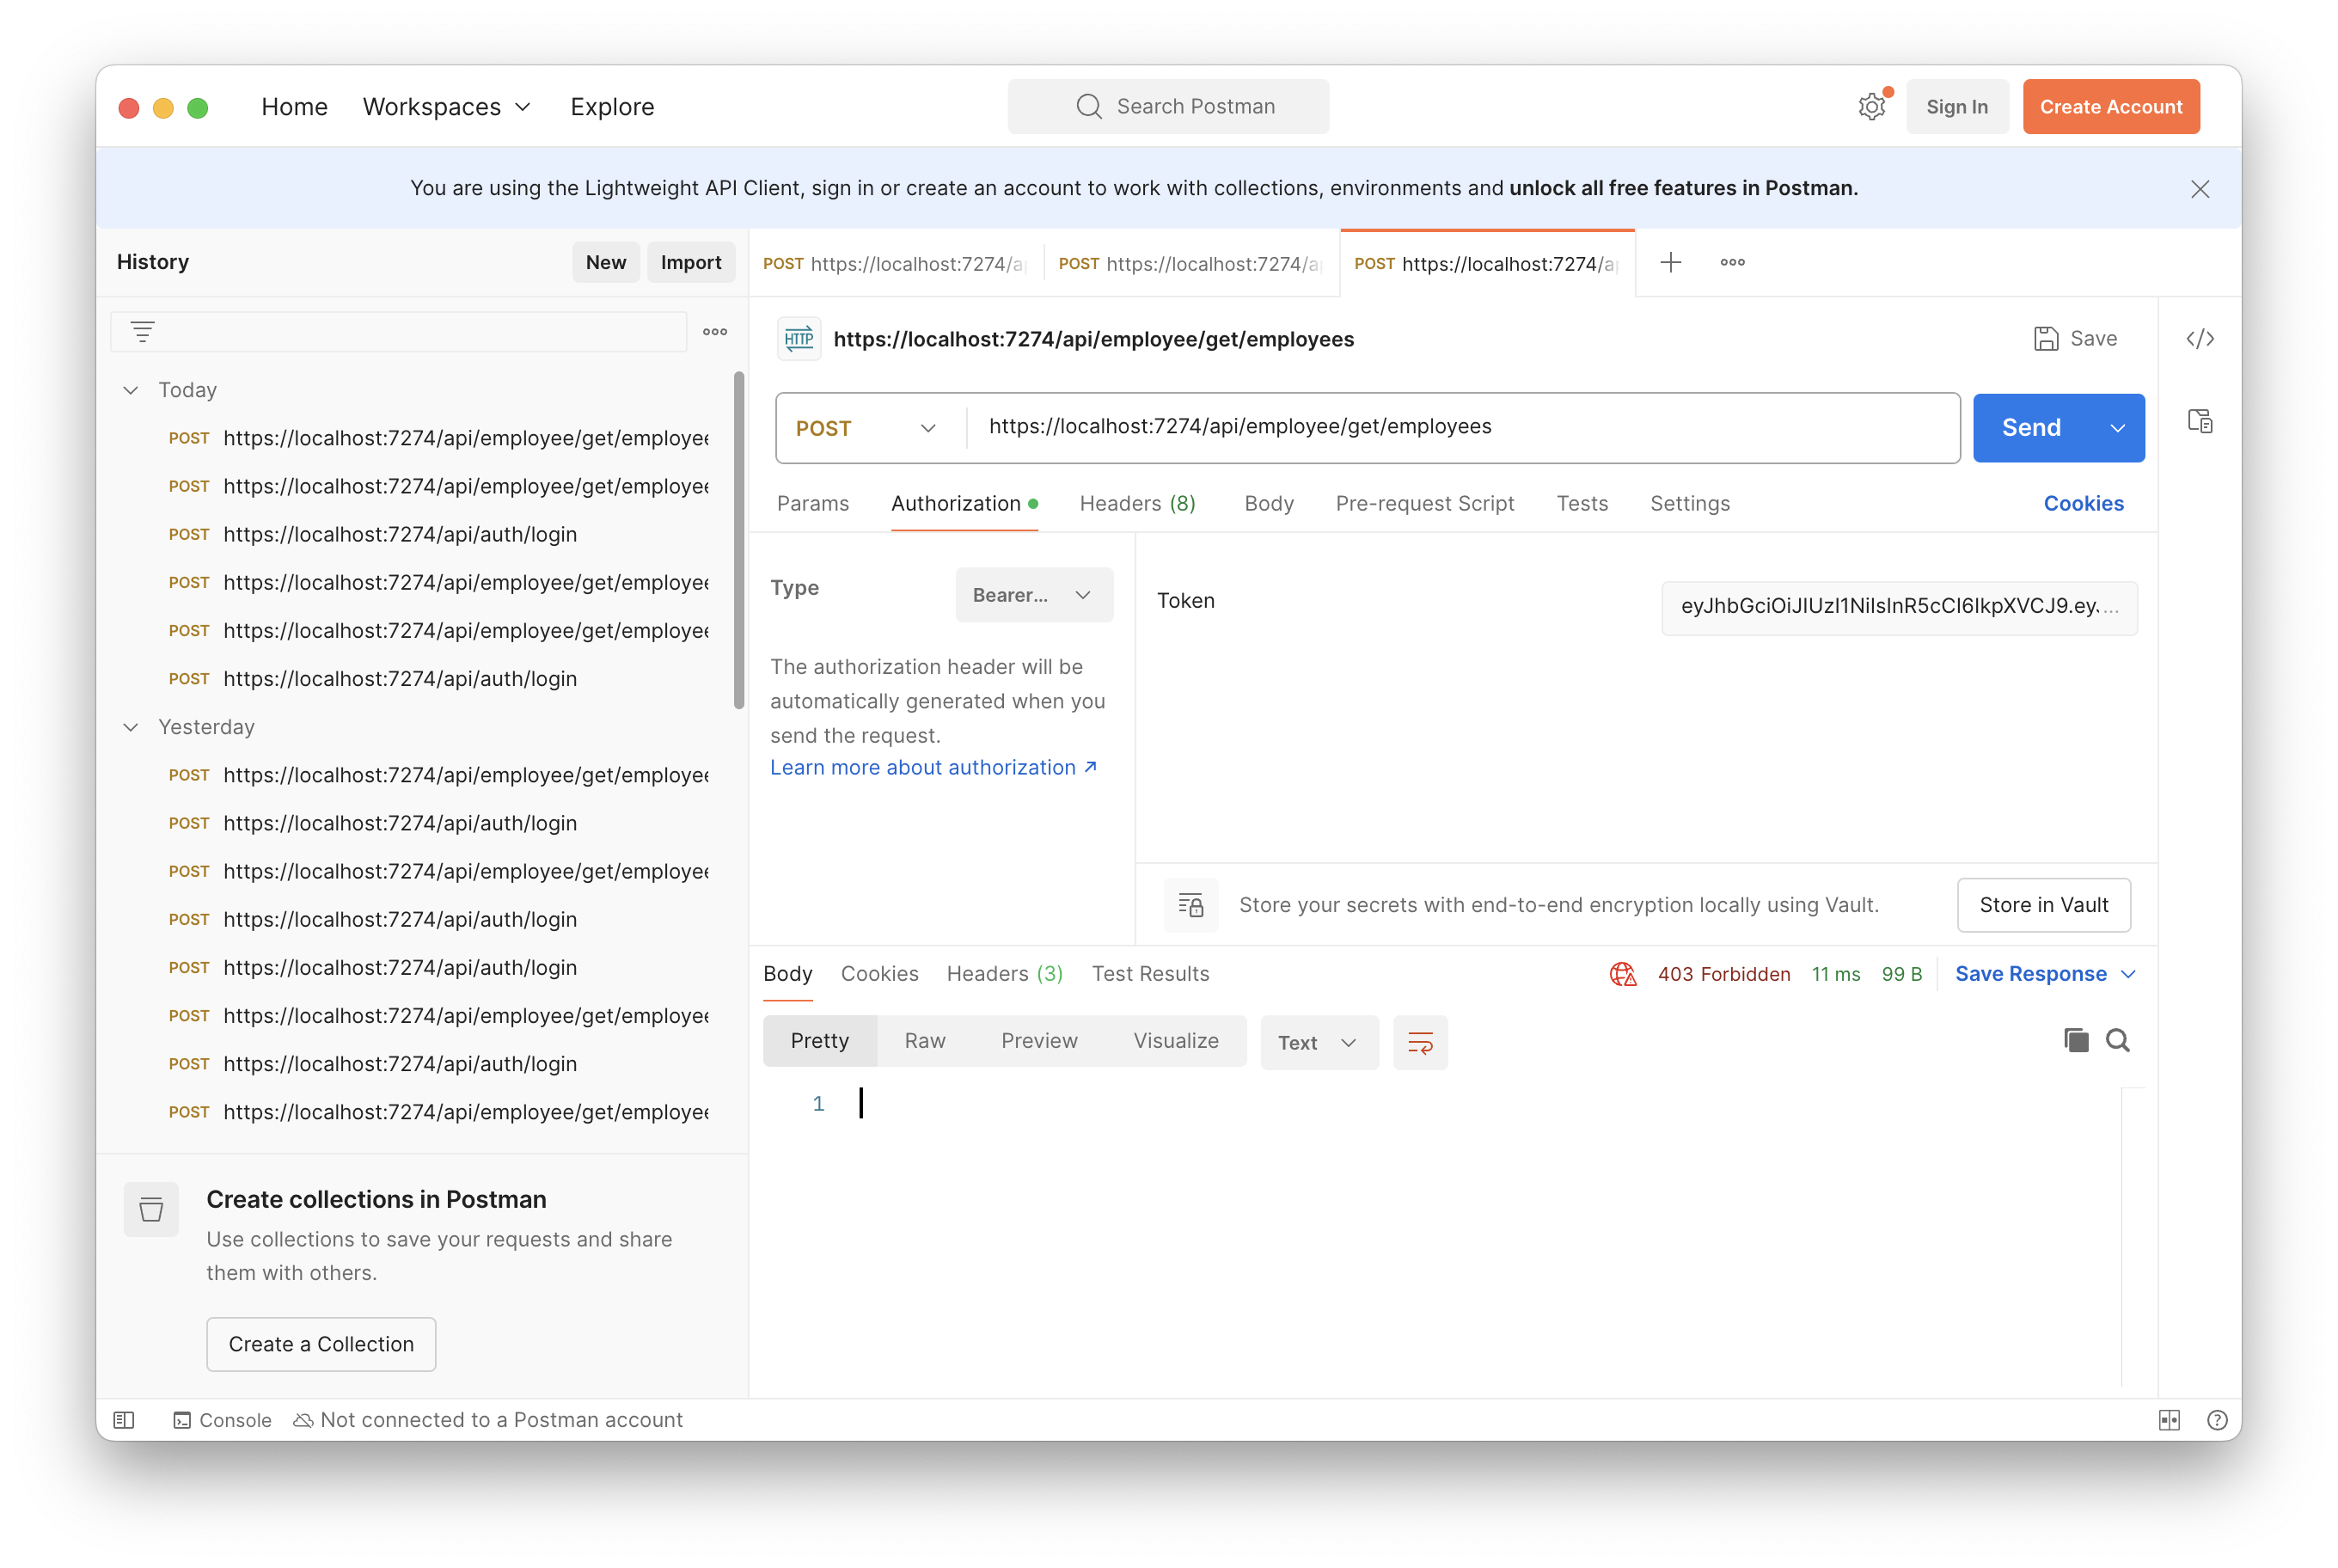
get/employees
RefreshToken
RefreshToken 簡單來說就是為了取得新的 JWT 的 Token,這個驗證機制分成了兩個部分
- AccessToken:以本篇來說,就是 JWT,為了安全性考量,效期比較短(數分 ~ 數小時)。
- RefreshToken:更新 AccessToken 的 Token,為了使用者體驗並兼顧安全性,一樣需要設定有效期限,不過期限比較長(數日)。
因為 JWT 的有效期限比較短,假設一個使用者在系統操作某個功能,一段時間後又需要操作另一個功能,但因為時間的關係導致 JWT 過期了,這個時候可能會強制登出,或回傳 Http 401,最後使用者都要重新登入才可以進行接下來的任務,這樣會讓使用者體驗不佳。我個人覺得 RefreshToken 是在安全性及使用者體驗中取得一個平衡,在 JWT 過期時,可以使用 RefreshToken 來更換一個新的 JWT,讓使用者可以不用重新登入,增加使用者體驗
Sequence Diagram
登入的部分可以參考 ,不過在登入完成後回傳的物件除了 JWT 還增加了一個 RefreshToken,下圖為 RefreshToken 使用場景
- 當需要某存取伺服器上的資源時,跟原本使用 JWT 一樣,將 JWT 傳送至伺服器驗證
- 如果 JWT 合法就可以存取相關資源,如果 JWT 過期伺服器會回應 JWT 過期了。
- 將 RefreshToken 送到伺服器驗證
- RefreshToken 合法伺服器會更換新的 JWT,如果 RefreshToken 也過期了或是不合法,就要重新登入。
- 將新的 JWT 回應給使用者(就像再次登入的意思),至於要不要回傳新的 RefreshToken 會依使用需求而定
 1
 2
 3
 4
 5
 6
 7
 8
 9
10
11
12
13
14
15
16
17
18
19
20
21
22
23
24
25
26
27
| ┌──────┐ ┌──────────────────────┐ ┌─────────┐
│Client│ │Filter(Validate Token)│ │WebServer│
└──┬───┘ └──────────┬───────────┘ └────┬────┘
│ │ │
│ 1. Request(JWT) │ │
│─────────────────────────────────>│ │
│ │ │
│ │ 2-1. JWT is valid │
│ │───────────────────────>│
│ │ │
│ 2-2. Response(JWT Expired) │ │
│<─────────────────────────────────│ │
│ │ │
│ 3. Request(RefreshToken) │ │
│─────────────────────────────────>│ │
│ │ │
│ │4. RefreshToken is valid│
│ │───────────────────────>│
│ │ │
│4-2 Response(RefreshToken Expired)│ │
│<─────────────────────────────────│ │
│ │ │
│ 5. Response(NewJWT, NewRefreshToken[optional]) │
│<──────────────────────────────────────────────────────────│
┌──┴───┐ ┌──────────┴───────────┐ ┌────┴────┐
│Client│ │Filter(Validate Token)│ │WebServer│
└──────┘ └──────────────────────┘ └─────────┘
|
TokenHelper
為了產生 RefreshToken,在使用者登入時一並回傳,在 Helper 目錄下新增 TokenHelper.cs
 1
 2
 3
 4
 5
 6
 7
 8
 9
10
11
12
13
14
15
16
17
18
19
20
21
22
23
| using System.Security.Cryptography;
namespace JWT_Authentication_API.Helper;
/// <summary>
/// Token 輔助類別,宣告為 static
/// 不需要 DI 可以直接使用
/// </summary>
public static class TokenHelper
{
/// <summary>
/// 產生 RefreshToken
/// </summary>
/// <param name="byteSize"> RefreshToken 的位元長度,預設 32 位元 </param>
/// <returns> Base64 編碼後的 RefreshToken </returns>
public static string GenerateRefreshToken(int byteSize = 32)
{
var randomBytes = new byte[byteSize];
var rnd = RandomNumberGenerator.Create();
rnd.GetBytes(randomBytes);
return Convert.ToBase64String(randomBytes);
}
}
|
RefreshToken Entity
為了驗證 RefreshToken,需要將 RefreshToken 存入資料庫,在 Entities 目錄新增 RefreshToken.cs 如下
其中為了知道這個 RefreshToken 是哪一位員工的,所以加入了 EmployeeId 這個欄位,另外 Employee 導航屬性,會將 EmployeeId 自動關聯到 Employee 的對映物件,不過資料庫不是本篇的重點,所以就不多說明了
 1
 2
 3
 4
 5
 6
 7
 8
 9
10
11
12
13
14
15
16
17
18
19
20
21
22
23
24
25
26
27
28
29
30
31
32
33
34
35
36
37
38
| using System.ComponentModel.DataAnnotations;
using System.ComponentModel.DataAnnotations.Schema;
namespace JWT_Authentication_API.Entities;
/// <summary>
/// RefreshToken 的資料模型
/// </summary>
public class RefreshToken
{
/// <summary>
/// RefreshToken 的資料識別
/// </summary>
[Key, DatabaseGenerated(DatabaseGeneratedOption.Identity)]
public Guid Id { get; set; }
/// <summary>
/// RefreshToken 的值
/// </summary>
[Required, MaxLength(512)]
public string Token { get; set; } = string.Empty;
/// <summary>
/// RefreshToken 過期的時間
/// </summary>
public DateTimeOffset ExpiresAt { get; set; }
/// <summary>
/// RefreshToken 建立的時間,預設是產生的當下
/// </summary>
public DateTimeOffset CreatedAt { get; set; } = DateTimeOffset.Now;
/// <summary>
/// 員工的識別(FK)
/// </summary>
public Guid EmployeeId { get; set; }
/// <summary>
/// 關聯的 Employee(ORM 的關聯設定)
/// </summary>
[ForeignKey("EmployeeId")]
public Employee Employee { get; set; } = null!;
}
|
接著在 AppDbContext.cs 加入 RefreshToken 的對映
 1
 2
 3
 4
 5
 6
 7
 8
 9
10
11
12
13
14
15
16
17
18
19
20
21
22
23
24
| using Microsoft.EntityFrameworkCore;
namespace JWT_Authentication_API.Entities;
/// <summary>
/// Database Context
/// </summary>
/// <param name="options"> 資料庫設定 </param>
public class AppDbContext(DbContextOptions<AppDbContext> options)
: DbContext(options)
{
/// <summary>
/// 員工資料表
/// </summary>
public DbSet<Employee> Employees { get; set; }
/// <summary>
/// Token 黑名單資料表
/// </summary>
public DbSet<TokenBlackList> TokenBlackLists { get; set; }
/// <summary>
/// RefreshToken 資料表
/// </summary>
public DbSet<RefreshToken> RefreshTokens { get; set; }
}
|
完成後使用 Rider 新增 Migration 並更新資料庫 參考
ITokenService
由於 RefreshToken 的驗證機制,我利用上一篇所建立的 TokenService 實作相關功能,所以先定義會用到的方法
- 新增:員工登入時,產生新的 RefreshToken
- 驗證: 在要更新之前要檢查 RefreshToken 是否過期,如果過期回傳 RefreshToken 過期,沒過期才更新。
- 更新:JWT 過期時,要產生新的 JWT,同時更新一個新的 RefreshToken,基於安全性考量,我只更新 Token 的值,不更新到期時間
- 刪除:員工登出時,刪除員工所屬的 RefreshToken,再新增到黑名單
 1
 2
 3
 4
 5
 6
 7
 8
 9
10
11
12
13
14
15
16
17
18
19
20
21
22
23
24
25
26
27
28
29
30
31
32
33
34
35
36
37
38
39
40
41
42
| namespace JWT_Authentication_API.Interfaces;
/// <summary>
/// Token 相關服務的介面
/// </summary>
public interface ITokenService
{
/// <summary>
/// 新增 token 到黑名單
/// </summary>
/// <param name="token"> 要新增的 token </param>
/// <returns> 新增結果 </returns>
Task<bool> AddTokenToTokenBlackListAsync(string token);
/// <summary>
/// 新增 RefreshToken
/// </summary>
/// <param name="refreshToken"> 要新增的 RefreshToken </param>
/// <returns> 新增的結果 </returns>
Task<bool> AddRefreshTokenAsync(RefreshTokenRequestDto refreshTokenRequestDto);
/// <summary>
/// 檢查 RefreshToken 是否過期
/// </summary>
/// <param name="refreshTokenRequestDto"> 要檢查的 RefreshToken 物件 </param>
/// <returns> 檢查結果 </returns>
Task<bool> IsRefreshTokenExpiredAsync(RefreshTokenRequestDto refreshTokenRequestDto);
/// <summary>
/// 更新 RefreshToken
/// </summary>
/// <param name="refreshTokenRequestDto"> 要更新的 RefreshToken 物件 </param>
/// <returns> 更新結果 </returns>
Task<bool> UpdateRefreshTokenAsync(RefreshTokenRequestDto refreshTokenRequestDto);
/// <summary>
/// 刪除 RefreshToken
/// </summary>
/// <param name="refreshToken"> 要刪除的 RefreshToken </param>
/// <returns> 刪除結果 </returns>
Task<bool> RemoveRefreshTokenAsync(RefreshTokenRequestDto refreshTokenRequestDto);
}
|
RefreshTokenRequestDto
上一個完成後會出現錯誤,因為沒有 RefreshTokenRequestDto 這個物件,所以在 Models 下新增這個類別,上面的方法,都會需要知道要異動的是哪一筆 RefreshToken,所以要知道哪一個員工、舊的 RefreshToken 或 新的 RefreshToken
 1
 2
 3
 4
 5
 6
 7
 8
 9
10
11
12
13
14
15
16
17
18
19
20
| namespace JWT_Authentication_API.Models;
/// <summary>
/// RefreshToken 的請求物件
/// </summary>
public class RefreshTokenRequestDto
{
/// <summary>
/// 員工的識別
/// </summary>
public Guid EmployeeId { get; set; } = Guid.Empty;
/// <summary>
/// 舊的 RefreshToken
/// </summary>
public string OldRefreshToken { get; set; } = string.Empty;
/// <summary>
/// 新的 RefreshToken
/// </summary>
public string NewRefreshToken { get; set; } = string.Empty;
}
|
最後傳 ITokenService 補上下面的程式碼就可以了
1
| using JWT_Authentication_API.Models;
|
TokenService
介面定義完成後,就可以開始實作 TokenService 的方法,細節說明如下
更新、刪除都要找出要異動的那一筆資料,因此將查詢要異動的資料查詢方法獨立出來。
開啟 TokenService.cs,新增查詢 RefreshToken 的方法 _getRefreshToken
加入新增、驗證、更新、刪除 RefreshToken 的方法如下
  1
  2
  3
  4
  5
  6
  7
  8
  9
 10
 11
 12
 13
 14
 15
 16
 17
 18
 19
 20
 21
 22
 23
 24
 25
 26
 27
 28
 29
 30
 31
 32
 33
 34
 35
 36
 37
 38
 39
 40
 41
 42
 43
 44
 45
 46
 47
 48
 49
 50
 51
 52
 53
 54
 55
 56
 57
 58
 59
 60
 61
 62
 63
 64
 65
 66
 67
 68
 69
 70
 71
 72
 73
 74
 75
 76
 77
 78
 79
 80
 81
 82
 83
 84
 85
 86
 87
 88
 89
 90
 91
 92
 93
 94
 95
 96
 97
 98
 99
100
101
102
103
104
105
106
107
108
109
110
111
112
113
114
115
116
117
118
119
120
121
122
123
124
125
126
127
128
129
130
131
132
| using JWT_Authentication_API.Entities;
using JWT_Authentication_API.Helper;
using JWT_Authentication_API.Interfaces;
using JWT_Authentication_API.Models;
using Microsoft.EntityFrameworkCore;
namespace JWT_Authentication_API.Services;
/// <summary>
/// Token 資料存取服務
/// </summary>
/// <param name="context"> 資料庫物件 </param>
public class TokenService(AppDbContext context): ITokenService
{
/// <summary>
/// 資料庫物件
/// </summary>
private readonly AppDbContext _appDb = context;
/// <summary>
/// 將需要異動的 RefreshToken 依 token 及員工編號取得
/// </summary>
private readonly Func<string, Guid, Task<RefreshToken?>> _getRefreshToken =
async (token, employeeId) =>
await context.RefreshTokens.FirstOrDefaultAsync(r
=> r.EmployeeId == employeeId && r.Token == token);
.......
#region Add Refresh Token
/// <summary>
/// 新增 RefreshToken
/// </summary>
/// <param name="refreshTokenRequestDto"> 要新增的 RefreshToken </param>
/// <returns> 新增的結果 </returns>
/// <exception cref="ArgumentException"> 沒有提供新增的 RefreshToken 或所屬員工 </exception>
public async Task<bool> AddRefreshTokenAsync(RefreshTokenRequestDto refreshTokenRequestDto)
{
await _appDb.RefreshTokens.AddAsync(new RefreshToken
{
Token = refreshTokenRequestDto.NewRefreshToken,
// 配合週休二日,設定 5 天後到期
ExpiresAt = DateTimeOffset.Now.AddDays(5),
EmployeeId = refreshTokenRequestDto.EmployeeId
});
return await _appDb.SaveChangesAsync() > 0;
}
#endregion
#region Validate RefreshToken
/// <summary>
/// 檢查 RefreshToken 是否過期
/// </summary>
/// <param name="refreshTokenRequestDto"> 要檢查的 RefreshToken </param>
/// <returns> 檢查結果 </returns>
/// <exception cref="KeyNotFoundException"> 找不到要檢查的 RefreshToken </exception>
public async Task<bool> IsRefreshTokenExpiredAsync(RefreshTokenRequestDto refreshTokenRequestDto)
{
// 取得要檢查的 RefreshToken
var refreshToken = await _getRefreshToken(
refreshTokenRequestDto.OldRefreshToken, refreshTokenRequestDto.EmployeeId);
// 找不到要檢查的 RefreshToken
if (refreshToken == null)
throw new KeyNotFoundException("Refresh token not found!");
// 回傳是否過期
return DateTimeOffset.UtcNow > refreshToken.ExpiresAt;
}
#endregion
#region Update Refresh Token
/// <summary>
/// 更新 RefreshToken
/// </summary>
/// <param name="refreshTokenRequestDto"> 要更新的 RefreshToken </param>
/// <returns></returns>
/// <exception cref="KeyNotFoundException"> 找不到要更新的 RefreshToken </exception>
/// <exception cref="InvalidOperationException"> 新增舊的 RefreshToken 黑名單失敗 </exception>
/// <exception cref="Exception"> 更新失敗 </exception>
public async Task<bool> UpdateRefreshTokenAsync(RefreshTokenRequestDto refreshTokenRequestDto)
{
// 先找出要更新的 refreshToken
var refreshToken = await _getRefreshToken(
refreshTokenRequestDto.OldRefreshToken, refreshTokenRequestDto.EmployeeId);
// 如果找不到要刪除的 RefreshToken
if (refreshToken == null)
throw new KeyNotFoundException("Refresh token not found!");
// 將舊的 RefreshToken 新增到黑名單
var addResult = await AddTokenToTokenBlackListAsync(refreshToken.Token);
if(!addResult) throw new InvalidOperationException
("Failed to add refresh token into black list!");
// 更新 RefreshToken
refreshToken.Token = refreshTokenRequestDto.NewRefreshToken;
_appDb.RefreshTokens.Update(refreshToken);
return await _appDb.SaveChangesAsync() > 0;
}
#endregion
#region Remove Refresh Token
/// <summary>
/// 刪除 RefreshToken
/// </summary>
/// <param name="refreshTokenRequestDto"> 要刪除的 RefreshToken </param>
/// <returns> 刪除結果 </returns>
/// <exception cref="ArgumentException"> 沒有提供舊的 RefreshToken 或所屬員工 </exception>
/// <exception cref="InvalidOperationException"> 舊的 RefreshToken 新增黑名單失敗 </exception>
/// <exception cref="Exception"> 刪除失敗 </exception>
public async Task<bool> RemoveRefreshTokenAsync(RefreshTokenRequestDto refreshTokenRequestDto)
{
// 先找出要刪除的 refreshToken
var refreshToken = await _getRefreshToke(refreshTokenRequestDto.OldRefreshToken, refreshTokenRequestDto.EmployeeId);
// 如果找不到要刪除的 RefreshToken
if (refreshToken == null)
throw new KeyNotFoundException("Refresh token not found!");
// 將要刪除的 RefreshToken 新增到黑名單
var addResult = await AddTokenToTokenBlackListAsync(refreshToken.Token);
if(!addResult) throw new InvalidOperationException
("Failed to add refresh token into black list!");
// 再將舊的 RefreshToken 刪除
_appDb.RefreshTokens.Remove(refreshToken);
return await _appDb.SaveChangesAsync() > 0;
}
#endregion
}
|
RefreshTokenResponseDto
在一開始的介紹說明,可以知道 RefreshToken 要回傳兩個物件
- AccessToken:就是合法的 JWT
- RefreshToken:更新 AccessToken 的 Token
所以要新增一個回傳用的 Model,在 Models 新增 RefreshTokenResponseDto.cs
 1
 2
 3
 4
 5
 6
 7
 8
 9
10
11
12
13
14
15
16
| namespace JWT_Authentication_API.Models;
/// <summary>
/// RefreshToken 回應
/// </summary>
public class RefreshTokenResponseDto
{
/// <summary>
/// JWT
/// </summary>
public string AccessToken { get; set; } = string.Empty;
/// <summary>
/// RefreshToken
/// </summary>
public string RefreshToken { get; set; } = string.Empty;
}
|
Refresh
最後回到 AuthController.cs 實作 Refresh 檢查及更新 AccessToken 的方法,預期會傳送要更新的 RefreshToken,所以用 RefreshTokenRequestDto 當作參數
 1
 2
 3
 4
 5
 6
 7
 8
 9
10
11
12
13
14
15
16
17
18
| /// <summary>
/// 驗證、更新 RefreshToken
/// </summary>
/// <param name="requestDto"> 要驗證的 RefreshToken </param>
/// <returns> 新的 RefreshToken 或 AccessToken </returns>
[HttpPost("refresh-token")]
public async Task<ActionResult> RefreshTokenAsync(RefreshTokenRequestDto requestDto)
{
// 產生一個新的 RefreshToken
requestDto.NewRefreshToken = TokenHelper.GenerateRefreshToken();
// 更新 RefreshToken
var updateResult = await _tokenService.UpdateRefreshTokenAsync(requestDto);
return Ok(new RefreshTokenResponseDto
{
RefreshToken = requestDto.NewRefreshToken
});
}
|
完成後,會發現沒有產生新的 JWT 給 AccessToken,參考 CreateJwt,產生 JWT 需要 EmployeeDto,所以要新增一個取得員資料的方法,開啟 IEmployeeService、EmployeeService,加入 GetEmployeeById 方法
 1
 2
 3
 4
 5
 6
 7
 8
 9
10
11
12
13
14
15
16
17
18
19
20
21
22
23
24
25
26
27
28
29
30
31
32
33
34
35
36
37
38
39
40
41
42
43
44
45
46
47
48
49
50
51
52
53
54
55
56
57
58
59
60
61
62
63
64
| using JWT_Authentication_API.Models;
namespace JWT_Authentication_API.Interfaces;
/// <summary>
/// 員工資料存取介面
/// </summary>
public interface IEmployeeService
{
......
/// <summary>
/// 依員工的 Id 取得員工資料
/// </summary>
/// <param name="id"> 員工識別 </param>
/// <returns> 員工資料 </returns>
Task<EmployeeDto?> GetEmployeeByIdAsync(Guid id);
...
}
using System.ComponentModel.DataAnnotations;
using JWT_Authentication_API.Entities;
using JWT_Authentication_API.Interfaces;
using JWT_Authentication_API.Models;
using Microsoft.AspNetCore.Identity;
using Microsoft.EntityFrameworkCore;
namespace JWT_Authentication_API.Services;
/// <summary>
/// 員工資料存取服務
/// </summary>
/// <param name="dbContext"> 資料庫對映物件 </param>
public class EmployeeService(AppDbContext dbContext) : IEmployeeService
{
/// <summary>
/// 資料庫對映物件
/// </summary>
private readonly AppDbContext _appDb = dbContext;
......
/// <summary>
/// 依員工 Id 找出員工資料
/// </summary>
/// <param name="id"> 員工識別 </param>
/// <returns> 員工資料 </returns>
public async Task<EmployeeDto?> GetEmployeeByIdAsync(Guid id)
{
var employee = await _appDb.Employees.FirstOrDefaultAsync(e => e.Id == id);
if (employee == null) return null;
return new EmployeeDto
{
Email = employee.Email,
EmployeeRole = employee.UserRole
};
}
......
}
|
最後回到 AuthController 修改 Refresh 方法
 1
 2
 3
 4
 5
 6
 7
 8
 9
10
11
12
13
14
15
16
17
18
19
20
21
22
23
24
25
26
27
28
29
30
31
32
| /// <summary>
/// 驗證、更新 RefreshToken
/// </summary>
/// <param name="requestDto"> 要驗證的 RefreshToken </param>
/// <returns> 新的 RefreshToken 或 AccessToken </returns>
[HttpPost("refresh-token")]
public async Task<ActionResult> RefreshTokenAsync(RefreshTokenRequestDto requestDto)
{
// 驗證 RefreshToken
if(string.IsNullOrEmpty(requestDto.OldRefreshToken) ||
requestDto.EmployeeId == Guid.Empty)
return BadRequest("'EmployeeId' or 'OldRefreshToken' cannot be null or empty!");
if(await _tokenService.IsRefreshTokenExpiredAsync(requestDto))
return BadRequest("Refresh token expired!");
// 產生一個新的 RefreshToken
requestDto.NewRefreshToken = TokenHelper.GenerateRefreshToken();
// 更新 RefreshToken
await _tokenService.UpdateRefreshTokenAsync(requestDto);
// 找出目前使用的員工
var employee = await _employeeService.GetEmployeeByIdAsync(requestDto.EmployeeId);
if (employee == null)
return NotFound("Employee does not exist!");
// 回傳新的 RefreshTokenResponse
return Ok(new RefreshTokenResponseDto
{
AccessToken = _jwtHelper.CreateJwt(employee!),
RefreshToken = requestDto.NewRefreshToken
});
}
|
最後調整 LoginAsync 及 LogoutAsync 的方法,在登入時要新增 RefreshToken,登出時要將 JWT 及 RefreshToken 加到黑名單,並刪除員工所屬的 RefreshToken
 1
 2
 3
 4
 5
 6
 7
 8
 9
10
11
12
13
14
15
16
17
18
19
20
21
22
23
24
25
26
27
| #region 登出
/// <summary>
/// 登出 API
/// </summary>
/// <returns> 登出結果 </returns>
[Authorize]
[HttpPost("logout")]
public async Task<IActionResult> LogoutAsync(RefreshTokenRequestDto requestDto)
{
// 從 header 讀取 JWT
var token = $"{HttpContext.Request.Headers.Authorization}"
.Replace("Bearer", string.Empty, StringComparison.OrdinalIgnoreCase)
.Trim();
if (string.IsNullOrEmpty(token))
return BadRequest("Not token provided!");
// 將 JWT 加入黑名單
var result = await _tokenService.AddTokenToTokenBlackListAsync(token);
if (!result) return BadRequest("Logout failed!");
// 將 refreshToken 刪除
result = await _tokenService.RemoveRefreshTokenAsync(requestDto);
if (!result) return BadRequest("Logout failed!");
return Ok("Logout successfully!");
}
#endregion
|
登入的部分,因為需要員工的 Id,所以要修改 EmployeeDto,加入 EmployeeId 的欄位
 1
 2
 3
 4
 5
 6
 7
 8
 9
10
11
12
13
14
| namespace JWT_Authentication_API.Models;
/// <summary>
/// 員工角色資料
/// </summary>
public class EmployeeDto
{
/// <summary>
/// 員工 Id
/// </summary>
public Guid Id { get; set; } = Guid.Empty;
...
}
|
調整 EmployeeService 的 GetEmployeeByEmailAsync 方法,多回傳一個 Id 欄位
 1
 2
 3
 4
 5
 6
 7
 8
 9
10
11
12
13
14
15
16
17
18
19
20
| /// <summary>
/// 依帳號取得員工資料
/// </summary>
/// <param name="email"> 登入信箱/註冊信箱 </param>
/// <returns> 員工資料 或 null </returns>
public async Task<EmployeeDto?> GetEmployeeByEmailAsync(string email)
{
var employee = await _appDb.Employees
.FirstOrDefaultAsync(e => e.Email == email);
return employee == null
? null
: new EmployeeDto
{
Id = employee.Id,
Email = employee.Email,
PasswordHash = employee.PasswordHash,
EmployeeRole = employee.UserRole
};
}
|
回到 LoginAsync,加入新增 RefreshToken 的方法
 1
 2
 3
 4
 5
 6
 7
 8
 9
10
11
12
13
14
15
16
17
18
19
20
21
22
23
24
25
26
27
28
29
30
31
32
33
34
35
36
37
38
39
40
41
42
| #region 登入
/// <summary>
/// 登入 API
/// </summary>
/// <param name="loginDto"> 使用者的輸入資料 </param>
/// <returns> 登入結果 </returns>
[AllowAnonymous]
[HttpPost("login")]
public async Task<ActionResult> LoginAsync(LoginDto loginDto)
{
// 登入資料驗證
if (string.IsNullOrEmpty(loginDto.Email) ||
string.IsNullOrEmpty(loginDto.Password))
return BadRequest("Please provide 'Email' and 'Password'");
// 檢查員工帳號
var employee = await _employeeService.GetEmployeeByEmailAsync(loginDto.Email);
if (employee == null)
return BadRequest("User does not exist!");
// 檢查員工密碼並回傳登入結果
if (!_authService.IsValidateUserAsync(loginDto, employee))
return BadRequest("Login failed!");
// 新增 RefreshToken 及產生 Jwt
var jwt = _jwtHelper.CreateJwt(employee);
var refreshToken = TokenHelper.GenerateRefreshToken();
var result = await _tokenService.AddRefreshTokenAsync(new RefreshTokenRequestDto
{
EmployeeId = employee.Id,
NewRefreshToken = refreshToken,
});
if(!result) return StatusCode(StatusCodes.Status500InternalServerError);
return Ok(new RefreshTokenResponseDto
{
AccessToken = jwt,
RefreshToken = refreshToken
});
}
#endregion
|
測試
都完成後,就可以來測試 RefreshToken 的驗證機制了
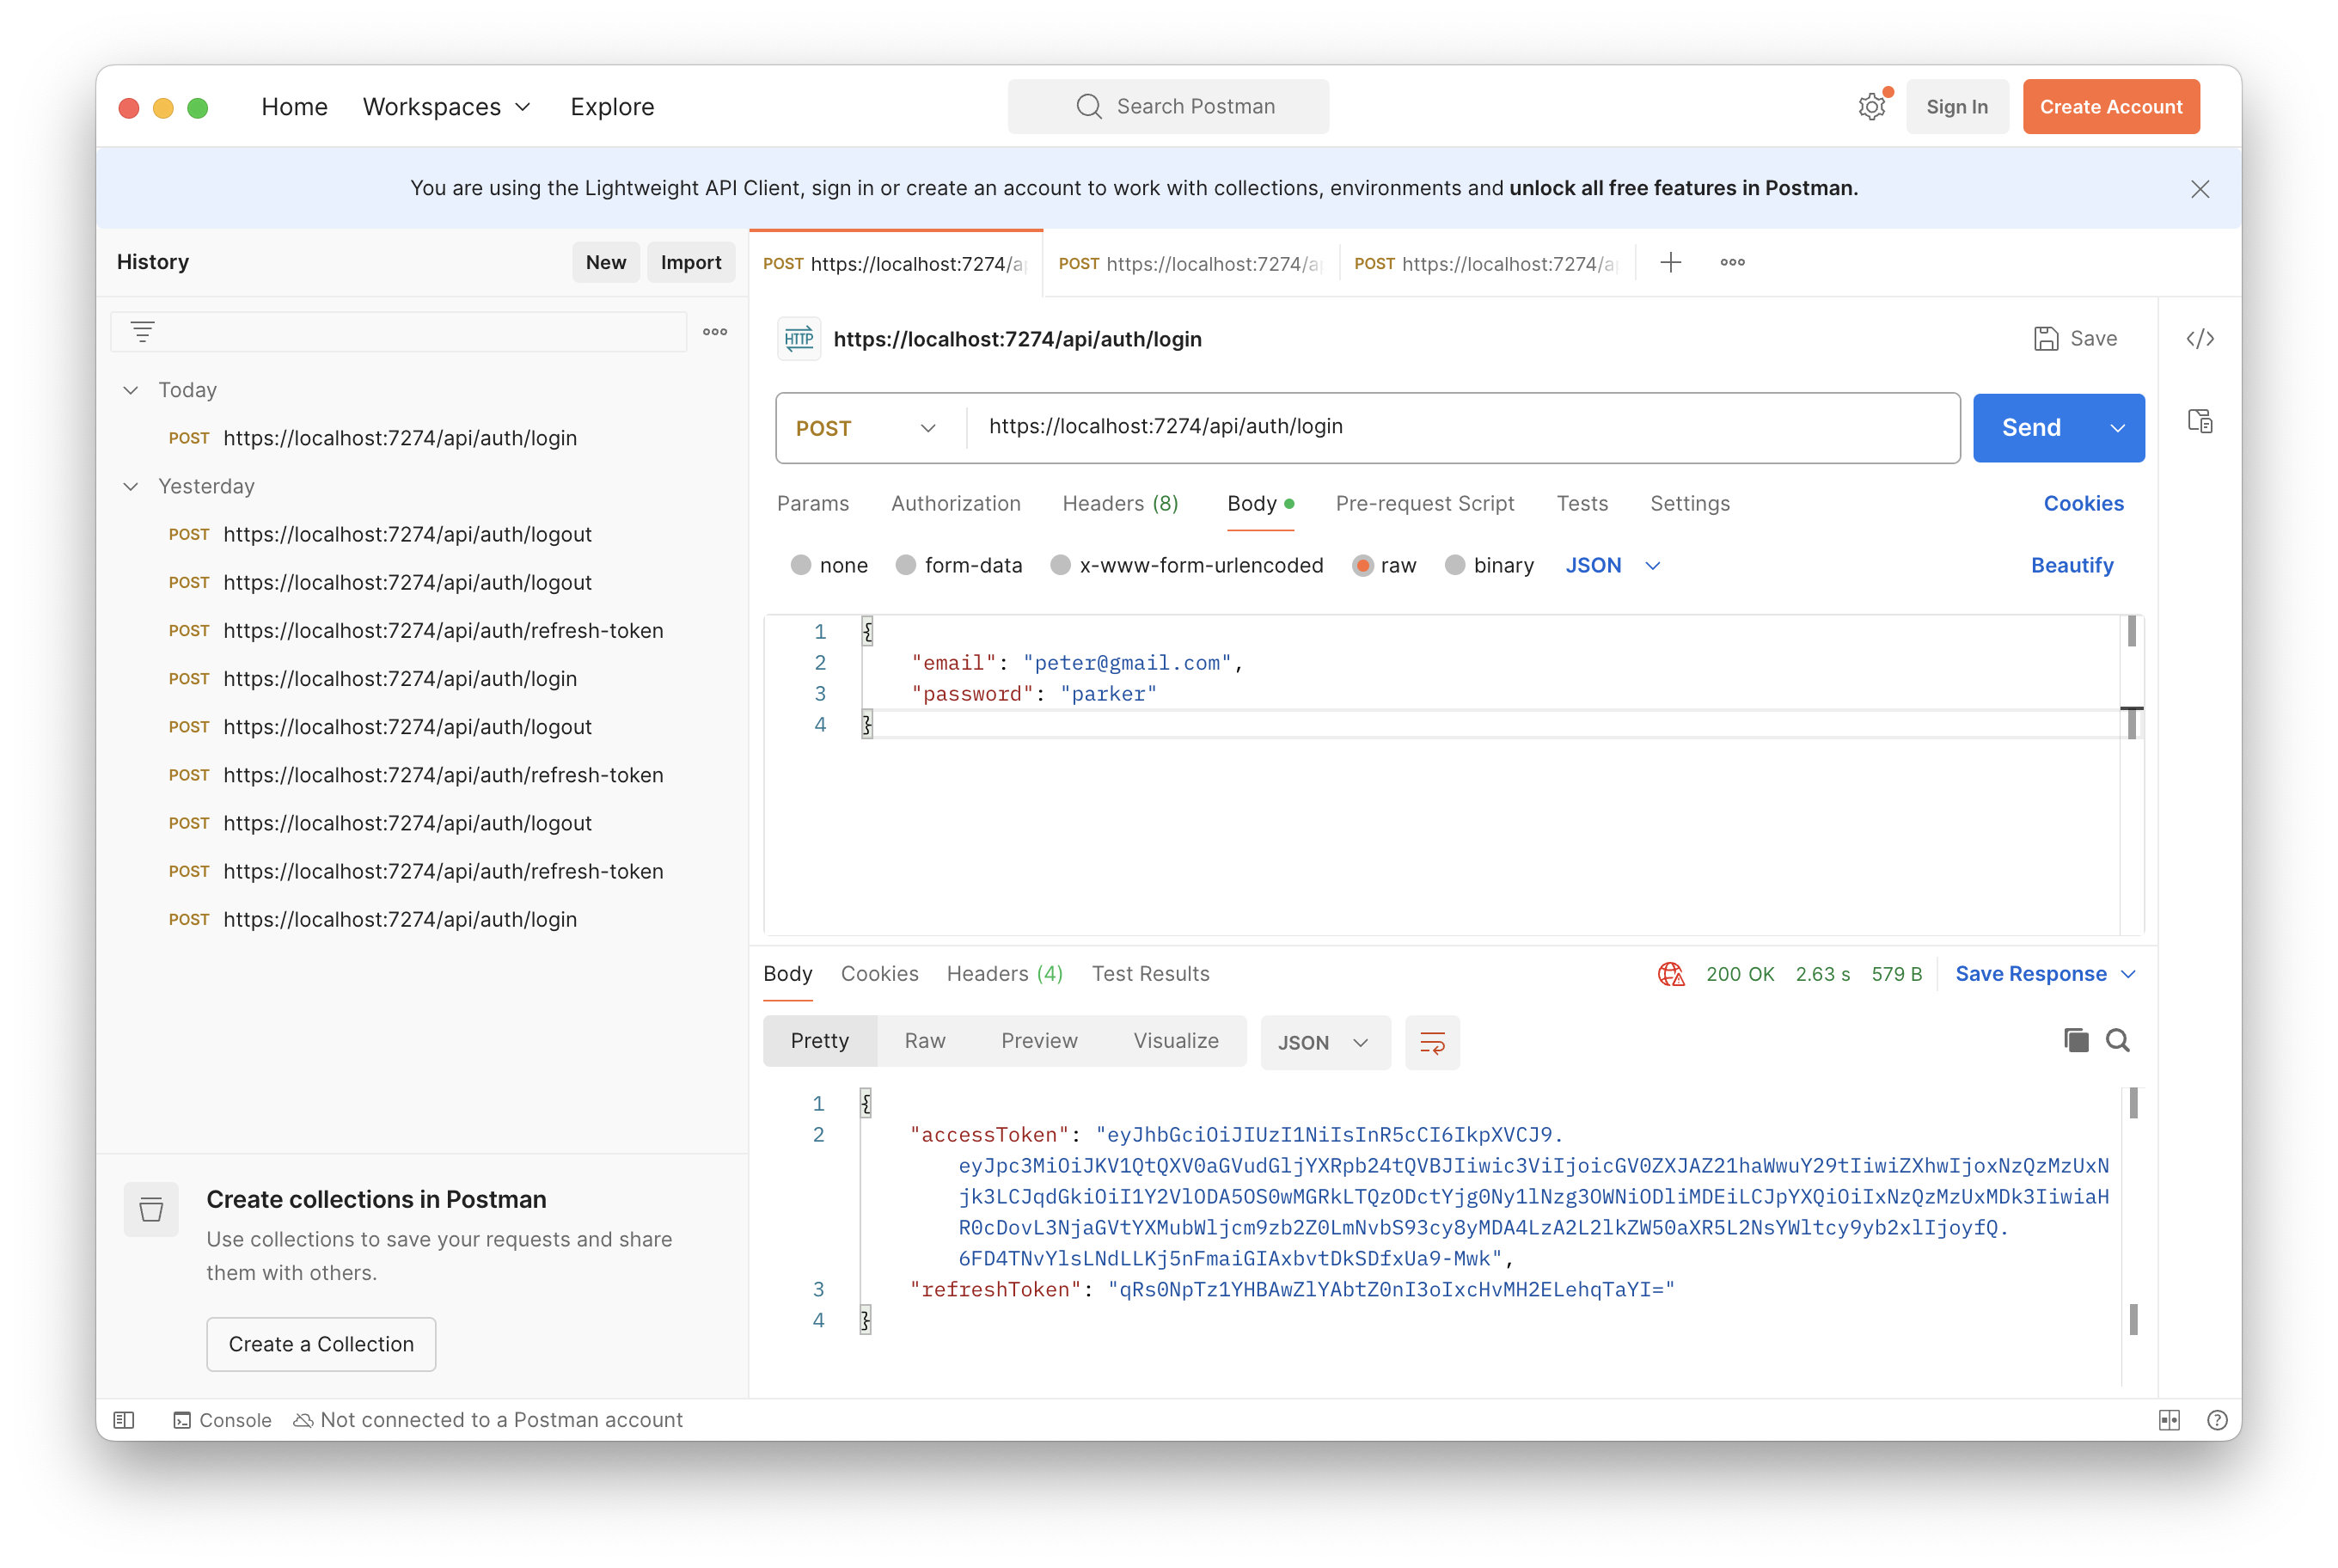
開啟 Postman 使用 peter 登入,如果有成功收到 ResponseToken,將 Response 的 body 整個 copy 下來,在 Save Response 下方有一個複製的按鈕
1
2
3
4
| {
"accessToken": "eyJhbGciOiJIUzI1NiIsInR5cCI6IkpXVCJ9.eyJpc3MiOiJKV1QtQXV0aGVudGljYXRpb24tQVBJIiwic3ViIjoicGV0ZXJAZ21haWwuY29tIiwiZXhwIjoxNzQzMzUxNjk3LCJqdGkiOiI1Y2VlODA5OS0wMGRkLTQzODctYjg0Ny1lNzg3OWNiODliMDEiLCJpYXQiOiIxNzQzMzUxMDk3IiwiaHR0cDovL3NjaGVtYXMubWljcm9zb2Z0LmNvbS93cy8yMDA4LzA2L2lkZW50aXR5L2NsYWltcy9yb2xlIjoyfQ.6FD4TNvYlsLNdLLKj5nFmaiGIAxbvtDkSDfxUa9-Mwk",
"refreshToken": "qRs0NpTz1YHBAwZlYAbtZ0nI3oIxcHvMH2ELehqTaYI="
}
|
refresh-token
接下來測試 refresh-token,由於需要知道 peter 的 Id,所以開啟 Rider 資料庫工具輸入下面的語法,來取得 Peter 的 Id,也將 Id 複製下來
1
2
3
| SELECT Id
FROM Employees
WHERE Email = 'peter@gmail.com'
|
我的資料庫中 peter 的 Id 如下
1
| 8d9e431a-e002-416b-21f3-08dd670f7321
|
在 Postman 中新增一個 refresh-token 的 request,並在 body 中選 raw,最旁邊下拉選 JSON,輸入要傳送的物件格式 RefreshTokenRequestDto 如下
- employeeId:上面查詢的 peter Id
- oldRefreshToken:一開始登入的 RefreshToken
- newRefreshToken:更新不需要提供,由程式自己產生,給空字串
1
2
3
4
5
| {
"employeeId": "8d9e431a-e002-416b-21f3-08dd670f7321",
"oldRefreshToken": "qRs0NpTz1YHBAwZlYAbtZ0nI3oIxcHvMH2ELehqTaYI=",
"newRefreshToken": ""
}
|
最後 Send,看有沒有重新取得一組新的 RefreshTokenResponseDto 物件,如果有可以將它複製下來與第一次登入的對比
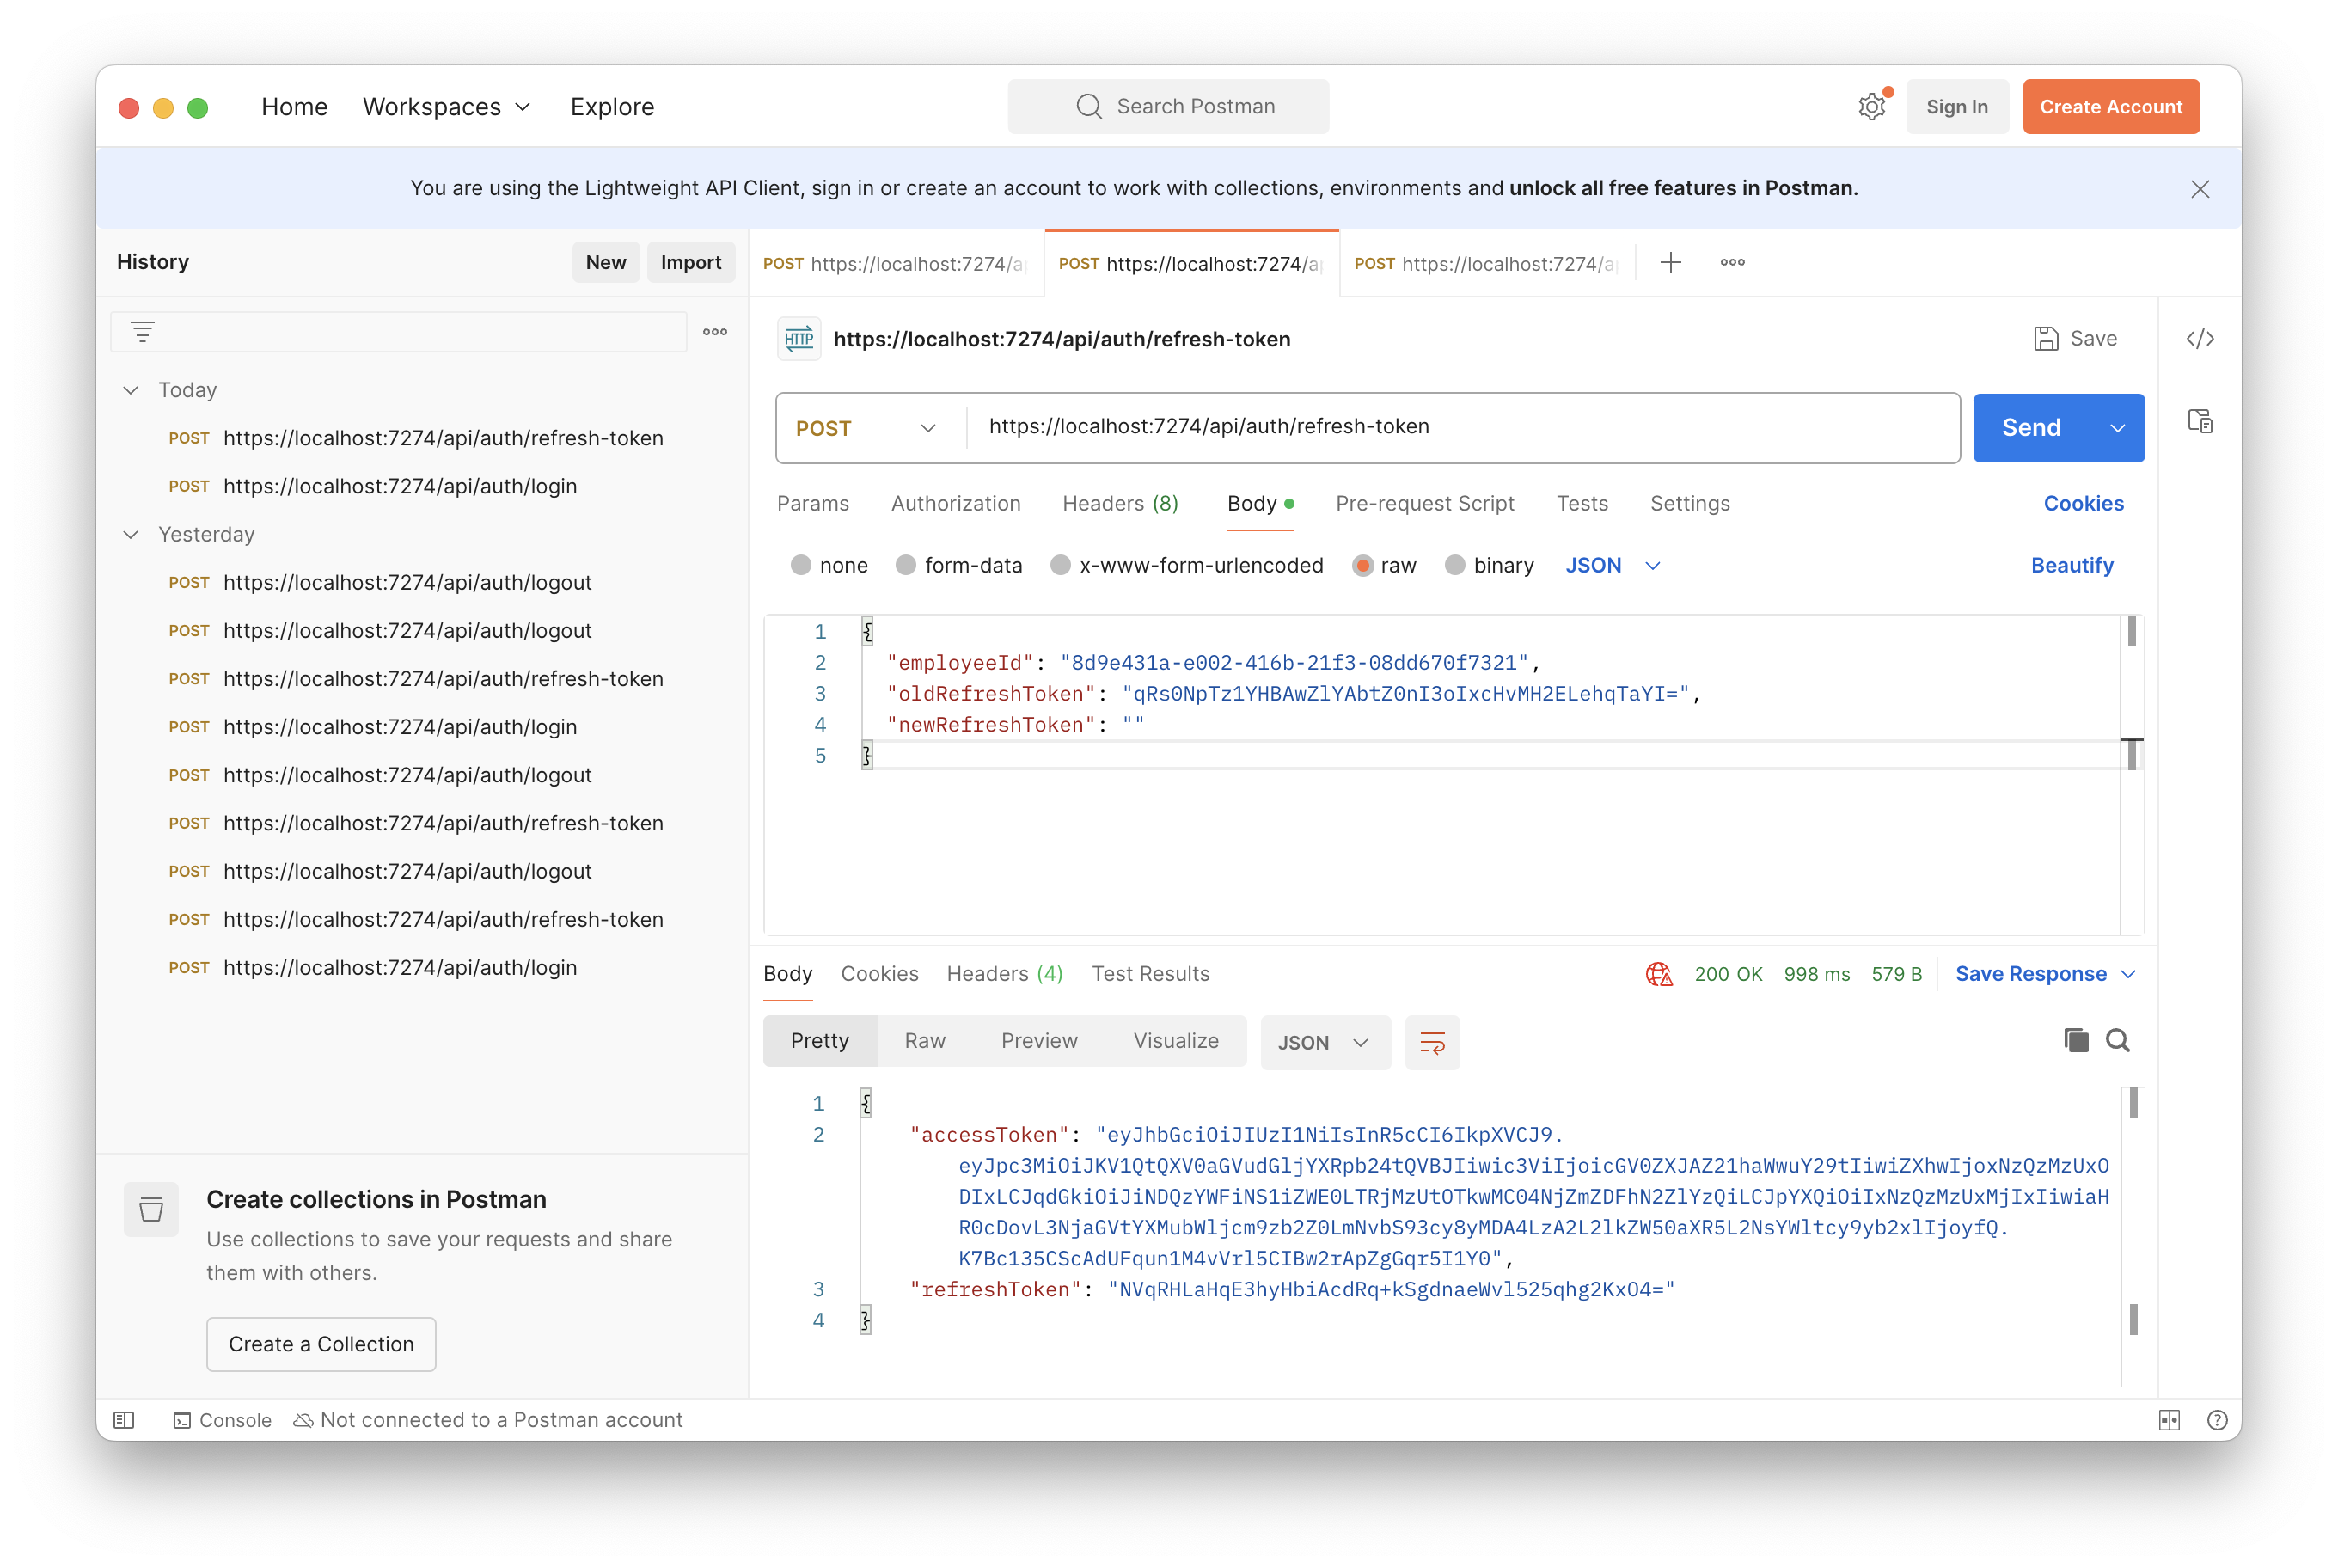
1
2
3
4
| {
"accessToken": "eyJhbGciOiJIUzI1NiIsInR5cCI6IkpXVCJ9.eyJpc3MiOiJKV1QtQXV0aGVudGljYXRpb24tQVBJIiwic3ViIjoicGV0ZXJAZ21haWwuY29tIiwiZXhwIjoxNzQzMzUxODIxLCJqdGkiOiJiNDQzYWFiNS1iZWE0LTRjMzUtOTkwMC04NjZmZDFhN2ZlYzQiLCJpYXQiOiIxNzQzMzUxMjIxIiwiaHR0cDovL3NjaGVtYXMubWljcm9zb2Z0LmNvbS93cy8yMDA4LzA2L2lkZW50aXR5L2NsYWltcy9yb2xlIjoyfQ.K7Bc135CScAdUFqun1M4vVrl5CIBw2rApZgGqr5I1Y0",
"refreshToken": "NVqRHLaHqE3hyHbiAcdRq+kSgdnaeWvl525qhg2KxO4="
}
|
Logout
最後來測登出,一樣傳入 RefreshTokenRequestDto 物件,不過更新不同的是 oldRefreshToken,要改成上一個測試 refresh-token 拿到的 refreshToken,如果使用第一次登入所拿到的 refreshToken 應該會出現 HTTP 500,因為原本的 refreshToken 在 refresh-token 的時候就己經寫到黑名單了,所以會找不到
1
2
3
4
5
| {
"employeeId": "8d9e431a-e002-416b-21f3-08dd670f7321",
"oldRefreshToken": "NVqRHLaHqE3hyHbiAcdRq+kSgdnaeWvl525qhg2KxO4=",
"newRefreshToken": ""
}
|
另外將更新後的 AccessToken 放到 Authorization,
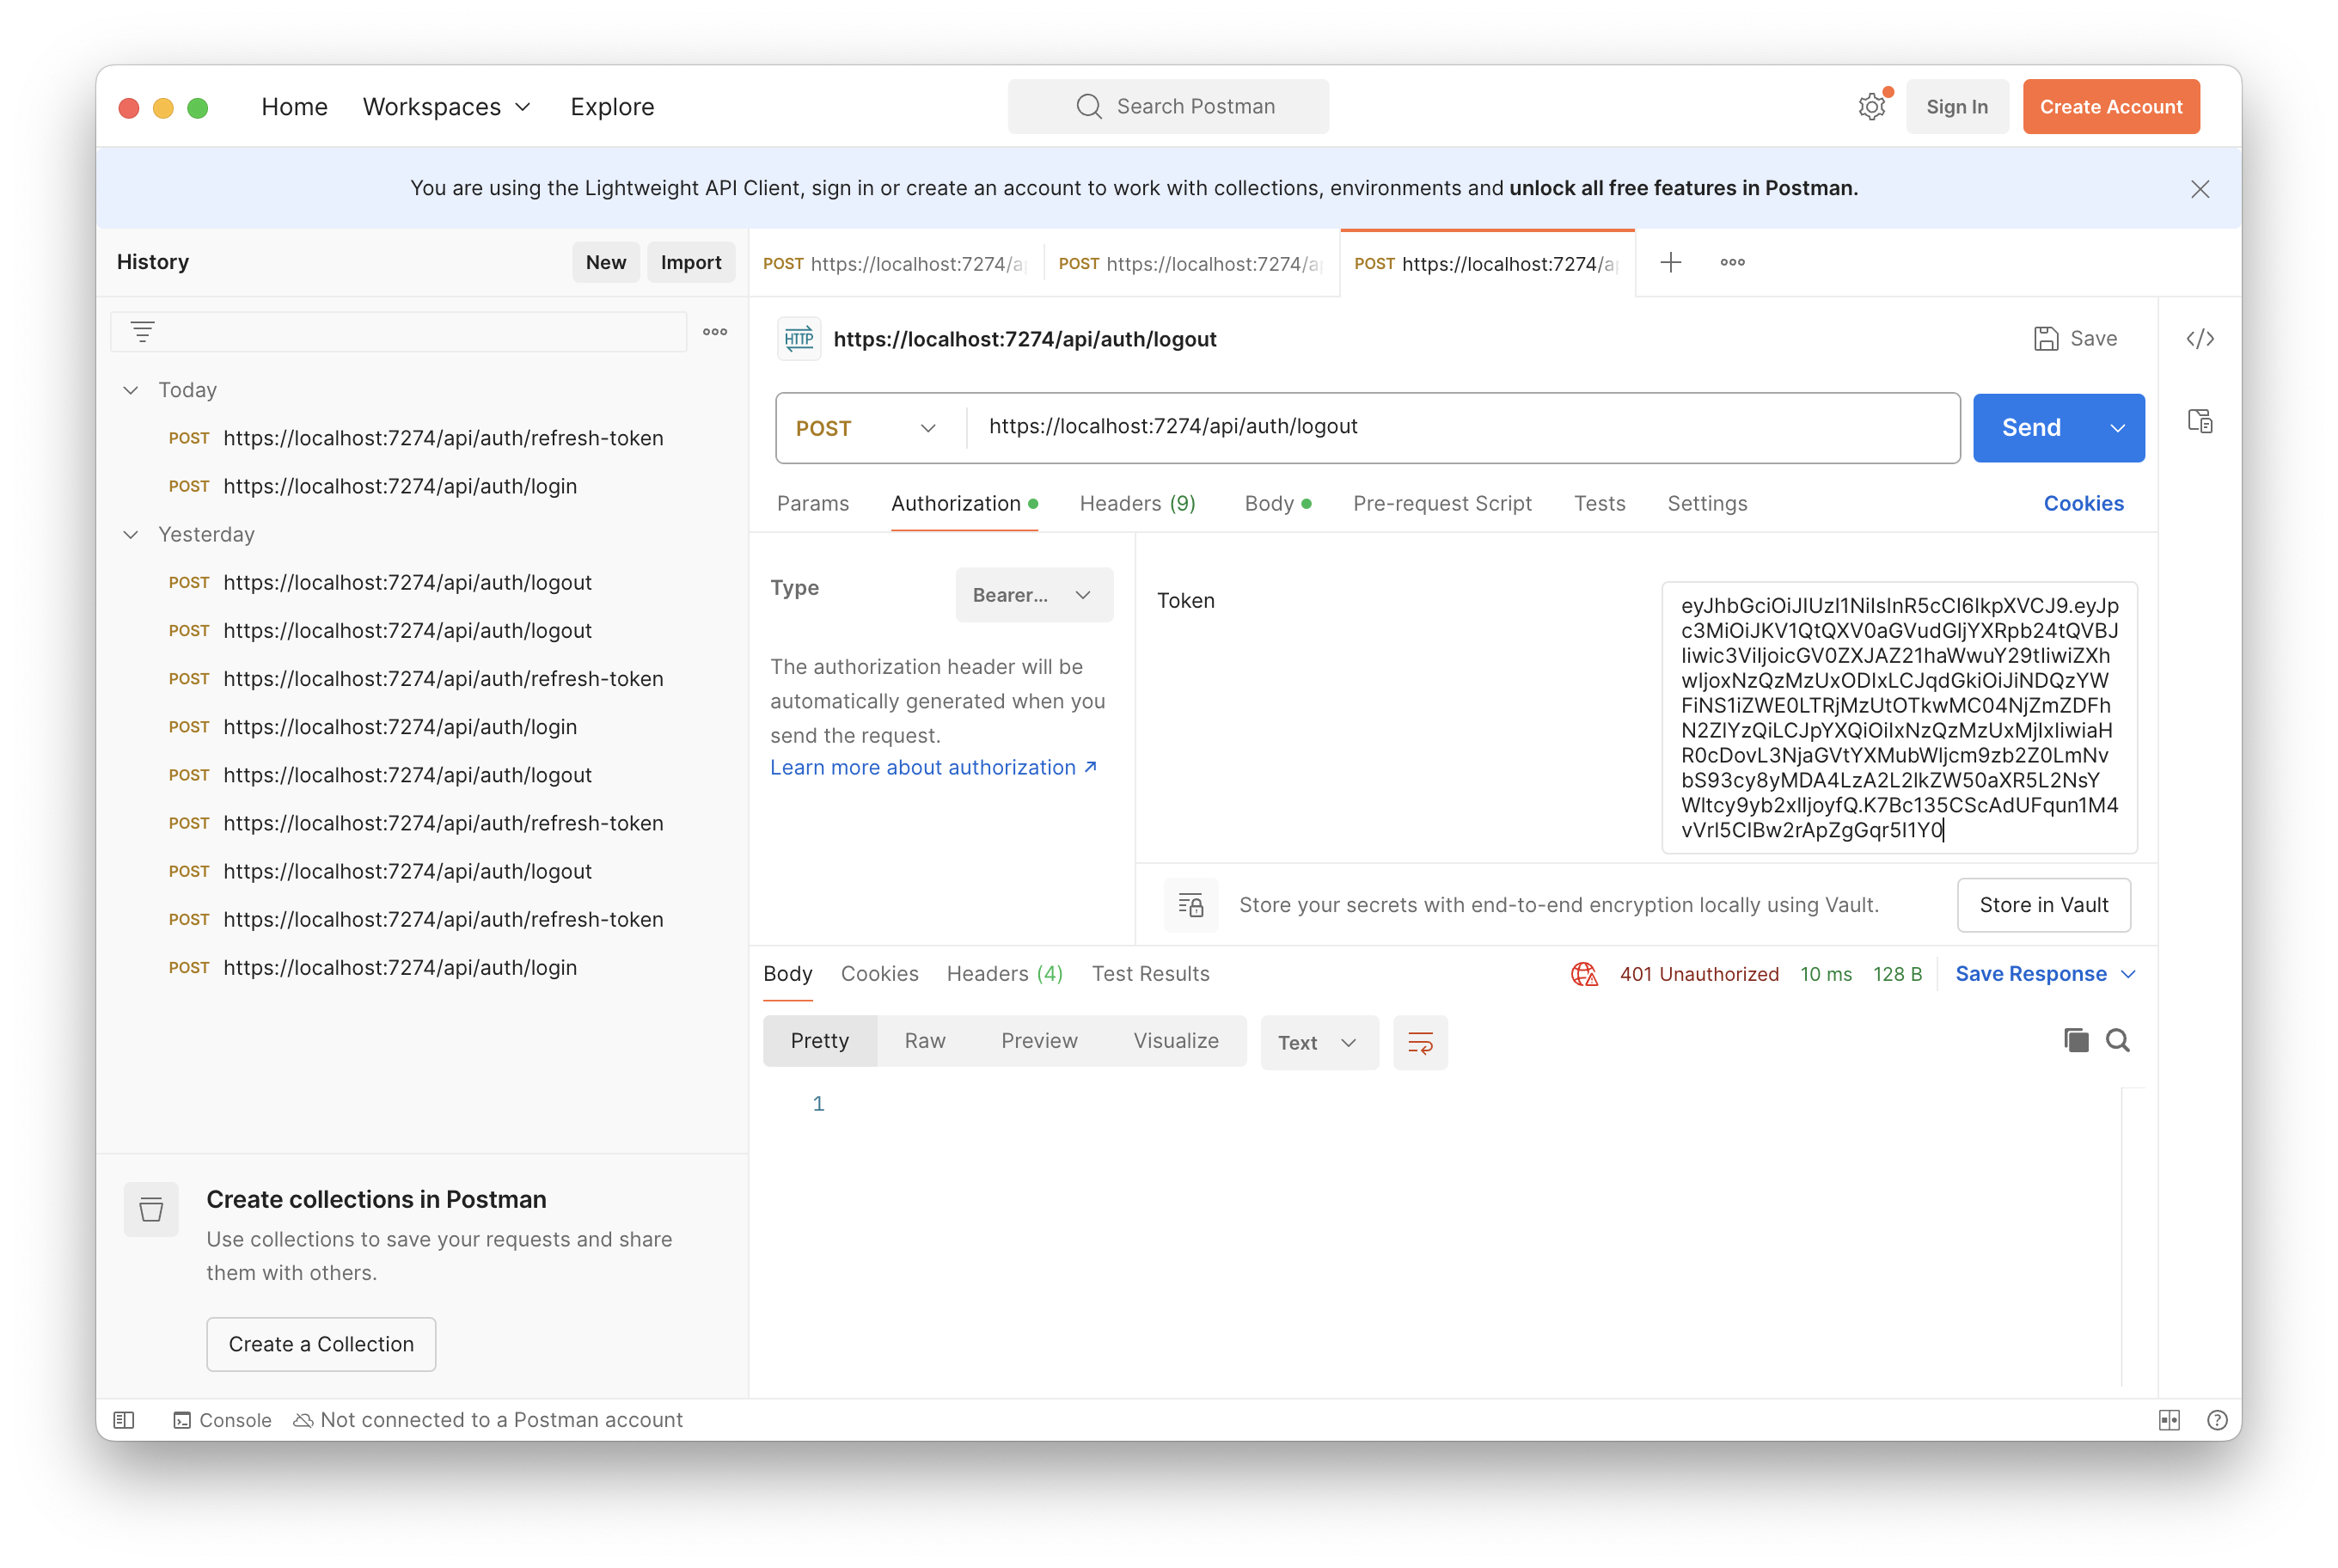
Send 後看登出結果

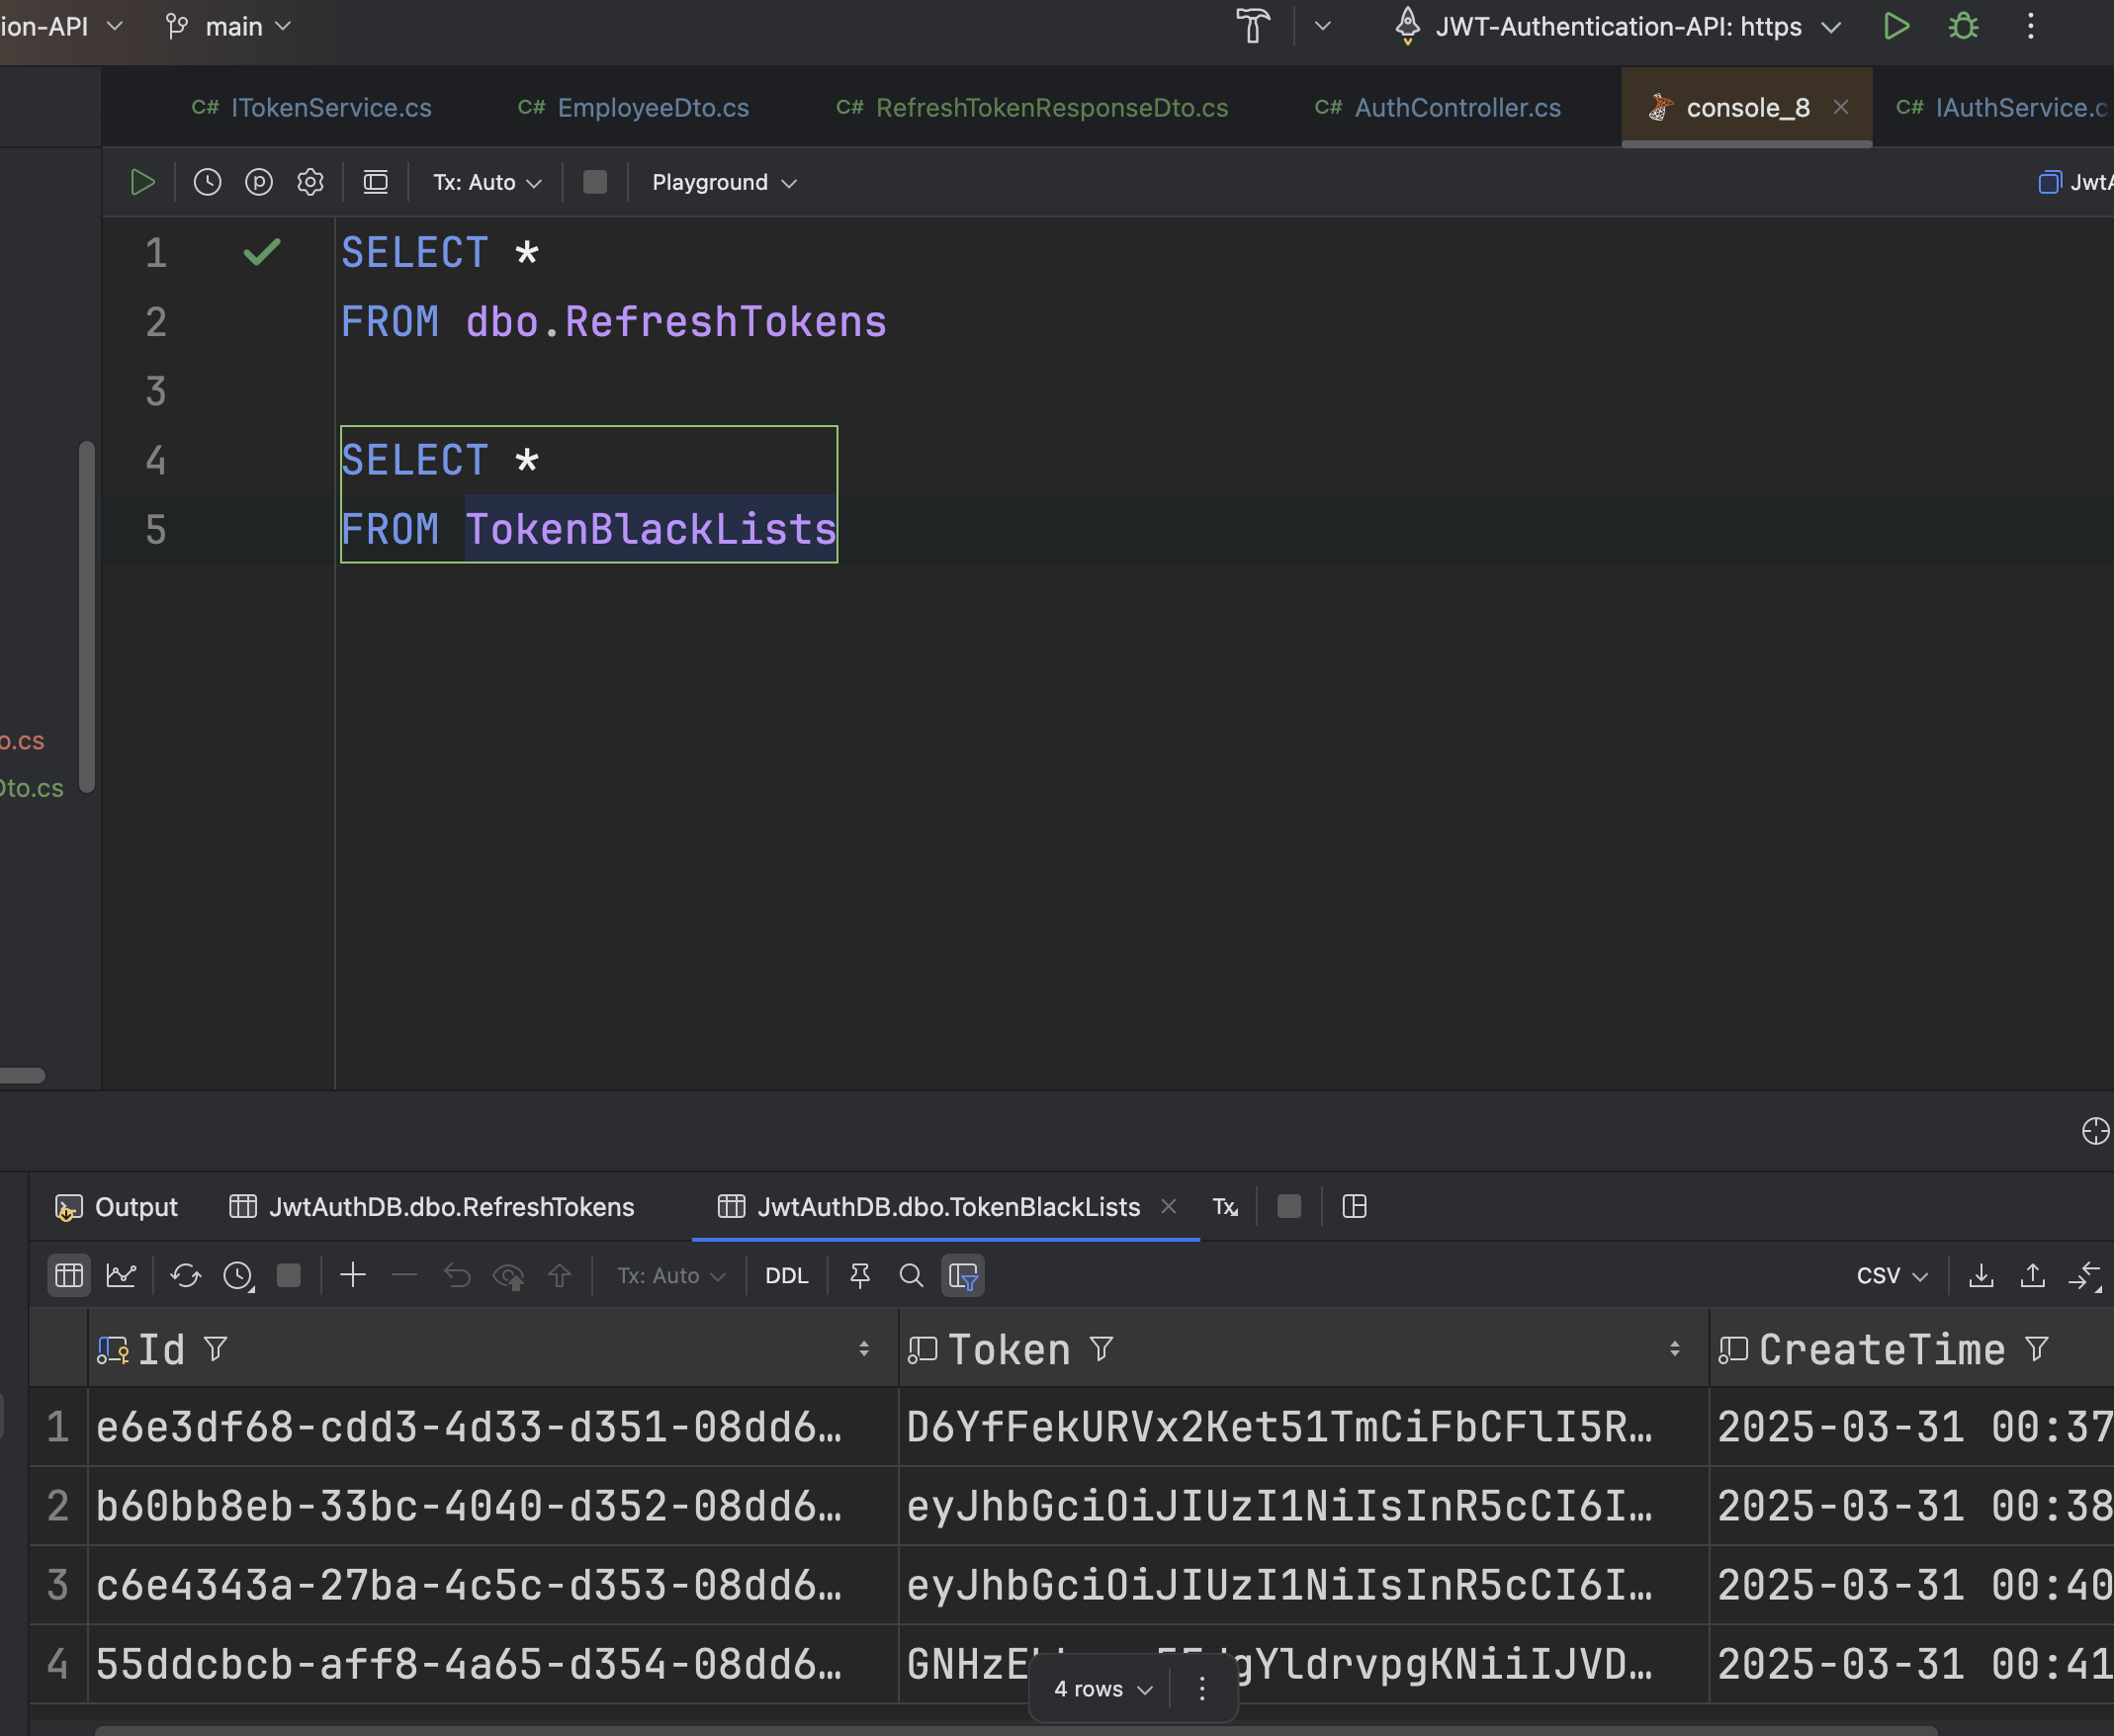
最後,使用資料庫工具確認黑名單有沒有資料,理論上來說應該要有 4 筆資料,更新的時候會將第一次登入的兩個 Token 新增到黑單、登出的時候會把 refresh-token 取得的兩個新 Token 寫入,使用下面的語法查詢
1
2
| SELECT *
FROM TokenBlackLists
|
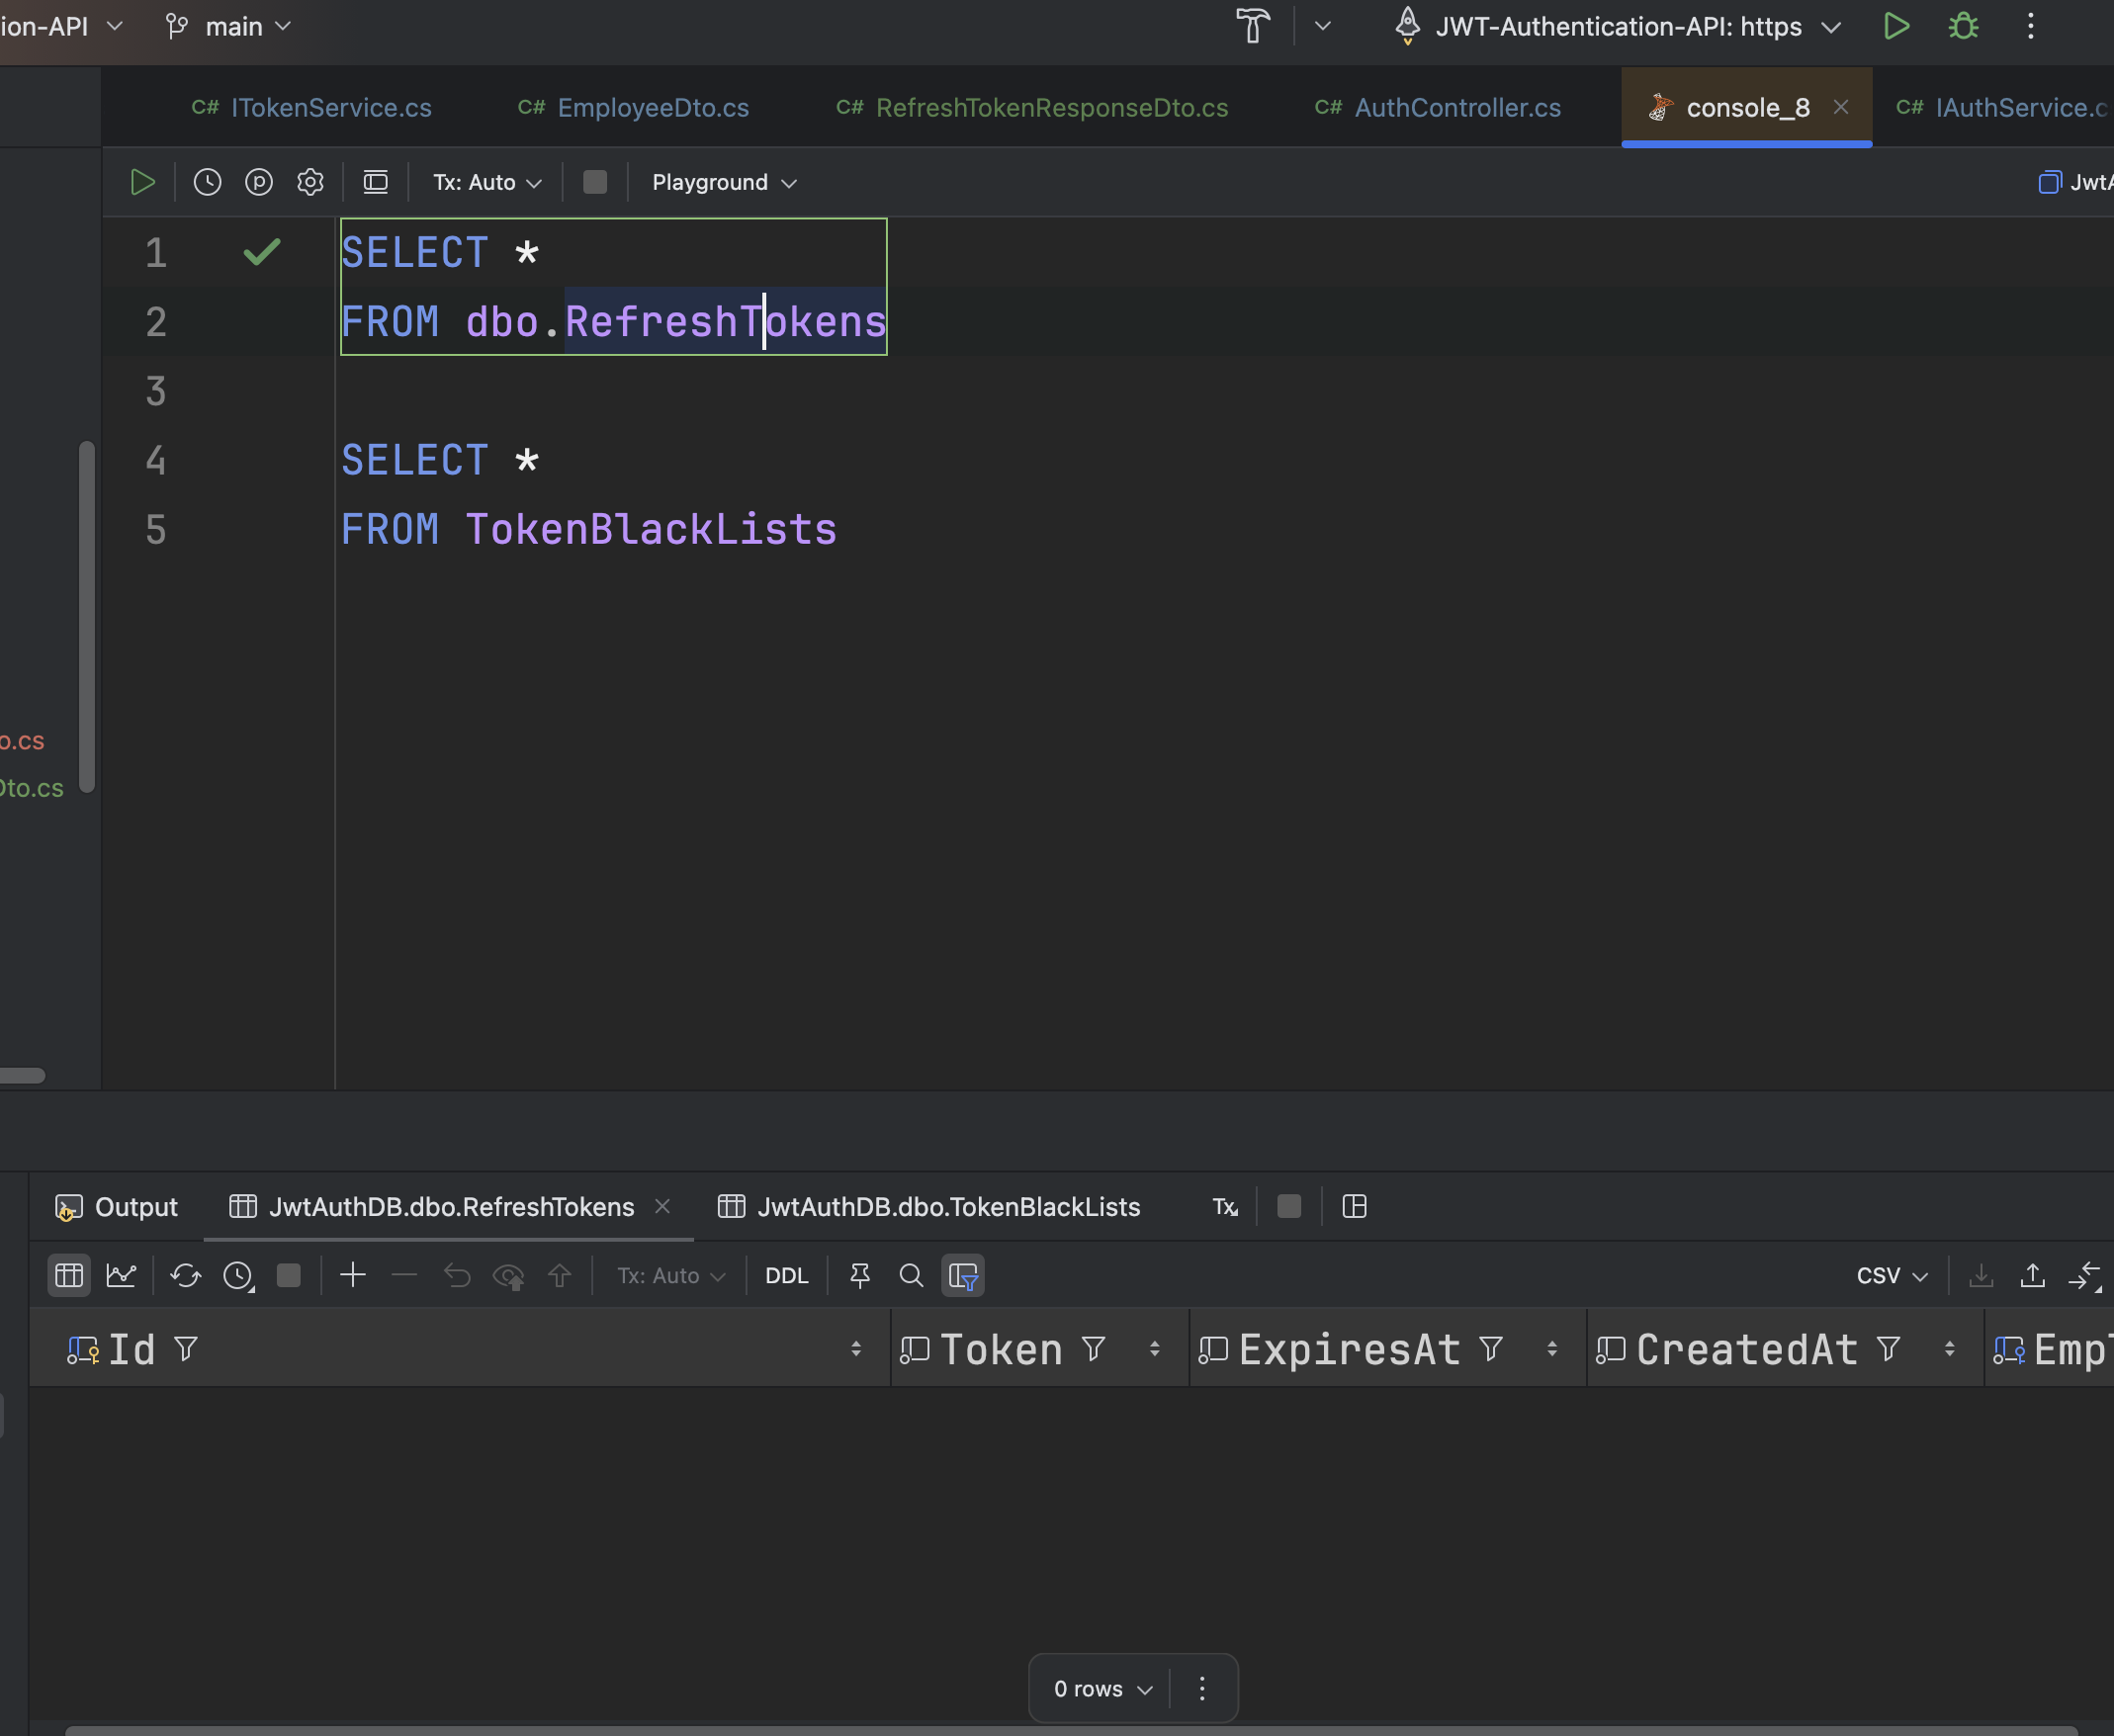
RefreshToken 應該要是 0 筆,因為 peter 已經登出了
1
2
| SELECT *
FROM dbo.RefreshTokens
|
結語
內容很長,終於完成了!不過這個版本的程式仍然有一些問題,例如:在登出的時候同時新增了黑名單,刪除 RefreshToken,而這兩個操作各自儲存了異動,容易造成資料不一致
也就是說,新增黑名單完成後,如果在刪除 RefreshToken 出現錯誤導致 RefreshToken 並沒有被刪除,但就已經出現在黑名單了,這樣的資料不應該新增進黑名單,應該是兩個操作同時完成後再一次儲存。
所以如果同時要操作多個資料表,需要所有操作都完成後再一次儲存所有異動
第二個問題是,我在 Service 層中丟出了很多系統執行時的 Exception,但沒有在 Controller 中處理,應該要在 Controller 統一處理,因此需要統一回應物件格式,這些會在下一篇一一說明並實作。

